More set-up tips
- Eliminating the sniper
- Marines checkpoint
- Blockades and other rearranging
- Spare weapons
- Bringing in a Warthog
- Using a base save
- Getting good rock geometry
Eliminating the sniper
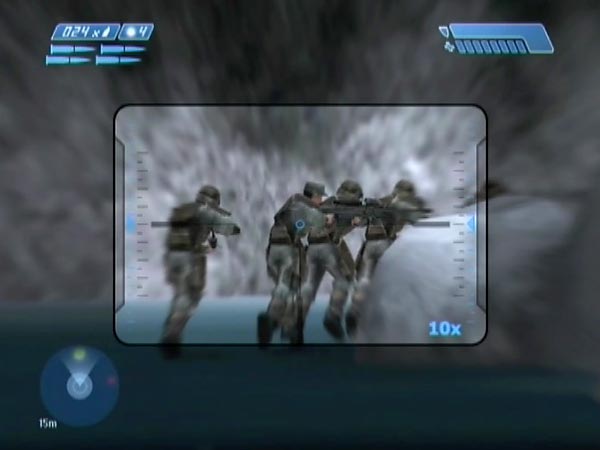
Often when I battle, I prefer not to have a sniper because he's so powerful and he frequently steals my kills. That can be annoying, especially when I send in a stream of needles or throw a grenade, only to see my target fall dead from a sniper round instead, wasting my efforts and spoiling my anticipated fun. In addition he could kill several covies before I've even had time to join the Marines. If you'd like to eliminate him - ideally before your battle start checkpoint - here are some options.
Quick sniping
You can do it with a sniper rifle after squashing the Hunters as described in my refined routine. If you kill them fast, there's time to get him before he passes behind the rocks on his way to the base of the spiral path, though you'll also need to be quick about dismounting and aiming. I'd normally use two body shots; one to make him stagger, one to finish him off. If you miss this opportunity, there's another when he briefly emerges from behind the rocks. If you happen to have a blockade across the ice which will stop the Marine advance, you could potentially kill him while he's standing at it. If you're lucky he'll drop a few frags there, which will add to the bang when you blast the blockade later. You can see just such a bang in BCM6.
One drawback with all this is that you might get the underpass checkpoint before you've killed him. If that's not good enough for you, all you can do is try again. Otherwise you'll have to be content with needing to snipe him each time you start your battle. Actually, maybe you'll prefer things that way, as it gives you the opportunity of leaving him alive when you want. Things would be especially convenient if you happen to get the checkpoint just as you've got him in your sights.
There's a way you can conveniently delay the checkpoint until you want it however. Remember the two Shade gunners up on the ledge? If you deliberately leave the one on the right alive, you'll be under threat from his Shade when you're down on the ice, causing checkpoint delay. Once you've killed the sniper, follow up by killing the Shade gunner, enabling the game to give you the checkpoint (though it may get delayed due to the Marines fighting). Sometimes the sniper may kill the gunner first though, which can necessitate a retry. You can reduce the chances of this by having moved the Shade back a little in advance (see Blockades and other rearranging), so the sniper won't have such a good line of fire - but so you'll still be under threat. An alternative way of delaying the checkpoint is simply to throw a grenade and take your shot before it goes off. Or you could try taking your shot while doing some jumping, but that's a bit awkward.
Leisurely elimination
If you've got a blockade to hold back the covies from prior to the spiral path area (such as a 3-Ghost pass blockade), there's another method available. Descend low enough to trigger the Marines and Hunters, but not low enough to trigger the dropship yet. Kill the Hunters, assuming you want to. The Marines run to the base of the spiral path (unless blocked) and spread out there. Identify the sniper and kill him. You could do that in the Banshee, but it's also possible to dismount on the Shade ledge or spiral path and kill him with a sniper rifle or whatever, which would help keep your Banshee safe from Jackal fire.
While you're doing all that, the high blockade holds back the covies who otherwise would've advanced, so there's no rush. The covies who spawned in the spiral path area are territorial, so they won't advance, and the dropship hasn't even been triggered yet. Afterwards, you can get the underpass checkpoint to finish off. Or alternatively you could get the Marines checkpoint (see next section) if you didn't get it already.
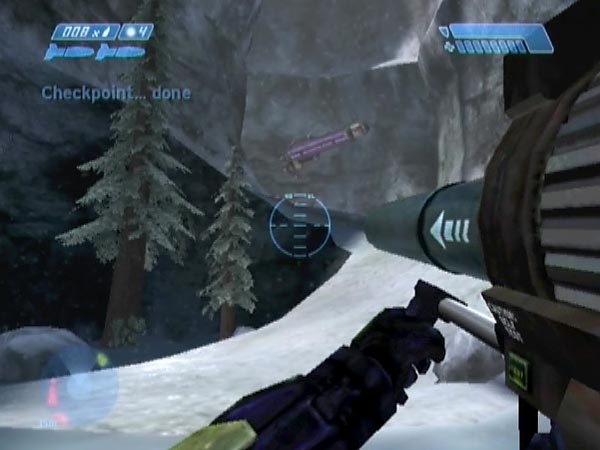
Marines checkpoint
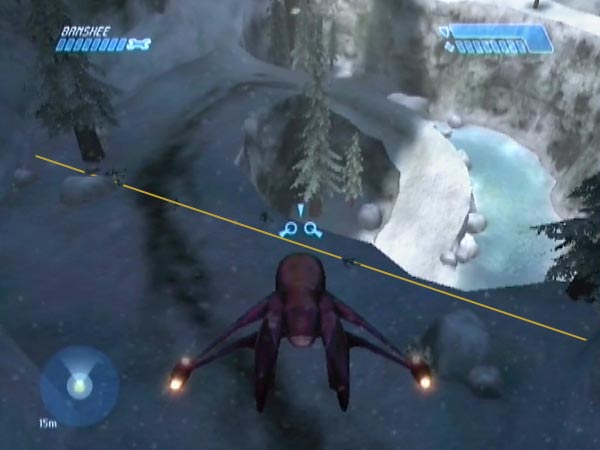
Rather than using the underpass checkpoint as your battle start checkpoint, it's possible to instead use an earlier checkpoint which I call the 'Marines checkpoint', associated with triggering the Marines and Hunters. In normal play you'd trigger it by crossing a line on the ground which I've indicated in the picture, but in our circumstances you'll typically instead be in a Banshee and triggering it by descending into the trigger zone, somewhere past the line. That's what we're talking about really; a three-dimensional trigger zone rather than a mere line. The ceiling of the zone is several metres above the top of the path - approximately where the snowy base of the cliff face ends.
Checkpoint structure
Before I get to the uses of the checkpoint, let me just say what I think is going on in regard to checkpoint structure in this area. When you trigger the Marines and Hunters, the game intends to give you the associated checkpoint I'm talking about, but there's initially a delay. If you've neared the underpass in the meanwhile (heading in to land in your Banshee, or whatever), this supersedes the earlier trigger point, and the game will now intend to just give you the underpass checkpoint. That's the only one you'd get when setting up a spiral path megabattle as I've described thus far. But if you don't approach the underpass (e.g. if you land at the base of the spiral path and stay there), you can get the Marines checkpoint.
Using the Marines checkpoint
The main use I'm thinking of for the Marines checkpoint is if you want a save in which you start out at the base of the spiral path, ready to either defend from there (see my path base defence) or to launch an immediate attack up the path or defend from the top of it (see cyborg advance and path top defence). Just land there directly and cross your fingers that you get the checkpoint promptly. The Marines will already be on their way and the dropship will be coming into view shortly.
As long as the Marines aren't getting into a tangle with the Hunters, the only reason the checkpoint might be delayed is if the game considers you under threat. That seems to be quite fickle (maybe it depends how close enemies are to the cliff edge above), so it can take a few attempts before you get lucky and get a checkpoint promptly. As long as you got a handy final phase checkpoint though, that's no great trouble.
As an alternative way of setting things up, you could get low enough to trigger the Marines and Hunters, then ascend and wait, letting the checkpoint be delayed by enemy threat or Banshee fire until the Marines reach the path base. When you then land and - hopefully - get the checkpoint, they'll be on hand right from the start, allowing you to launch a joint advance earlier if you want.
Keeping clear of the underpass
Bear in mind that if you subsequently approach the underpass, you'll potentially get the underpass checkpoint if not under enemy threat, and thus lose the ability to revert to the start of your save. As such, you may want to stay clear of it (specifically, don't head past the huge boulder on the right of the path; the trigger line was shown earlier if you want to see it). That doesn't prevent you killing the underpass Hunters if you want to though. You could do it from the ice, or looking down on them from the edge of the spiral path.
Blockades and other rearranging
As described in Rearranging the furniture, there are places where you can temporarily skip a trigger and move ahead to make alterations such as shifting vehicles and Shades around, so things play differently when you play through properly later. This has great application to the spiral path megabattle, as follows. I'll talk about where to skip from in the subsections 'Early rearranging' and 'Late rearranging'.
Blockades
You can set up a blockade to hold back the enemy, and you could release them at some point by blasting the blockade. A typical blockade would comprise a line of Ghosts, but you could also use Shades or other items. Blockades add a whole new dimension to the battle, giving some highly enjoyable combat as well as some fantastic opportunities for mischief. There's huge potential for varied placement and design. They can play a strong part during the main battling, or can be used just as a way of controlling the initial release of enemies. They can also be used to halt the Marines at the start, stopping them from getting into an early skirmish at the base of the spiral path. See Blockade tips for more advice on this major topic.
Handy vehicles
You can leave a few handy vehicles lying around in the spiral path area. You could leave a healthy Banshee by the supply area in case you want to switch from the smoking wreck you may've flown in on (depending on your set-up routine). A nearby Ghost would allow you to mow down covies with relative ease, and you could even have the Scorpion waiting! Warning: don't leave anything in the area where the Marines and Hunters will spawn, else they can get trapped or tangled up.
When doing early rearranging, the Warthog can't be rearranged like other objects can, as it always gets magically moved back into position for the first ground battle. However, late rearranging can enable you to get a hog into position down onto the ice, ready for some chain-gun fun. See Bringing in a Warthog for details.
Spare weapons
You can arrange spare weapons for later use, placing them wherever you like. See my separate section on that for details.
Spiral path Shades
You could blast the spiral path Shades down onto the ice and position them as desired, to potentially jump into or use as cover. For example, I often fight from the outside corner of the curving ice path, but it's quite an exposed position and things can get nasty when a load of plasma-happy Elites turn up all at once. A Shade just ahead can be a big help as cover if you need it (though you'll also run the risk of accidentally getting into it when merely trying to reload).
If you overturn the spiral path Shades or blow them off the ledge, the gunners will still materialize on the ledge later but they obviously won't be so much threat, so maybe you'll like to leave them alive for the battle. It can be fun killing them when you're part way up the spiral path for example. The one on the right will be within range of a nice stream of needles.
Rocket targets
You can leave Ghosts or Shades in places where the enemy may later be, so you can have the fun of rocketing the object and taking out lots of enemy with the blast. For example, when you defend from the corner of the curving ice path, it would be nice to have a Ghost near where the enemy comes into view around the base of the spiral path. Sometimes enemies will even obligingly take shelter behind the objects you leave around. Bad move!
Early rearranging
So, where do you skip ahead to set up a blockade or do other rearranging? For maximum freedom skip at the first bridge using a descent method. Rearranging done from here is called early rearranging. The rest of the level will be free of enemies, so there's nobody to hinder you as you go about your work.
There are three Banshees you can fetch, any of which you could use for setting up the megabattle later, rather than having to rocket down the platform Banshee when playing through. Actually, if you care to put a Banshee near the exit of the rising tunnel, you can later avoid flying up the tunnel taking damage. Instead you could whizz up in a Warthog then transfer to the waiting Banshee to resume the usual airborne set-up work. As a side benefit, the hog will now on hand if you want to get it into the megabattle for some chain-gunning; see the 'hog blasting' method of Bringing in a Warthog.
Note also that you can overturn some Ghosts and the Shade on the slope, and destroy the Wraith, to save you having to do any of that later. Incidentally, if you destroy the Wraith, it may well be gone when you get back later, as the game often clears it away. You could also blast the tower Banshee down, to make sure it won't get piloted (the pilot will still materialize up top later).
The downside of early rearranging is that you have to be able to manage a descent method off the bridge, and after doing your work you'll have to come all the way back. For this reason you may prefer to use 'late rearranging' instead, described next.
Late rearranging
Simply by flying high in a Banshee, there are three triggers you could skip to do some late rearranging. There's the tower trigger (normally activated by nearing either of the tower doors low down), the pass trigger (normally activated by nearing the entrance of the pass low down), and the pass exit trigger (normally activated by being low in the pass at some point). Skipping any of these will stop further enemies spawning. There will still be some around, but crucially, they won't chase you beyond the pass (except for manned Ghosts, so make sure there aren't any). That leaves you free to set up a blockade or whatever, as long as you keep your distance from the enemy. You can potentially even set one up near the pass. If enemies approach, just quit work and lead everyone away again, giving you time to fly back and continue building.
To minimize the number of enemies around, skip the tower trigger. In this case the dropship troops will remain back near the tunnel, and sometimes nobody comes to the pass at all. My refined routine actually involves a quick spot of late rearranging, namely when you skip the tower trigger to overturn some items and destroy the Wraith.
With late rearranging you haven't got such easy access to blockade material (unless you've put it there in advance with early rearranging, which you may well have done in a base save), but you can still get plenty. From here and the twin bridges area you have easy access to two Ghosts, six Shades, and another Banshee. But you can also bring in Ghosts and Shades from the tower area by blasting them along from high up in the Banshee (being careful not to damage any enemies). That's a bit laborious however. Instead you could let Elites man and drive their Ghosts into the spiral path area. There would potentially be three if you're skipping the tower checkpoint; the two dropship Ghosts and one from the bottom of the tunnel. They'll soon plummet over the cliff; and even if a pilot doesn't fall out, you can blast his Ghost over as usual. Once he's out, he'll retreat to the pass or beyond. Alternatively, lead Ghosts after you near the Wraith so they end up bouncing off its nose and overturning. It seems to be pretty easy, and there's no risk of damaging pilots this way. Once they're out, you won't have so far to blast the Ghosts.
Spare weapons
The game provides a plasma rifle near the active camouflage, and there's also a pistol, AR and rocket launcher nearby (they appear when you trigger spiral path enemies). With a bit of work however, you can import additional weapons for later use, placing them wherever you like. Here's a guide.
With a bridge descent
After using a descent method at the first bridge and fetching a Banshee, fly back to the bridge, kill any remaining enemies and throw enemy weapons off the edge. These can be any that were dropped by the enemies on the bridge or earlier in the level. Get needlers full on ammo before throwing them off. Plasma pistols on 100% charge can be obtained from Grunts on Shades - so it's a good idea to let plasma pistol Grunts man Shades before killing them. On Heroic or Legendary you should also be able to find a plasma rifle on 100% from the Banshee pilot. Once you've got the weapons on the ground, move them to wherever you want in the spiral path area - perhaps to some favourite defence spots. You can move multiple weapons at once to save time; see my general advice on weapon moving.
How about UNSC spares? When moving covie weapons earlier, the only UNSC weapons available were the pistol and AR you started the level with, and ARs held by Marines below the bridge. You could at least get a full AR out of all that if you kill enough Marines. But there's something else you can do. Leave extra Covenant weapons as place-holders in the spiral path area, and later when you get your hands on the UNSC weapons you want, you can fly in and swap them for the place-holders. You'd need to do that swapping sometime before triggering the pass checkpoint, so you'll be able to land in the spiral path area without triggering anyone there (see Late rearranging).
Without a bridge descent
There are also some methods you can use which don't require descending off the first bridge. Here's one, but it'll cost you an enemy per weapon. After overturning the dropship Ghosts and going on to overturn more stuff and destroy the empty Wraith, all as described in my refined routine, lead enemies to the pass exit. That's as far as they'll go for now as you haven't triggered spiral path enemies yet. Kill one with plasma cannon fire, then lead enemies back out of the pass and well clear. Fly back to the spiral path area and land a safe distance past the pass exit. Run to the dropped weapon and move it away before any enemies turn up (they may, depending on how far away you led them). Once you're well clear of the pass, you can take all the time you want to move the weapon into position somewhere.
If you really prefer not to kill any megabattle enemies, an alternative source of spares is the cavern (the underground bridge area), but it'll take more time. There's no problem moving weapons close to the start of the rising tunnel; you can do that before flying up the tunnel. But how are you going to get them up the tunnel later? The potential trouble is that enemies may come down after you. Here's my routine. After overturning the dropship Ghosts and going on to overturn more stuff and destroy the empty Wraith, lead the tunnel enemies to the pass exit (the dropship troops stay near the tunnel exit). Now fly back and do some weapon moving up the tunnel. Some of the tunnel enemies may turn up again (I found that the Grunts usually do, but the Elites remained at the pass), in which case you'll have to retreat to your Banshee and fly past them to lead them away again. When you finally get weapons up near the exit, you can switch to another weapon moving technique, namely blasting them along with Banshee blasts from a safe height. Keep a careful eye on where they go, so you don't lose track! All this is pretty easy, just a bit time consuming. If you're trying to bring up a lot of weapons, you may need to get a new Banshee at some point. There's the one on the tower roof of course, but there's also one in the twin bridges area if you want that.
Spare rocket launcher
To mention one specific idea, how about a spare rocket launcher? One near the base of the spiral path would be nice for example. It would be very handy for keeping you stocked with rockets in the path base defence, which is such great fun for rocket use. To spell things out, here's how you could do it, with or without needing a descent trick. Having moved a covie weapon into position as a place-holder as previously explained, later swap it for the rocket launcher you've got with you from way back in the level. That's now going to be your spare launcher. Assuming you also want to be starting your battle with a rocket launcher, that's easy. Sometime before the final phase of your set-up work, land and swap the covie weapon for the rocket launcher outside the tower.
Spare sniper rifle
Let me also point out that you can have a spare sniper rifle. After all, there's not just the first one the game provides you; there's also one carried by a sergeant (you can kill him for it if necessary) plus another in the two-Wraith area. You can leave a place-holder somewhere and swap it for a sniper rifle later. If you also want to be starting your battle with a sniper rifle, you'd then swap the place-holder for some other sniper rifle you've left somewhere - probably back at the cavern.
Getting spares up high
It's actually possible to get spares up on the Shade ledge or adjoining underpass roof. Or by dropping them down from those places, on top of the huge boulder below the ledge, or on the pipe platform joining the two pillar-like pipes at the front of the underpass. You can do it by using the Scorpion to blast weapons up in a spell of early rearranging, and - if needed - replacing them later. Here's the detail.
Put a weapon somewhere on the spiral path and line up the Scorpion ready to blast it. Fly off to trigger a tunnel checkpoint, but keep it delayed with Banshee fire until you're back at the Scorpion. Get aboard and blast the weapon, trying to keep sight of where it goes (maybe hop out quick and switch to a zoomed pistol view). Check whether it landed up on the ledge or underpass roof. If so, you can fly up and fine-tune its position. If not, revert for another try; and so on. Depending on how confident you are, it may be worth trying to get further weapons up before 'consolidating' with another delayed checkpoint. If you're going to try and drop a weapon down onto the huge boulder or the underpass extension, it'll probably be worth getting a delayed checkpoint first, so that if the weapon bounces off, you can keep reverting for another go (especially with the rock, where bouncing is more of a problem).
Each weapon you blast up would probably just be a place-holder, which you'd replace later with the actual weapon you want, when you get hold of it. Presumably a rocket launcher, sniper rifle or pistol.
A warning about weapons from the cavern
One thing I need to add. Weapons taken from the cavern and moved to the spiral path area may vanish if you subsequently go back across the loading point. So keep that in mind when planning things.
Bringing in a Warthog
With a Warthog or two, you can have fun mowing down the enemy with the chain-gun, getting support from a chain-gunner in a Marine-retaining hog, or both. However, assuming that you're planning to eventually fly into the spiral path area as usual when doing your set-up work, how can you get a hog into the area ready for action before getting your save checkpoint? Here are two methods. The second is best as you'll be able to position the hog at leisure in advance, and you can also be doing it as part of a base save.
Method 1: Running the gauntlet (crude)
Get the enemy through the pass entrance; don't trigger the Marines yet. Leaving the Banshee in the Wraith area, go off to bring back the hog, and park it just behind the rock at the pass entrance. Get into the Banshee and use it to tempt most of the enemy away from the pass, then quickly land at the hog and bring it through while the pass is relatively clear. This way, hopefully you'll take no health damage and squash no enemies as you 'run the gauntlet' (though youcould just barge straight on though if you want to risk it). Drive it down the spiral path; either right to the bottom, or perhaps fly off the edge to land near the underpass or near the corner of the curving ice path. Complete your set-up by getting your final checkpoint.
With this method, the enemy can be heading down the path rather quickly if you've drawn them away from the pass. That can cause the Marines to get into a heavy premature fight, giving unacceptable checkpoint delay. I found this a frustration when trying it, but I did eventually manage a decent set-up. As usual, it would help if you've got a blockade that will keep the Marines and enemy apart at the start. A blockade could also give you all the time you might need to kill the newly triggered Hunters. You don't want them taking pot-shots at you when you're chain-gunning!
Method 2: Hog blasting
If you can at least get the hog into the tower area, and you've also got a Banshee on hand, you can blast the hog along to the spiral path area from high up, avoiding enemy fire. As long as you haven't triggered any spiral path enemies yet, the existing enemies won't chase beyond the pass, so you're free to get out and position the hog at leisure if you want. After that, you can fly back out and continue set-up work as normal.
So, how do you prepare? If you don't mind doing some early rearranging, a good way is to leave a Banshee near the tunnel exit in advance (just out of the shadow or thereabouts). Playing through later, whizz up the tunnel in the hog, quickly transfer to the Banshee, overturn dropship Ghosts as usual, then start your hog blasting, staying high until past the tower (you're skipping the tower checkpoint, and therefore no enemies will get triggered here or in the spiral path area yet). This method also saves you from having to fly up the tunnel taking damage; your Banshee will start in perfect health.
If you want to avoid early arranging however, try this. After clearing the underground bridge, bring the hog and a Banshee to the tunnel corner just before the Elites and Grunts. Board the hog and whizz up the tunnel to where the far end of the incoming dropship is going to be. Sneakily jump into one of the Ghosts it drops ("Ta very much guys!"), and whizz back to the Banshee. Get in and fly back up the tunnel. Overturn the remaining dropship Ghost, then do hog blasting as just described (staying high until past the tower).
With both these ways of preparing, you temporarily skip the tower checkpoint, which is good because it keeps enemies to a minimum. Moreover, the dropship checkpoint tends to be delayed for the whole time you're blasting the hog along to the pass, as you've got some enemies nearby down below. That's handy if you're doing this as part of a base save which is to start with the dropship checkpoint (probably for blockade battles). Your base save will have the hog already in the spiral path area, where you'll always be able to adjust its position with late rearranging.
Using a base save
As with the rockslide megabattle, some set-ups will be better than others, depending on the pattern of enemy attack and so on, which is partly down to luck. As such, it'll be worth trying multiple set-ups over time if you want to get the best experiences. You can save a lot of time in generating different battles by using a base save in which plenty of the set-up work has already been done; ideally as much work as possible, for the range of situations you're interested in.
Plain base saves
If you want a base save that's just for 'plain' battles, i.e. ones without blockades or other special rearranging work, you could play through up to the point where you trigger the pass guards (Hunters and Elites), then save when you get the associated checkpoint. The eventual attack dynamics of the enemy will depend to some extent on how they cram themselves into the pass, and they've yet to do that; so I think this makes a good starting point for getting a wide variety of attack dynamics in different saves.
Alternatively, you could play up to the point where you've got a 'final phase checkpoint' as described in my refined routine, then save. In this case the enemy will have gone into the pass, but you'll still be able to influence their configuration by flying around a bit (you can lead them back and forth, as mentioned in my refined routine). So you'll still be able to obtain quite varied attack dynamics. Maybe not quite as much as with the former base save I described though.
Blockade base saves
For generating blockade battles, a base save should include several Ghosts assembled in the spiral path area (six should be plenty), and maybe some Shades too, ready to use as blockade material. This way you won't have to go around laboriously collecting them each time you want to try out a new blockade, which makes life a lot easier. Ideally the Ghosts should mostly be safe ones, so you never have to potentially overturn them to stop Elites jumping in. It's worth making a note of where each assembled Ghost came from, just in case you later want to know about its safety.
Here's a plan for a highly convenient blockade base save. Skip at the end of the first bridge, then drive off and assemble blockade material, and optionally do some other early rearranging. Come back and resume normal play. Continue through the level until you're hovering above the exit of the rising tunnel, waiting for the dropship to leave. You should get a checkpoint after a while, namely a delayed 'dropship checkpoint' from triggering the dropship. Save to finish. Each time you want to try out a new blockade, you'll be able to do it with just a quick bit of late rearranging (skipping the tower checkpoint) using the material already assembled.
If you don't want to have to do a descent trick, you could create a similar base save just with late rearranging, though you won't have such easy access to blockade material when assembling it. Here's the idea. Skip the tower checkpoint, then assemble blockade material and do any other rearranging. To get blockade material from the tower area, you'll probably need to blast Ghosts along or let Elites drive them into the area, as mentioned in the section on late rearranging. Come back to the tower area, get the tower checkpoint, and save. Each time you want to try out a new blockade, you'll be able to do it with late rearranging (skipping the pass approach checkpoint) using the material assembled.
Rock geometry considerations
Bear in mind that rock geometry gets randomized at a loading point after the underground bridge. So if you want your base save to vary the rock geometry each time you use it, the save checkpoint needs to be earlier than that. If you instead want the same rock geometry each time, the save checkpoint needs to be after the loading point somewhere, and you may first want to ensure that the geometry is suitable for certain tactics. See the next section for details.
Getting good rock geometry
Rock geometry varies with set-up and this can be relevant to your battle tactics. Sometimes a particular rock may offer good cover, other times it may be uncomfortably small. Sometimes a large rock may be climbable, other times you'd inconveniently need a Banshee to drop yourself off on top. The loading point at which the rock geometry gets randomized is in the tunnel after the underground bridge (just before where you reach a snoozing Grunt).
Simple restart method
When being fussy about rock geometry, I'd normally use the 'simple restart method' as follows. Start with a save where you've just cleared the underground bridge (you may or may not have done some early rearranging, e.g. to assemble blockade material in the spiral path area). Proceed with set-up work as in the refined routine until you've overturned the dropship Ghosts, then fly to the spiral path area without triggering tower enemies (stay high as you pass the tower). Go down for a look. If the rock geometry is acceptable, fly back and resume the usual set-up work (note: you've probably had a delayed dropship checkpoint by now and may like to save it). Otherwise eject the disc and reload to restart from before the loading point again, hoping for better rock geometry this time.
Some rocks of note
There are various rocks whose geometry you may be interested in. Here are some I've usually got my eye on.
It's nice if a rock on the inside corner of the curving ice path is just the right height for shooting over while giving you decent cover. It can be great for defending from, alongside Marines.
It's nice if the huge boulder along the ice path is climbable, so you can easily clamber up to defend from on top, rather than needing a Banshee to get up there.
It's nice if the rock by the ammo is low enough that you can jump up onto it without getting interference from the tree next to it. Sometimes if you throw a grenade, it catches in the branches above your head and falls down around your boots, which can be a bit annoying!
From near the corner of the ice path, you'll see a few Jackals hanging around a rock up on the cliff, over on the far left. It's nice if that rock is high enough to slam a rocket into, to send Jackals flying off almost horizontally. You'll love it!