Setting up
Associated movies
- BCM70 - Heroic; Setting up with no advance prep - plus bonus carnage! (8:24)
- Basics
- Refined routine
- Adding a cloaked Elite or two
- Getting enemies out of the tower
- Skipping and spawning
- Enemy numbers
Basics
The spiral path megabattle takes place in the spiral path area of level 5 ('Assault on the Control Room'), where you meet up with some Marines that get attacked by a pair of Hunters. The idea for setting it up is to get a mass of enemies chasing after you from previous areas, greatly adding to the enemies you trigger here. On Legendary you can end up facing around 60 in all, while on the other difficulty levels it's around 50. Here's the basic method for setting it up. This is all you need to go and start having some fun, and I suggest you do so. You can leave my refined set-up routine and other advice for later.
Basic method
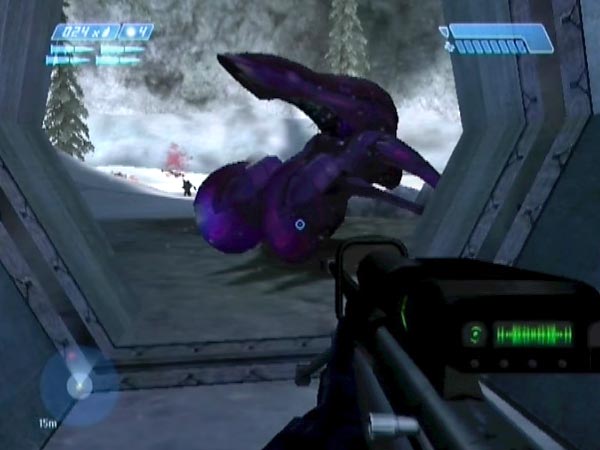
Progress through the level killing all enemies and letting Marines get killed, until past the underground bridge. Steal a Banshee along the way and keep it healthy. Be armed with the weapons you'll want to enter the spiral path area with - I recommend a sniper rifle and rocket launcher - and be fully stocked with grenades. In the key work coming up next, you may like to save checkpoints occasionally to consolidate progress, in case anything doesn't work out well enough.
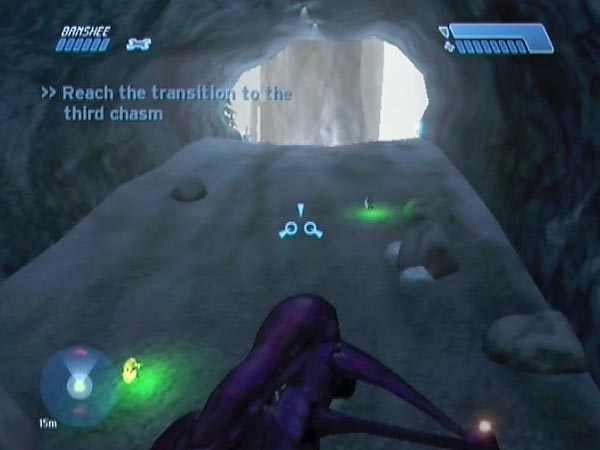
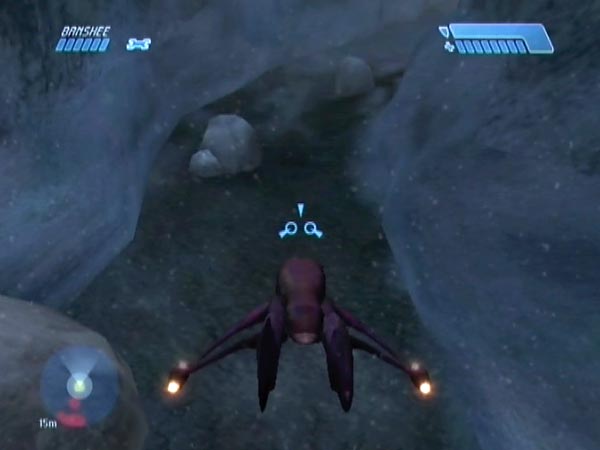
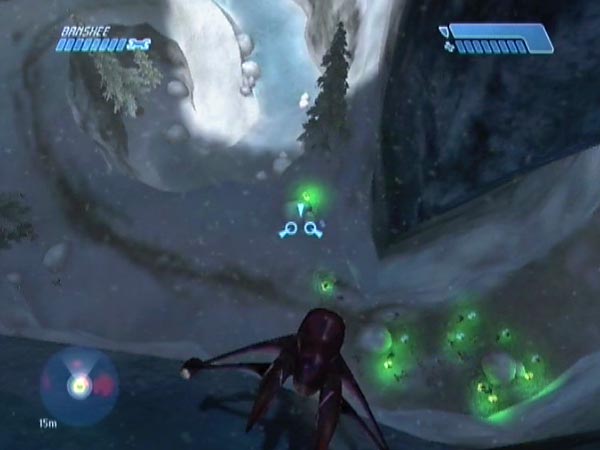
Fly up the rising tunnel after the underground bridge. Enemies from the tunnel will give chase. Fly low past each of the tower doors to trigger more enemies. Destroy the Wraith, and eject any Ghost pilots with blasts to one side as you want everyone on foot. Actually, to save yourself ejection work, it's good if you can overturn the relevant Ghosts along the way before they ever get manned (it's easy with a blast to one side). Also, fly low past the narrow pass that leads into the next area, to trigger some guards.
Draw enemies towards the pass as best you can, then fly through low down to trigger enemies beyond. This also triggers enemies outside to head into the pass; so fly back out again - after perhaps blasting the Shades which I'd recommend - and wait for most or all enemies to enter. Some may need a bit of encouragement, but with a bit of patience you'll probably be able to get everyone in.
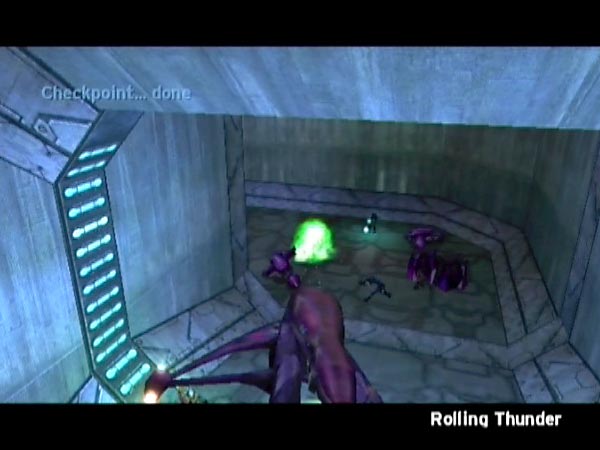
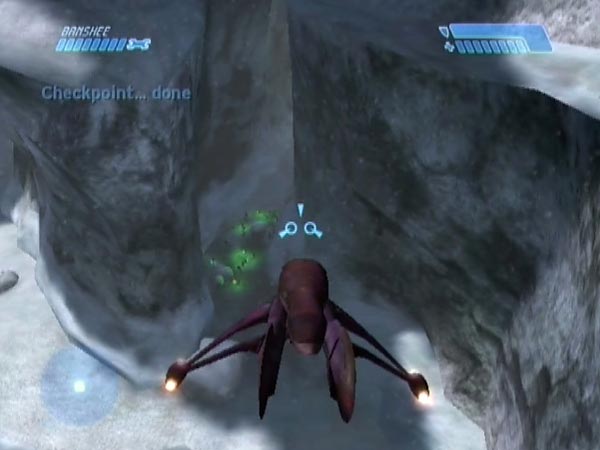
Fly back in, trigger the Marines and Hunters, kill the Hunters quick and get a checkpoint near the underpass (the short tunnel). Hopefully you'll get it within a few seconds, but it can get delayed quite a while if you were slow to kill the Hunters and the Marines got into an early skirmish. Hey presto, you're done. Prepare for battle!
Difficulty levels
Even if you're used to playing Halo on Legendary, I recommend using Heroic or lower to begin with as the battling is so much more intense than normal Halo play. Heroic will probably feel more like Legendary a lot of the time. Setting it up on Legendary would give you a new level of grief entirely. Survivable yes, but if you forbid yourself the long-distance luxury of the sniper rifle, you'll sure need to grit your teeth!
Refined routine
This section details a more refined version of the basic method, starting from just before the rising tunnel. With a bit of care and patience it should give you all available enemies except the cloaked Elite (or Elites) in the tower, covered in a separate section as an optional addition.
NB: To make sure you can get the maximum enemy count, you'd better kill all previously spawned enemies, otherwise some of the possible megabattle enemies may not spawn.
There are various reasons behind parts of the plan, which are explained along the way. In the main description I'll assume you've been playing through the level normally except for stealing the platform Banshee, but at the end I'll mention differences if you've instead done a bridge descent to do some advance preparation. You can see the routine demonstrated in BCM70 for the case of playing through normally.
Throughout you should avoid damaging enemies, and especially avoid killing them of course. You want everyone healthy for the battle. If things go badly at any point, you can always revert to your last checkpoint and try again; I won't keep repeating this.
Overturn the Ghost and fly up the rising tunnel
As you head into the rising tunnel, be on a suitable flight path for blasting over the nearest Ghost to stop any Elite getting in. Actually they often don't bother because of how you speed away, but it's best to be safe. A blast just off the right wing should do it, but there was a checkpoint just before the corner so it's easy to keep trying if needed. You don't need to bother with the other Ghost as that one's earmarked for allied use only. Fly evasively up the tunnel. You may take some nasty plasma at the bottom but you should be able to get past the Jackals without further damage.
Overturn the dropship Ghosts
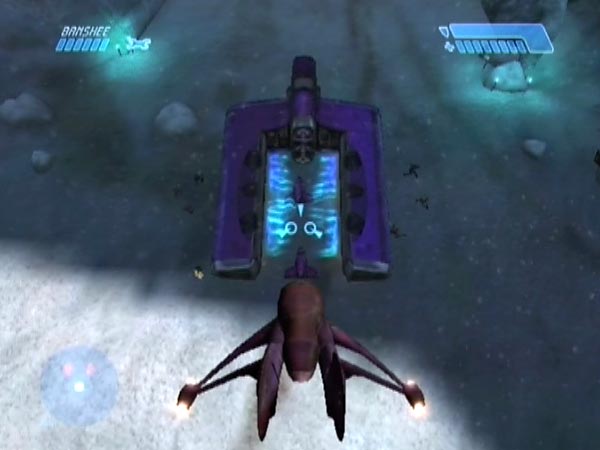
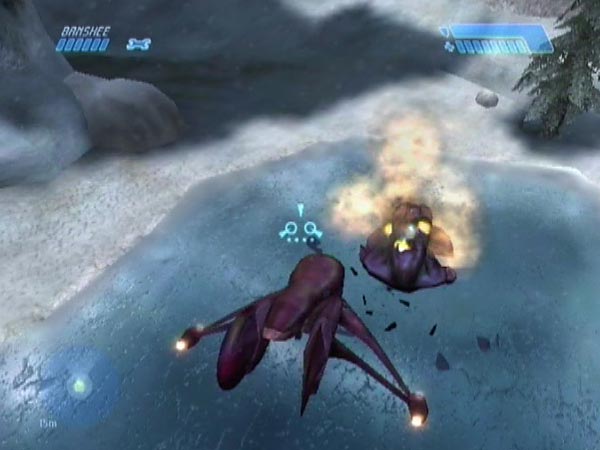
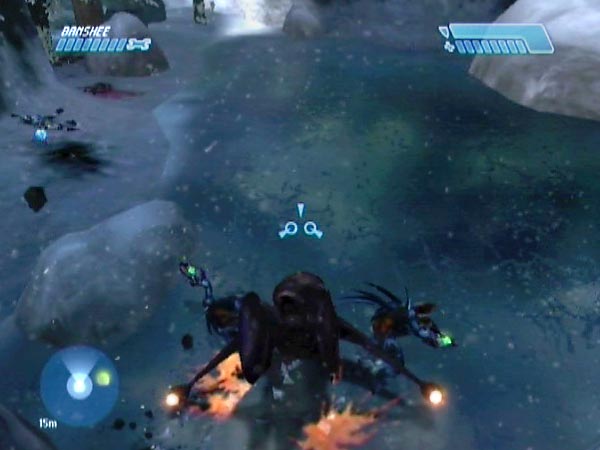
As you exit the tunnel, fly past the dropship and turn around to hover above and behind it. Just as it's starting to rise and the Elites are moving in, land a blast between the Ghosts to overturn them so they can't be manned. You needed to wait until the ship was slightly off the ground for this shot, else the far Ghost tends to hit the ship and fail to overturn.
Fly up and hover above the tunnel exit (resting on the ledge if you like) to wait for the tunnel troops to emerge; I suggest counting them so you know when they're all out. Occasionally some of them may stop part way up, having lost the scent, but you can get them moving again if you briefly fly in to get their attention (you could also leave that for later if you prefer to have fewer enemies around to fire on you).
If you'd like a checkpoint sometime around now, just raise your altitude to get more distance from the enemy (go quite a way higher than the ledge), and the game should give you a delayed checkpoint from when you triggered the dropship. Checkpoints are delayed while the game considers you under threat.
Overturn more stuff and destroy the empty Wraith
Fly off along the front of the tower, staying high when going past the door to avoid triggering enemies yet (you're skipping the tower trigger). Be above treetop level to be safe. Overturn the Shade; you may need more than one shot as it often lands on its feet. The gunner who spawns later will be unable to board, and will join the crowd.
Moving on, overturn the two Ghosts near the tower corner and destroy the Wraith. It's okay to be low down by now as you're not near a tower door. All this Ghost overturning saves you having to eject pilots from them later, and it also stops Elites running over their own troops. Destroying the Wraith will enable the pilot to join the crowd.
Trigger the front door and draw enemies towards the pass
Head back past the front door low enough to trigger the enemies behind it; you can fly left of the Shade slope to stay clear of enemy fire. You also trigger the Shade gunners and Wraith pilot. Ascend and briefly fly on to get the attention of the dropship troops near the tunnel exit, who've only now become free to leave that territory and give chase (they hang around there until you've triggered tower enemies).
Staying high to avoid triggering the pass guards yet, draw earlier enemies along towards the narrow pass that leads through to the spiral path area; I often hover slowly backwards doing this. Part of the reason for doing this now is to minimize the chance of any of these free-roaming enemies getting drawn into the tower when you fly around the back of it shortly. Enemies that go inside can be awkward to get back out. Troops from the tower will remain near their door for now, and likewise the Shade Grunt, but never mind, you'll get them moving later.
Push off the Shade and trigger the back door
When you triggered the front door, you also triggered the 'tower checkpoint' but it remained delayed while the game considered you under threat from the enemy. Climb high to finally get it.
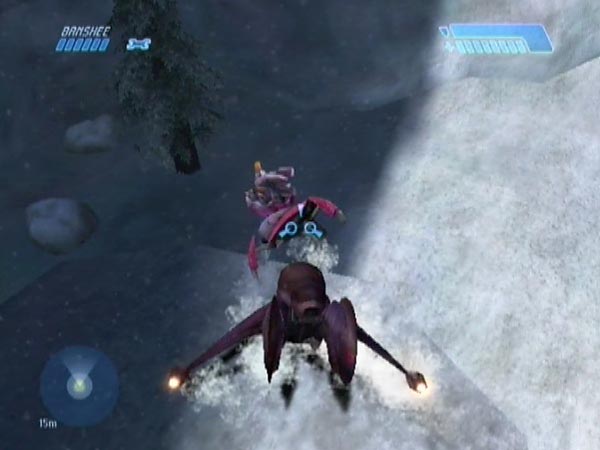
Fly over to the manned Shade and arc around to avoid taking fire as you push it off the plateau with a firm shove at the base. Hopefully the Grunt will fall out and survive. If he doesn't, you can just revert for another go; or alternatively, if he remains seated (now on the ground) you could leave his ejection for later when the other enemies have cleared off.
Next, trigger enemies behind the back door, plus the balcony Elite (or two on Legendary). Those all trigger as a single group. Having just pushed the Shade off, it suffices to skirt around the top of the Shade plateau for example; that's what I usually do. As you head past the balcony, fire to get the attention of the balcony Elite (or Elites). He spawns on the ramp but you want him to take a running leap and land on the snow. Back off and pause to watch for that. He'll usually jump quite soon and it helps if he can see you. If it doesn't work out you can revert, or just leave him as a problem to deal with later (though I wouldn't recommend it). Head back towards the pass when he jumps. You want to trigger the pass guards before he returns to the ramp and balcony, else he may get stranded there.
Trigger the pass guards and draw enemies over
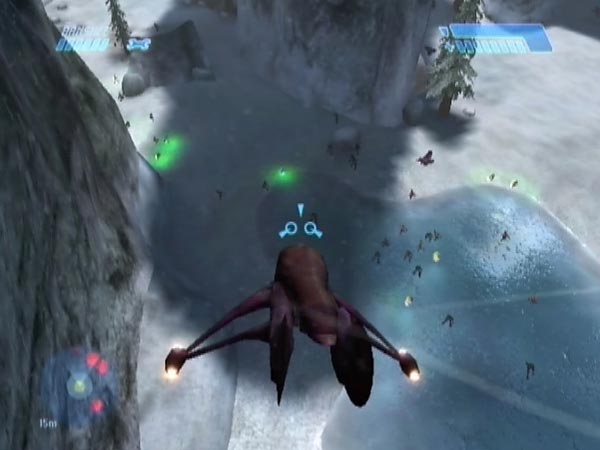
Fly low past the pass entrance to trigger the pass guards: two Hunters and two Elites. You also get a Banshee pilot on the tower roof, but unlike in normal play he doesn't seem to board his machine (due to the weight of enemy numbers I think), so he's apparently no threat. Triggering the pass guards also frees the tower troops from both sides to come after you, and also the balcony Elite (or Elites) and the back Shade Grunt.
Hover high near the pass entrance to draw enemies over. If you see anyone remaining distant aside from the front Shade Grunt who likes to stay near his slope for the time being, go and get their attention to tempt them along if you can. Some Elites will hang around at the corner of the tower (namely the Wraith pilot, two Ghost pilots and two pass guards), but that's okay. Minor enemies often get drawn to those Elites but you can probably tempt them away if you want - or don't bother.
If you want a checkpoint after this phase of the work, you can climb to get a delayed 'pass approach checkpoint' from when you triggered the pass guards. If you save it, that would be a safeguard against accidentally getting the forthcoming pass checkpoint before you want it. However, I prefer not to bother with this checkpoint at all, because when you descend again, Jackals tend to release plasma balls in shock, which could easily damage their own troops - and I want my battle fodder healthy.
Fly in then back out
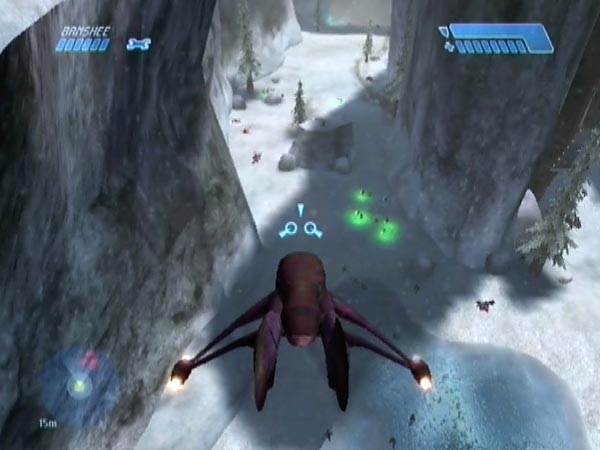
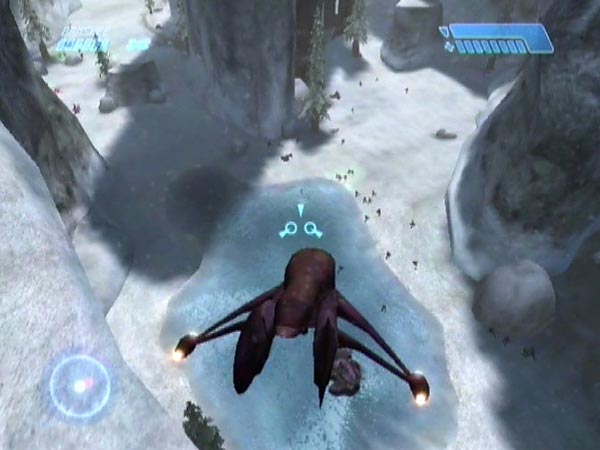
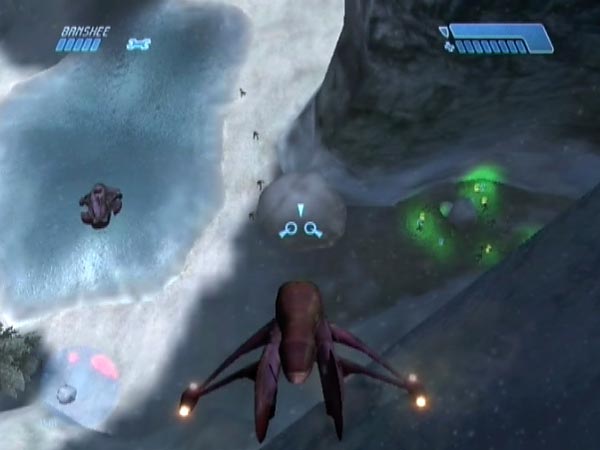
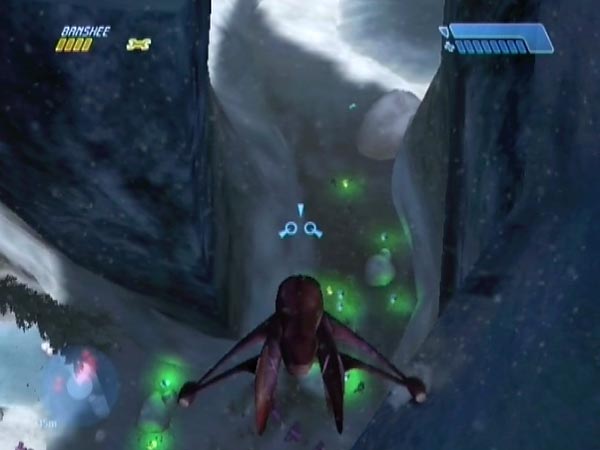
With the pass clear, swoop in and fly through some part of it low down to trigger enemies beyond: Jackals and Grunts to the right, Elite and Grunts sauntering up the spiral path, and Shade gunners on the far ledge. Actually you don't have to get very low to do this triggering; around the height of the snowy cliff base will do.
Climbing back up again (you can be doing that even before you're through the pass), kill the Shade gunners unless you prefer to leave them alive for the battle. You may also like to ensure that a plasma pistol gets blown down onto the ice, ready for possible use in the battle. I'd normally kill both gunners as the Shades can otherwise be irritants in your back and side when battling. I strongly recommend at least killing the one on the right, else you'll later have a problem getting the 'underpass checkpoint' (you'll be under threat from his Shade, causing a checkpoint delay). Stay high enough to avoid triggering the Marines yet. When you're done, turn around and exit the area.
Along with the new enemies there's a checkpoint triggered too - the 'pass checkpoint' - and you'll probably want to make sure it stays delayed until later so you can use it as your 'final phase checkpoint', something I'll get to shortly.
Get enemies into the pass
When you triggered enemies in the spiral path area, it also triggered new behaviour in the earlier enemies. They'll now have an instinct to head into the pass, though some may still need a bit of prompting. Try to get everyone inside, unless you care to deliberately leave a few stragglers outside. Enemies that are outside at the start of the megabattle are likely to stay there until you fight your way up to the pass, at which point your proximity tends to attract them in. That can be a nice way of finishing off a battle, but it also means fewer enemies piling down the path of course. If you want to maximize the intensity of the main attack, get everyone into the pass (that's the standard arrangement).
A useful method of getting obstinate enemies to move is to fly beyond them, as if leaving the coast invitingly clear for them to advance. If that doesn't seem to get them moving, try another position. Hovering above the pass often works; that's worth trying first actually. I sometimes also give Elites a light peppering of plasma (not enough to get through their shields), to try to get them moving. Spend as little or as much time on this as you like; but with patience you should be able to get everyone through.
There may be a few special problems to deal with once other enemies are out of the way. If the gunner remained seated when you pushed the Shade off, carefully push it over to get him out so he can join the crowd. If there are any enemies on the tower balcony or the ramp up to it, or seemingly stuck inside, there are ways of getting them out so they'll join the crowd too; see Getting enemies out of the tower.
Get a new Banshee
Assuming your Banshee is damaged by now, fly up to the top of the tower, kill the dozy pilot and switch to his undamaged machine. You might as well have a new one, yes? Actually you could've blown or pushed this thing down to the ground earlier, in which case you won't need to fly up again unless you just want to kill the pilot (there's no particular need though).
Also get a 'final phase checkpoint' sometime
Soon you'll be heading back into the spiral path area for the final phase of the work. In case it doesn't go well enough, it's good to get a checkpoint just before. You should also save it, so you'll be able to return to it even if you have to eject the disc and reload (which you might, because there could be a further checkpoint before you decide things haven't gone well enough). There are two options for this 'final phase checkpoint'.
The option I recommend is to use the pass checkpoint you triggered when flying through the pass low down. It'll be delayed while the game considers you under threat (which it does even when you're quite a way from any enemies), and at other times you can keep it delayed with Banshee fire or jumping (see my article on checkpoint delaying). You can even maintain the delay when changing Banshees (see here for specifics). So it's quite easy to keep it delayed until you want it.
Alternatively you could go back over the underground bridge to trigger a tunnel checkpoint which you can then delay with Banshee fire until you return. In going back however, bear in mind that you'll cause the rock geometry to be newly randomized. If you're going to use this for your final phase checkpoint, you could use the pass checkpoint for something else, e.g. getting it just before trying to deal with any problems, such as a balcony Elite who didn't join the crowd earlier, or a Shade gunner who failed to eject.
Fly in and maybe do some herding
Now for the final phase. Start by flying through the pass. At this point you have the option of hovering around to draw enemies forward or backward to some extent, to influence the battle dynamic. The more advanced an enemy is, the more likely he is to attack early rather than hanging back (especially Hunters, who otherwise tend to remain in the pass until you come up the path to finish the battle). Drawing them forward - at least out of the pass - can thus give a more intense battle. But it can also cause the Marines to get into a heavier opening skirmish, maybe leading to an unacceptable checkpoint delay as discussed shortly - and maybe a lot of prematurely slaughtered Marines too! So it's not necessarily a good thing, though you certainly can get it to work.
Trigger the final troops and kill the Hunters
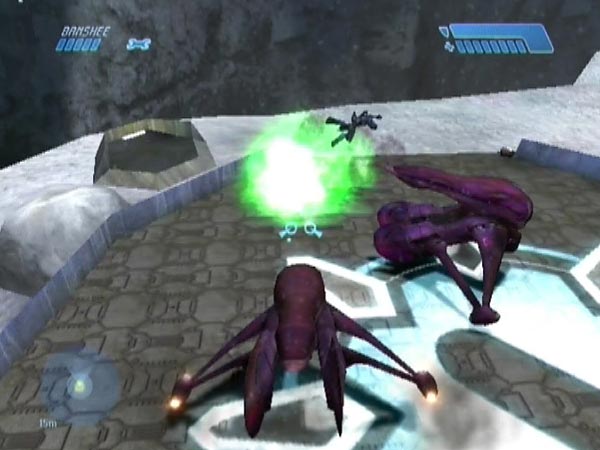
Trigger the Marines, Hunters and dropship, and kill the Hunters. The neatest way to do things is to fly high so you're practically above where the Hunters will spawn in the corner, then let yourself freefall. As you near the ice they materialize, and you can squash both at once before they've started going after the Marines. Killing them quickly has an advantage discussed shortly.
The reason I suggest freefalling rather than doing a powered dive is that you'll be coming in faster, which gives them less time to move off. But if you prefer the control of a powered dive, that can work fine too. A pretty reliable way is to be coming in along the direction of the path at a steep angle, starting to level out near the end. They'll initially have their backs to you, and usually you can mow them down where they stand. If they do realize the threat and take evasive action, it's good if you were heading very slightly to the right of them, as that would tend to make them leap back into the corner where the boulder meets the wall of the spiral path, where you can squash them with a little forward thrust.
If you want to set things up just for solo battling however, a different approach is recommended. Drop down to the ice near the base of the spiral path, then skim forward with the Banshee angled down a bit so the front of the legs get low to the ground. As the Marines come around the corner in a neat line heading for the base of the spiral path, scythe them all down in one go, then deal with the Hunters.
Get the underpass checkpoint
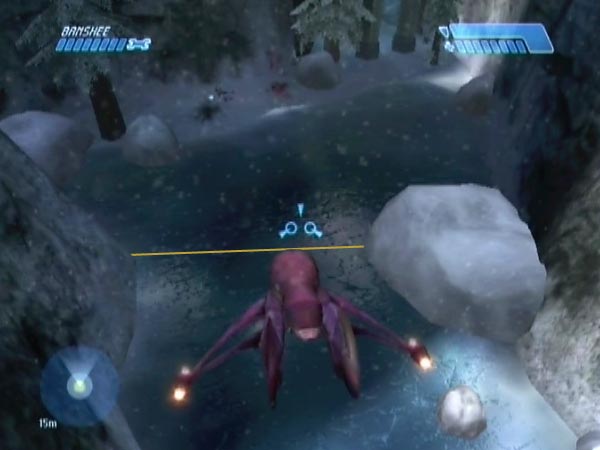
By the time you've killed the Hunters, you should be due the 'underpass checkpoint' because you got sufficiently close to the underpass (it would suffice to've been past the huge boulder which is on the right of the ice path as you approach; see pic for the actual trigger line). This will be your battle start checkpoint, so it's pretty important! If you killed the Hunters promptly, you'll probably get it within just a few seconds. During that time you may like to dismount and approach the supplies so that each time your battle starts, you'll be able to quickly swap weaponry if desired. That's a good idea unless you specifically want to be starting off in your Banshee so you can fly off as soon as possible.
Getting the checkpoint quickly is good as it can give you enough time to join the Marines for a defence at the base of the spiral path before the enemy is too close, or even to fly up onto the spiral path to try to hold out from near the top. If you failed to kill the Hunters promptly however, the Marines may have got into a bit of a skirmish by now, which can delay the checkpoint considerably. There may be casualties on both sides before you get it, which isn't ideal. If it doesn't come quickly enough for your liking, you'll just have to try again.
Note: If you happen to have a blockade that will keep the Marines and enemy well apart at the start, it should stop them getting into an early fight, so you'll probably get the checkpoint without delay.
Try out the battle before saving
Once you get the checkpoint, fight the battle to see if things turned out well enough to be worth saving. Battle dynamics vary quite a bit according to how the enemy is initially scattered around up on the cliff and beyond. If things aren't good enough, for example if you find that disappointingly many of the Marines got themselves killed at the start, all you can do is return to your latest save by ejecting the disc then reloading, to try again. That's where a saved final phase checkpoint comes in useful. Once you're satisfied with the battle quality, save to make things permanent.
Shorter version with advance preparation
If you descend from the first bridge, you can do some advance preparation to make the routine shorter (e.g. you'd want to do this when creating a base save from which to create megabattles). Fetch a Banshee from the twin bridges area then use it to destroy the Wraith, overturn the nearby two Ghosts, overturn the Shade on the slope, blast the tower Banshee down for easier access later, and overturn the enemy Ghost at the bottom of the rising tunnel. Now you've got a Banshee, you won't need to steal the platform Banshee later of course. Moreover you can blast it down in advance so it won't attack you.
Adding a cloaked Elite or two
In the tower, a cloaked Elite with a sword spawns when you get far enough inside; or two on Legendary. Originally I thought it was impossible to get him into the battle as he always returned to the tower, but I've finally (Feb. 2013) realized how it can be done after all. Here I'll describe my recommended adjustment to the refined routine, if you fancy adding him. But bear in mind that despite his glowing sword, Marines won't see him except when he's temporarily visible from taking damage - so they can get sliced up depressingly easily!
Adjustment to the refined routine
After triggering the pass guards and drawing enemies over, fly to the front door, enter and get the cloaked Elite spawned. Going halfway to the corner of the passage is enough; that's not even as far as the end of the snow. Head back out, reboard, and fire a few shots to rouse him as you depart before approaching covies get near.
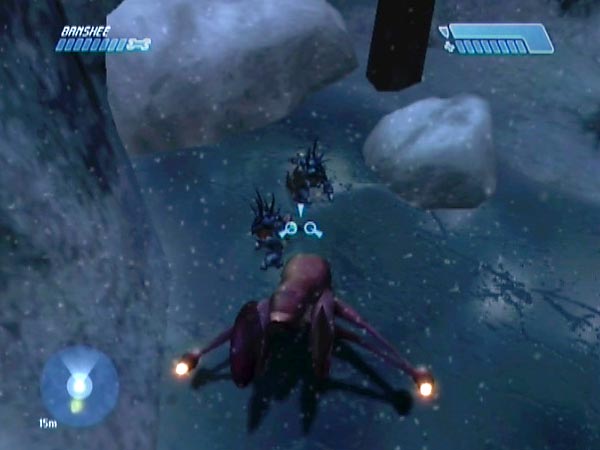
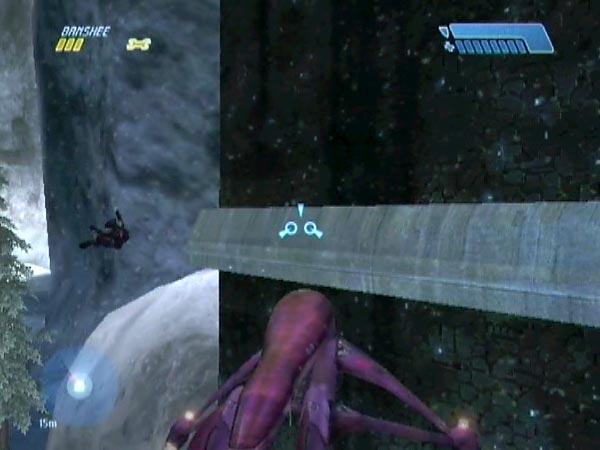
Draw the crowd back to the pass again - or don't bother - and get them into it as before. The cloaked Elite may well emerge from the back door and come running to join in. If he spots you he tends to stop and watch, but if you go into the pass and hover at a safe height, he'll very likely be drawn in (see pic).
If he hasn't turned up by the time the other enemies have cleared off however, fire near the front door to attract him out - or try the back door as he may've gone part way along the back passage - and lead him to the pass. Get him close to the entrance then draw him in by hovering in the pass as mentioned before. He may also go in if you instead back off from the pass a long way so he doesn't see you any more, but that seems much less reliable.
Note: I said to use the front door to spawn him but the back could be used too. I prefer the front for a few reasons, one being that you don't have to go in so far, but it's not critical. If you use the back passage, going halfway is enough.
Further remark
Originally when I was trying to add a cloaked Elite, my mistake was in getting him spawned too late. He needs to be spawned sometime before you trigger enemies in the spiral path area, because that's when the game gives earlier covies an instinct to head for the pass. If he doesn't exist yet, he misses that behavioural update and will only have his normal behaviour of wanting to return to the tower when not raging after you.
Getting enemies out of the tower
Cloaked Elites aside, sometimes you can be left with one or more enemies in the tower even after everyone else has cleared off to the pass. It wouldn't normally happen if you've used my refined routine with care, but still, here are some tips on freeing them up so they'll run off to join the crowd.
Getting balcony Elites out
If there's an Elite still on the balcony or ramp, you need to shift him as he can't seem to navigate his way off those areas. Once he's off, it usually seems to free him up to head for the pass.
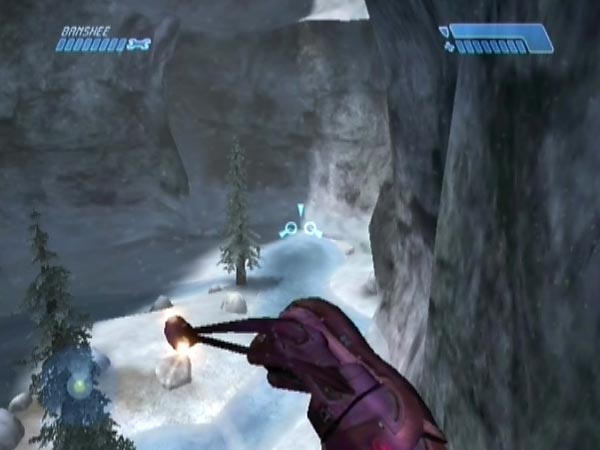
If he's on the ramp, you can get him to go down it by making him swipe at you. You can get close enough by simply running up to him, or to avoid heavy fire on the higher difficulty levels, using the nearby active camouflage to move in and brush up against him, then immediately back off to try and avoid the swipe. If you lose health there's a medkit outside.
Another method is to land a frag grenade nearby to blow him down a way (you'll be able to replace the frag outside), or you could blast him with a Banshee bolt from outside. But obviously you run the risk of damaging him, which isn't ideal. Yet another method is to drive up the ramp at him in a Ghost, hoping he leaps clear helpfully. Once when I tried this with a nasty red Elite halfway up the ramp, he leapt straight back and out into the snow. Some leap! However, it's hard to get it to work, and carries the risk of squashing your target. So you're best off trying to use the swiping method.
Things seem trickier if he's on the balcony. If you've got a Banshee you don't mind damaging, fly at him to make him jump off the open end or at least towards it. There's a trick you can use to minimize your damage here. Fly up at him from right below the balcony, which gives you cover; he'll still dive. If he's right near the end, it's hard to make him jump off; he'd tend to jump the other way. Instead, blast him off the rest of the way with a Banshee bolt nearby (trying to minimize damage to him). Actually, it's also possible to nudge him along with the Banshee's nose, but you take bad damage and run the risk of squashing him.
Getting other enemies out
Any time you're on one side of the tower, free-roaming enemies who happen to be on the other side can get drawn inside, trying to take the shortest route to you, and can end up stuck. They can also be drawn inside when you're on the roof. As long as you avoid such flying like my refined routine does, you'll rarely get this problem, but here's my advice.
If you've got a Grunt or Jackal on the balcony, try flying at him in a Banshee to make him dive off, much as you'd do with balcony Elites. Alternatively, drive at him in a Ghost to try and make him dive. If he's elsewhere in the tower and seems unwilling or unable to move, (e.g. if he's got stuck on the sloping sides of a passage, something I've also seen happen with a cloaked Elite even though he really ought to know his way around), go and pester him a bit or try that Ghost method. Or if it's a Jackal, make him roll by pinging a shot off his shield. He'll move position, which might free him up to move outside.
Skipping and spawning
Preferably kill all enemies who spawn on your way to the rising tunnel, else various later groups can fail to spawn, leaving you short for the megabattle. Presumably this is because the game tries to keep a lid on how much it's got to deal with. However, let me add two things.
Firstly, I think it's ok to skip the trigger for the crashed Pelican area. You can do that by flying sufficiently high as you approach the area, and staying high until past the trigger zone. In other words, just fly over the trigger zone. Obviously you'll need to've got a Banshee in advance for that. Having skipped the trigger, no troops will spawn there or along the two exit paths, or in the subsequent two-Wraith area (you can be low again by the time you're approaching that area), hence you won't have to spend time wiping them out. It's a considerable time-saver. Nowadays I skip the trigger routinely, having never noticed any adverse effect.
Secondly, it may be ok to leave covies alive in the cavern. I've tested that a few times and noticed no adverse effect, but that's no guarantee of course. Personally I'd kill everyone here anyway, partly to make sure my Banshee doesn't take any damage. But if you want to just fly straight through the cavern to save even more time, it may be perfectly ok.
No manned Ghosts please
One other thing about spawning. Make sure that before you trigger the pass guards, neither of the dropship Ghosts is manned, nor the two from near the tower corner (the ones that get manned in normal play). My testing on Heroic suggests that if any of these is manned, you won't get the two Elites in the pass; only the two Hunters. Perhaps this is the game's way of limiting the challenge, so you don't face too much at once.
Enemy numbers
On Legendary you can get 61 enemies, on Heroic 53, and on Normal or Easy 50. Just to clarify things, I'm only talking about the enemies up the spiral path. I'm not including the two Shade Grunts or the two Hunters near the underpass, even if any of these are still alive at the battle start checkpoint - which they usually wouldn't be anyway. You could have live Hunters if you start from the Marines checkpoint rather than the usual underpass checkpoint, but they still wouldn't be part of the main attacking force.
Enemy breakdown
For each difficulty level, there seems to be a fixed breakdown of the enemy numbers you can get. Expressed as 'Elites + Jackals + Grunts + Hunters', the number N of enemies breaks down as follows.
- On Legendary, N = 17 + 18 + 24 + 2 = 61
- On Heroic, N = 15 + 13 + 23 + 2 = 53
- On Normal or Easy, N = 15 + 11 + 22 + 2 = 50
As for where all these enemies come from, I'll list them in two groups. From before the spiral path area we have the following (43 on Legendary, 38 on Heroic, 37 otherwise):
- 2 Elites at the bottom of the tunnel, with 4 Grunts on Legendary, 3 on Heroic, 2 otherwise.
- 4 Jackals up the tunnel, or 6 on Legendary.
- 2 Elites in the tunnel exit dropship, with 4 Jackals and 2 Grunts on Legendary, 2 Jackals and 4 Grunts on Heroic, 6 Grunts otherwise.
- 2 Shade Grunts outside the tower.
- 1 Elite, 2 Jackals and 2 Grunts behind the tower's front door.
- 1 Elite, 2 Jackals and 2 Grunts behind the tower's back door.
- 1 tower balcony Elite, or 2 on Legendary.
- 1 cloaked Elite in the tower, or 2 on Legendary.
- 2 Ghost pilots at the far tower corner.
- 1 Wraith pilot spawning in the pass.
- 2 Hunters and 2 Elites guarding the pass.
And from the spiral path area itself we get the rest (18 on Legendary, 15 on Heroic, 13 otherwise):
- Grunts near the pass exit; 5 on Legendary, 4 on Heroic, 3 otherwise.
- 2 Jackals at the cliff-edge rock near the pass exit, or 3 on Legendary.
- 1 Elite near the top of the spiral path, with 4 Grunts on Legendary, 3 on Heroic, 2 otherwise.
- 1 Elite, 1 Jackal and 3 Grunts in the spiral path dropship.
There's also an important factor to consider. In regard to the Elites, what's the split between reds and blues? After all, reds are a whole lot nastier! The split is not fixed; it's randomized but with a possible bias towards reds or blues, depending on difficulty level. Legendary has a strong bias towards reds, so you can expect blues to be rare. Heroic seems to be a middle ground, with no obvious bias either way. Normal shows some bias towards blues, whilst Easy has a strong bias towards blues.
Territorials
Initially at least, two groups of enemies are territorial. Specifically (1) the Grunts who hang around near the pass exit, and (2) the Elite and Grunts who hang around by the tree near the top of the spiral path. They won't stray from their territory, and thus won't join in with the attack down the path. There's also a territorial inclination held by the Jackals who hang around the cliff-edge rock near the pass exit, but in their case it doesn't seem total. They usually stay put, but sometimes they join the attack, perhaps drawn into it by the presence of the passing Elites. I think that's quite rare though; it was a long time before I witnessed it at all.
Everyone else is freely able to head down the spiral path to attack. That includes the Hunters, though if you want them to attack down the path, you really need to draw them out of the pass in your set-up work (after flying through the pass in the final phase), else they tend to remain there until you fight your way up later.
In regard to the tree group, if you deplete their number far enough, the remainder will lose their territorial restriction and be free to head down the path. On Heroic or lower, killing two will free the remainder (you can see that done with a Banshee at the start of BCM186). There's a similar dynamic with the group of Grunts near the pass exit. In their case it looks like you need to kill all but one.
The territorial groups can actually be freed of their limitations using a special set-up technique that involves starting the battle from a later checkpoint than normal, but that's something I cover on a whole separate page; see Horde boosting.