Seven extra Marines and a hog
Posted July 21st 2006, updated later
Associated movies
- BCM8 - Heroic; Doing it fast, plus Johnson's hidden speech (4:01)
- BCM41 - Heroic; Banshee version with Marine preservation (5:48)
- BCM241 - Heroic; Doing it fast via Banshee grab (5:39)
- BCM315 - Heroic; First ground battle with ten Marines, x3 (5:55)
- BCM511 - Heroic; New development (7:34)
- BCM512 - Heroic; More Pelican Marine blocking options (6:55)
- BCM513 - Heroic; 10-Marine Stacker chain-gun special (6:58)
- Introduction
- The trick, and why it works
- Pelican Marine issues
- Ways to work the trick
- Blocking Pelican Marines to prevent deactivation
- Preserving Marines for later
- Marine management
Introduction
While exploring my three extras trick, I was amazed to find a quite different and comically simple method that gives you seven extra Marines in the first battlefield, plus an extra Warthog if you want it. Woo-hoo! Aside from the potential benefits in the first ground battle, having lots of extra Marines can also be good for other combat scenarios, notably the various megabattles later in the level.
Four of the extra Marines are the ones that come in on the Pelican. They're normally destined to be dead by the time you enter the first ground battle, but you trick the game into leaving them alive. They might initially be inactive, needing to be subsequently reactivated, but if the trick is done in certain ways, that issue can be circumvented, so they play a proper part in the first battle.
Having got ten Marines in the first area, you can have thirteen when you link up with the next group, and eighteen with the final group. Quite a sight! You can enjoy fighting through the level with your massively boosted squad, except that you'd be well advised to ditch any snipers to avoid them shooting everyone else in the back.
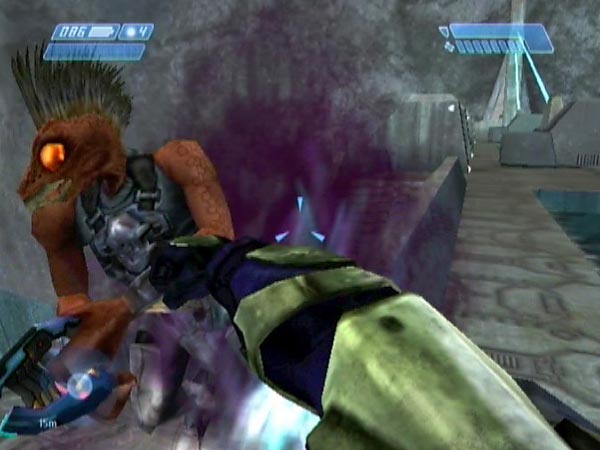
The Pelican Marines will include either Stacker or Johnson, something which gets randomly determined at the loading point just before you reach the bridge. If you get Johnson, you'll potentially be able to hear his hidden all-clear speech later!
As a side-benefit, getting seven extra Marines also enables you to get extra frags with which to launch stuff. After I posted the original version of this article, BigGruntyThirst did a video in which he exploited things to get two Johnsons and a hog to the end of the level. Nifty!
Note: The article has been majorly revised (18/9/2024), partly to incorporate a useful new development (blocking Pelican Marines), but also to do some fundamental restructuring, and cutting some material not directly related to the trick.
The trick, and why it works
The trick is comprised of just two elements:
(1) You need to've triggered the second room (the one after the bridge), but not gone down in the lift. To reach the ground you'll hence need to either do a descent trick off the bridge or use a Banshee if you've got one.
(2) Subsequently, you need to trigger the ground battle by going though the door there. You'll then have ten Marines rather than the usual three. If you also want an extra hog, be in the existing hog as you trigger the battle. Another will materialize at the base area, in the usual overturned state.
These elements can be woven into specific routines in various ways, depending on what your overall goal is. In particular you might be wanting to do some advance prep in the battlefield (or elsewhere), such as adding weapons or vehicles. Such prep can be done before or after the room trigger, or both. You'll also have checkpointing options to consider in relation to your working, but I'll get into some specifics later.
Note: before majorly revising the article, I used to focus on three specific routines. The 'basic version' was where you did things on foot, the 'Banshee fetch version' was where you descended from the bridge and fetched a Banshee, and the 'Banshee grab version' was where you did a Banshee grab at the bridge. But this somewhat obfuscated what the actual trick was, namely just the two elements. Talk on specific routines can now be found in my new section Ways to work the trick.
Some details
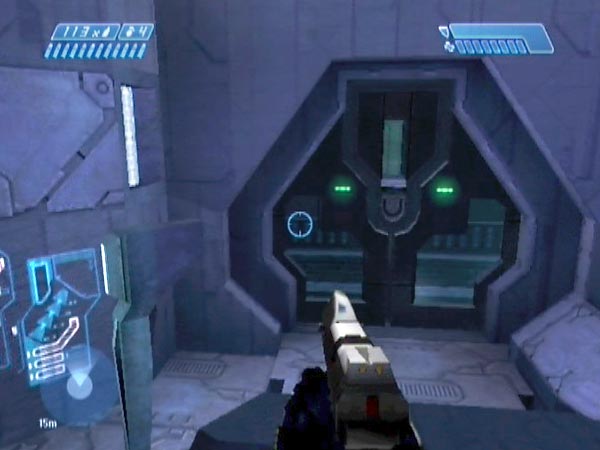
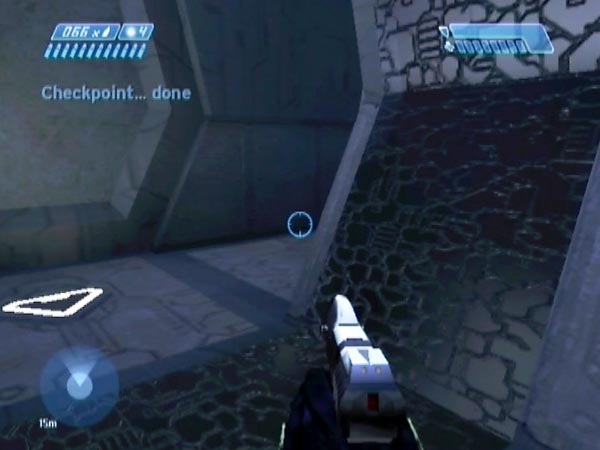
To trigger enemies in the second room, you just need to get across the start of the final black stripe in the long middle section of the passage leading to the room (see pic). You'll see red dots on your tracker if you hang around, but there's no need to. You can just run onto the stripe then head back out. The covies seem to get removed by the game when you trigger the ground battle later. It's also okay to go into the room if you want - e.g. for the supplies, which include a medkit.
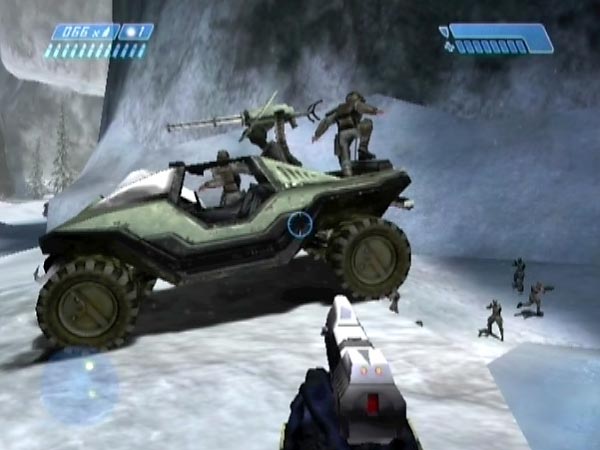
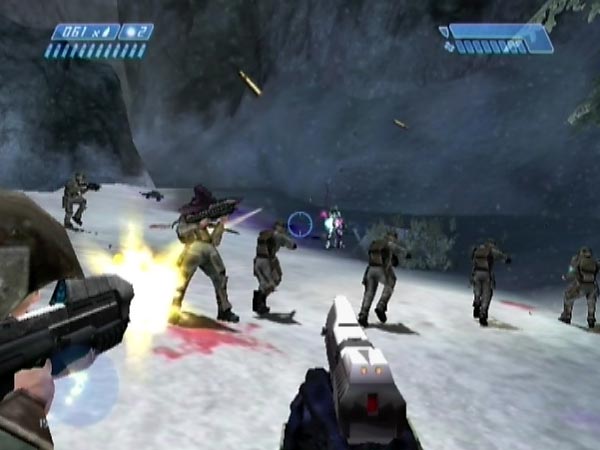
In regard to going through the door to trigger the battle, the actual trigger line is just past the metal floor strip across the doorway. If you're in the hog, it's okay to've first picked up passengers if you want. At the door, briefly dismount to make it open, then drive through (preferably backwards so you'll be facing the right way for coming out), triggering the battle. You don't need to get the whole hog through; just your body is enough. Meanwhile the door will be closing again, or about to close, so dismount to stop it, then drive out into battle (see pic, featuring the Shade in a novel position). You can see the working demonstrated in BCM174, though the actual focus of that movie is Johnson's hidden all-clear speech (which is why I used Easy).
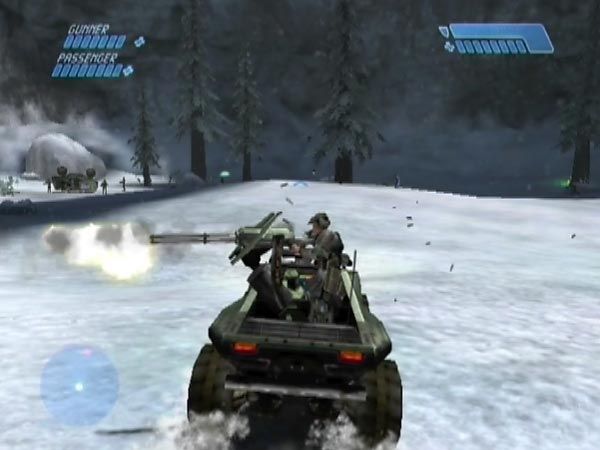
Incidentally. that hog will be Marine-retaining, meaning that passengers stay aboard even if you dismount. That enables you to get continued chain-gun support when you want it, or to position a seated sniper where you like. The usual hog isn't like that, so this is a major bonus, particularly for use in megabattles.
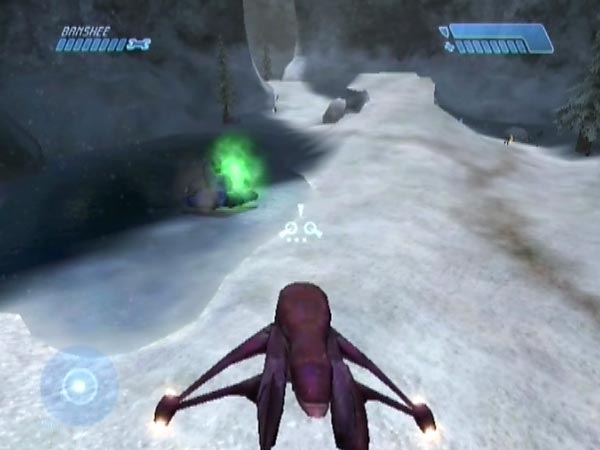
When you trigger the battle, you can actually see the enemy materialize, which is quite a novelty. See what you can spot. The nearby Shade gunner may spawn a considerable way away from his Shade, in which case the game quickly moves him into position. It seems to depend on where you're looking. You can see an example of that around 3:01 in BCM241. An explosion effect is visible near the Wraith, and you can see parts of something getting scattered. Actually it looks like a Wraith explosion effect. It's presumably just to give a loud bang that Bungie was expecting you to hear as you come through the passage leading outdoors
Why does it work?
When you arrive at the bridge, initially there are three Marines down below, and in due course they're joined by the four Pelican guys. If you were to go down in the lift beyond the second room, all these Marines would get removed by the game (specifically it seems to happen when you trigger enemies in the third room, namely as the lift comes down to a stop). By avoiding that, the removal never happens. Those are your seven extras. When you subsequently trigger the battle (entering the relevant trigger area, albeit from an unexpected direction), three fresh Marines are added to the base area as part of that. So, ten Marines in all.
As for the business of an extra hog, in normal play I think what happens is that the original gets removed and the game creates a new one in the usual overturned state. However, if you're driving the original, that's apparently enough to prevent its removal. You do still get the overturned one though.
Battle start checkpoint, for replaying the battle
In connection with the trick, you may well be interested in playing the ground battle over and over with your super-sized squad. For this, it's good to've saved a 'battle start checkpoint' at the door, before triggering the battle. One option is to delay the post-bridge checkpoint, triggered in the second short section of the passage after the bridge. Another option is to delay a tunnel checkpoint.
Bear in mind that in the battle, a checkpoint gets triggered part way up the field, if you're on the ground or sufficiently low down in a Banshee. The upfield checkpoint I call it - and you can see the trigger line here. Often it'll be delayed by enemy threat until all the covies are dead, after which you could either revert quickly or manually delay the checkpoint further until ready to revert. If you do get the upfield checkpoint however, you'll have to eject the disc and reload if you want to get back to your battle start checkpoint.
Pelican Marine issues
In the introduction I mentioned the possibility of Pelican Marines being inactive. Actually there's also the potential of them being invisible to enemies. I'll cover these important issues here.
Inactivity issue, and two solutions
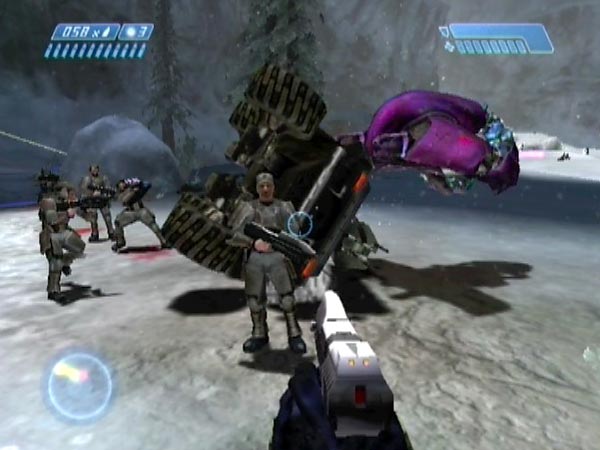
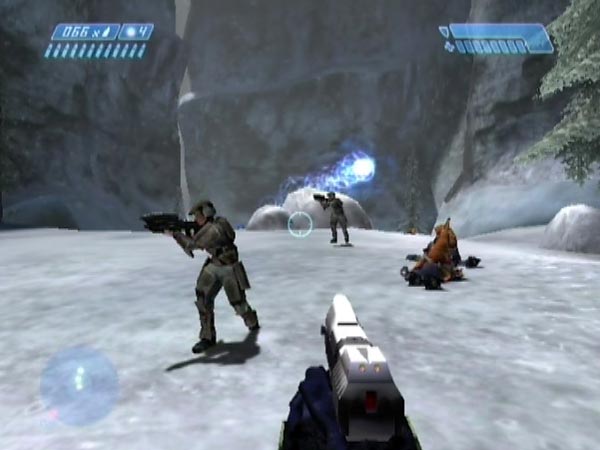
The way things are scripted, the Pelican Marines disembark, run to the base area, then go inactive all at once, just standing around. When you arrive on the scene later after having triggered the battle, one or two of them may reactivate (typically only one I'd say), and thus be able to play a part in the fighting. The others won't be any use here (see pic) but they can activate later to take part in subsequent play, which may be all you actually wanted them for; see my section on Marine management for details.
Deactivation can be thwarted however, saving you any reactivation issue. The simplest way is to complete the trick fast, triggering the battle before they finish their runs and deactivate. There's enough time for that, especially with the use of a grabbed Banshee (on Heroic or Legendary).
Originally that was the only way I knew. But much later I found another way involving getting one of the guys blocked so he keeps running on the spot (or twitching at least). That delays him indefinitely, usefully giving you time to go off and do some battle prep. See my blocking section for details.
Invisibility issue, and solution
After the Pelican Marines disembark, it seem like they undergo a change, becoming permanently invisible to the enemy. As such, they won't get targeted. On the plus side this can help you retain some Marine support and atmosphere as you battle away, either here or in later areas. It can also make for some amusing scenes when these guys run around shooting covies at close range! But it's distinctly unrealistic of course, and hardly fair combat.
This invisibility can be thwarted however. Just trigger the battle before they start running. In that case the change is never made. Of course, you'll need to do the trick quite fast (sand you won't be able to get an extra hog). But there's time, especially with a grabbed Banshee.
Note: originally I thought that the invisibility change occurred at deactivation time. But apparently I got that wrong; it happens a little earlier. Hopefully I've got things right now, with this 2024 revision.
Vanishing issue during set-up (yikes!)
Actually there's one other issue, though it's one which seems fickle and rare. Occasionally I've had times when I've gone off to do some battle prep, only to find the Pelican Marines absent on my return. Removed by the game, for some reason. I have no definite advice about this; just wanted to give you a warning.
Ways to work the trick
There's considerable variation available in working the trick, and it partly depends on your goals. If you're interested in fighting the first ground battle with an active squad of ten, that's one thing and you have a few options. If you instead only want the seven extras for some later purpose, it may be best to work differently. I'll cover some specific options here.
Fast with a Banshee grab
On Heroic and Legendary you have the possibility of doing a Banshee grab at the bridge. This is a good and flexible way to do the trick. Among the benefits, it lets you complete the trick fast enough that the Pelican Marines will be fully normal in the ground battle (active, and visible to the enemy). You just need to trigger the battle before they start their runs. You can see this demonstrated in BCM241, but I'll describe the routine here.
After grabbing the Banshee, fly to the far end of the bridge, landing there. Preferably avoid triggering further bridge covies along the way, or they'll get in your face at the far end. You can do that by avoiding flying low down over the bridge in the central area, where there's a trigger zone. Fly to the side instead.
The post-bridge checkpoint is triggered in the second short section of the passage. Keep it delayed to subsequently use as a battle start checkpoint. Trigger the second room, come back out and fly down. Dismount, get to the door, and save the checkpoint (ready to step back and trigger the battle, completing the trick). You should also save it, if you have battle replaying in mind.
Tip: to have your Banshee in perfect or near-perfect condition for the battle, deal with any covies near your take-off spot accordingly, so it takes little or no fire as you fly off.
Fast on foot
You can complete the trick similarly fast even on foot, although you'll need to be able to do a descent trick off the far end of the bridge, which I think is only a practical option for PAL Xbox users like myself. You can see me doing all this in BCM8, but I'll outline things here.
Start by crossing the bridge fast. If there's a Banshee it's likely to zero in on you, but momentarily stopping behind one of the stanchions can stop an attack run (the pilot veers off, having lost sight of you). When the far door opens you can send a grenade or two over the wall, hopefully wreaking carnage. If the gold Elite gets in your way, which is often the case, a good tactic is to tag him, then jump over him or go past while he's busy growling.
In connection with your descent, you may want a checkpoint just beforehand for retries. For this, you can delay the post-bridge checkpoint until heading back the other way. An alternative use for that checkpoint is to keep it delayed to eventually use as a battle start checkpoint, as described earlier. If there's an enemy Banshee however, its threat would likely prevent you from getting the checkpoint when you want it (at the door); so you might want to've destroyed it.
When you get back to the bridge there may still be enemies around, but they'll often either be panicking or heading off to watch the Pelican. If they don't initially see you, it may be best to leave them alone, trying not to get spotted. Ideally you want to be in perfect condition for the descent.
Descend from the bridge to finish off. If you're using the tree and rock method as seen in the aforementioned movie, the quickest way to the run-off spot is to drop through a glass panel hole, so it's good if you shattered the panel before you went indoors.
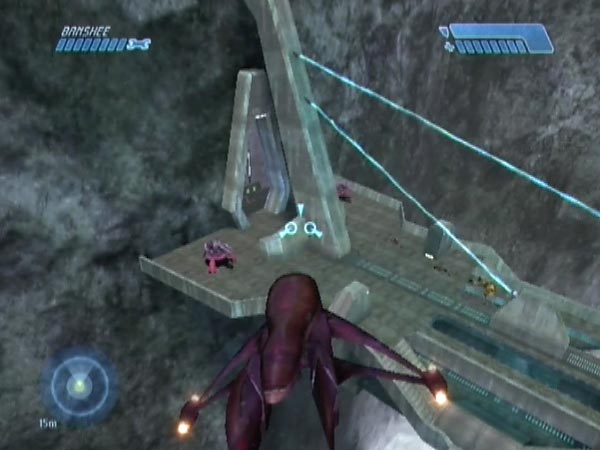
Note: at the expense of having the Pelican guys become invisible to the enemy, it's also possible to get an extra hog if you board it as soon as it's released. You'll then need to drive straight for the door (see pic) and go through in the hog quick, after a neat dismount to get the door open. It's just possible to trigger the battle in time to stop the Pelican Marines deactivating.
Slower working
Slower working is an option if you don't mind the Pelican Marines going inactive (you can get them reactivated later after all), or if you're planning to prevent their deactivation by doing some blocking (see next section). A Banshee grab makes an excellent starting point regardless, but is only available on Heroic or Legendary of course. If not doing a Banshee grab, you'll need to do a descent trick off the bridge and in due course fetch a Banshee, the first accessible one being in the twin bridges area. Either way, you acquire a Banshee and can take things from there.
A few tips on the descent case. Firstly, if there is an enemy Banshee, preferably destroy it before it attacks the Marines, or some could be hurt or killed. Secondly, if you get off the bridge very fast, don't head off too soon to fetch a Banshee, or the Pelican Marines may not get enough time to run to the base area, and in that case the game seems liable to remove them before you return. Based on my testing, you should make sure the music has played for at least ten seconds before you draw level with the ice patch. Thirdly, if you're going to want an extra hog, remember not to drive off in the hog. Travel by foot and Ghost instead.
Note on bridge troops
If you're intending to battle in the area below, it's good to've killed most or all of the bridge troops that have spawned so far. That's mostly to minimise any forthcoming strain on the game, but also so you don't get bogus tracker dots when battling. If you're having to complete the trick fast however, you likely won't have time to take care of all the bridge troops.
Blocking Pelican Marines to prevent deactivation
Originally, the only way I knew of having all four Pelican Marines active in the first ground battle was to get the battle triggered before they completed their runs to the base area and deactivated. But unfortunately that left no time for battle prep, other than perhaps moving the Shade a bit. Now however (September 2024), there's a fix! By getting at least one of them blocked so he's running on the spot, or at least twitching as if trying to run, deactivation can be delayed indefinitely (his run failing to complete), letting you do all the prep you want! This opens the door to a much greater range of battle experiences with an active squad of ten, so it's a real boon. There are multiple blocking options (or methods), and I'll describe them here. But see also my blocking tutorial BCM511 and its almost immediate sequel BCM512.
With the exception of one option (hog driving) you'll need a grabbed Banshee (available on Heroic on Legendary). But in any event, ideally it's good to delay a checkpoint until just before attempting the blocking operation so you'll be able to do retries quickly. You can either use the one triggered in the passage leading to the bridge (namely in the short second section), or the one triggered towards the far end of the bridge.
With Banshee then hog
For this first option, start by positioning the Banshee so the Pelican Marines will be heading towards the back of it. Done right (see first pic for guidance), it's quite easy to end up with a Marine at the tip of the right wing, running on the spot (second pic). That's what you want, though there are possibilities with other blockings too.
You can now use the hog to take over the blocking duty. You could get another delayed checkpoint for making tries at this (there's one you can trigger along the bridge, or you could use a tunnel checkpoint), but personally I'm not inclined to bother.
I find that the best way is to gently park the hog somewhat obliquely beside him, with the hog pointing between the two giant rocks in the background (third pic). Done right, he tries to edge around the tail but ends up running against the back right wheel (fourth pic). Another option is to put the hog more squarely across his path and get him running against the side of it, but I found that less reliable.
If any Marines boarded the hog in the meanwhile, make them dismount, or they'll be lost when the battle is triggered. You can now go off and do your other work. Later when the battle is triggered, the blocked Marine (or Marines, because occasionally you might have more than one blocked, which is fine) will automatically be freed because the hog vanishes (or in effect, gets moved). Very neat!
With Banshee only
If you instead stick with just the Banshee for blocking (maybe you want to be in the hog at the start of battle; and bear in mind you can alway go and fetch another Banshee to do the rest of your work with), how is he freed in that case? If you don't do something, he'll keep running in place even after the battle is triggered! Here's my recommendation, assuming you want to get it done before the battle triggering.
Let's assume you're delaying a checkpoint which you want as a battle start checkpoint. From a position not too far from the door (I go over to a large rock), throw a plasma grenade to land ideally a short way behind the Banshee's left tail fin (a throw you can practice separately beforehand so you know what elevation to use). While the grenade flies, head for the door. When the blast goes off and frees him (possibly without blast damage, depending on your throw), you'll now be able to checkpoint. From this battle start checkpoint you should have enough time to quickly trigger the battle before his run completes.
Freeing him is also possible with a shot or two fired from the near the door, making him stumble clear of the wing tip. But I find this less reliable and more awkward, plus his run tends to be less delayed than it is when the Banshee is blasted and goes tumbling, so you have a bit less time to get the battle triggered. It's certainly viable though.
Note: when using just Banshee blocking, only have a single blocked guy. If there are initially multiple guys running against the wings, you can potentially get rid of the excess by whacking the Banshee, or even by shooting guys to make them stumble clear - though it's obviously not good to be causing health loss.
Simpler Marine-kill option
Actually there's also a simpler option in which the Banshee-blocked Marine is just killed, something you can do as soon as all the other Pelican guys have completed their runs (not before!). Again, deactivation is averted. This option leaves you one guy short of course (you'll only be getting six extras), but maybe you don't mind too much, in exchange for saving yourself some bother.
Yet more options! With hog via bouncing
Just hours after covering the above three options in my tutorial BCM511, I had another idea for getting Pelican Marines hog-blocked. Namely, when the hog is dropped, bounce it into their path by simply having your Banshee somewhat underneath it (I seem to recall that there was a time long ago when I'd been fooling around with that bounce dynamic, just for fun). You can see this demonstrated in BCM512.
It's mainly the nose of the Banshee you'll be looking to get under the hog. You don't have to be aboard the Banshee, but being so gives you better Banshee positioning control plus there's no danger of being splattered, so I'd recommend it.
The bounce is easy to do (fun too), and while the outcome is somewhat random, I'd say you're likely to achieve success within a handful tries. Since the method is also very simple and requires no real finesse, I'm inclined to recommend it as the easiest way to achieve hog-blocking, and especially if you don't consider yourself very skilful.
Note: sometimes you may get a guy who instead of running on the spot, is doing a lot of twitching (possibly with spells of running mixed in), and perhaps looking like he might free himself. In such a case you'd best watch him for a while to better judge whether he's actually going to stay blocked. I've had a few cases where a guy like that has eventually freed himself but taken quite a while. I've also had cases where a runner managed to edge free (just managing to get past the bit that was blocking him), but it's relatively unusual. The twitchers are the ones to be more wary of.
Plus, with hog via driving (no Banshee required!)
In addition, it turns out that there's enough time to drive the hog into their path to achieve some blocking. However, you need to be very fast to get ahead of them in time, and it's easy to have unfortunate accidents which result in angry Marines shooting at you - an example of which is included in BCM512.
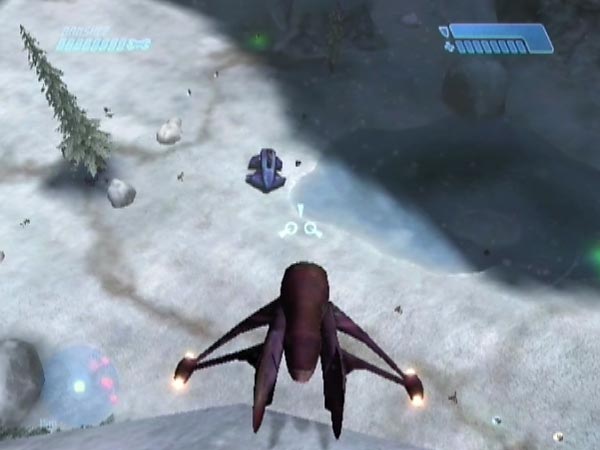
In regard to the driving route, I find it best to more or less turn on the spot (as best you can) and go under the Pelican (see pic), as that seems to give you slightly more time to get ahead, compared to driving around the Pelican. The timing remains tight however, and when making attempts, I found my success rate somewhat low. But who knows, maybe you're a hotshot driver and can do things well enough to actually prefer this option.
If any Marines happen to board the hog during your operation, make them dismount, or they'll be lost when the battle is triggered.
NB: This is the one blocking option which can be done without needing a Banshee. This is significant because it means you've got an option you can use on Normal or Easy, difficulty levels on which there's no Banshee to grab at the bridge. By doing a descent trick off the bridge, you can easily be down fast enough to use this blocking method. You don't need to've got there by flying down.
Shade option
For completeness, let me mention that it's also possible to get a Pelican Marine blocked by a Shade. You can blast one off the bridge with your grabbed Banshee, then blast and shunt it into a suitable position. There's time. It seems best to have it overturned and with the base facing the approaching Marines. All this said, I see no advantage to using a Shade. Blocking with a Banshee or hog is certainly much easier.
Loss avoidance tip
Something I should mention in regard to Banshee-blocking. Preferably don't stand close to the Pelican Marines as they disembark. Depending on your position, it can cause the rightmost Marine to exclaim about your presence, and while he's doing that, the hog slides and splatters him! It's probably best to be out of noticing range, so your presence doesn't affect them until after the hog has slid away.
Preserving Marines for later
If you merely wish to keep the ten Marines as healthy as possible for some later battling, here's my advice.
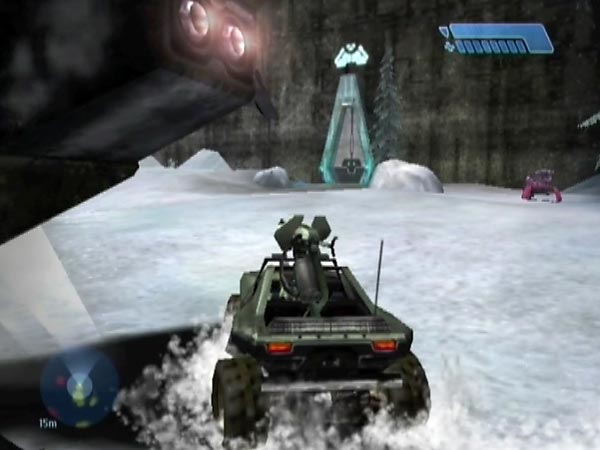
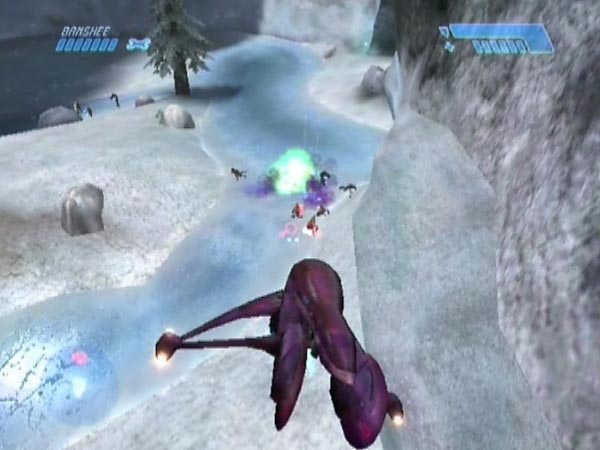
It's best to have a Banshee to hand. Overturn the Shade in advance to prevent its use, and have the Banshee near the door. As soon as you trigger the battle, board and head for the Wraith, giving it a quick first salvo to grab its attention (see pic). With any luck it won't fire a single shot at the Marines. Staying several metres below the height of the first ledge (below treetop height would do), continue up the battlefield until past the middle of the ice patch (specifically, past the upfield checkpoint trigger line which you can see here), then climb to greater safety if desired.
You've now triggered enemies to come after you. That takes pressure off the Marines, except that if the forward Elite boarded a Ghost, he may've gone for the Marines and failed to withdraw yet. If so, you could go and draw him away, or just blast him directly. Once all pressure is off the Marines you can wipe out the enemy at leisure, either from a safe height or lower down.
If you don't have a Banshee, you can still do something similar using a Ghost. If you're instead on foot, here's another plan entirely. Blitz the forward covies (have a pistol) then head up the battlefield to clear threats ahead of the Marines. You'd probably want a rocket launcher to deal with the Wraith fast.
Jackal attack preferred
One last general tip. When the battle is triggered, the enemy attack will be led by either Jackals or Grunts. Jackals are strongly preferable as they don't throw squad-wrecking plasma grenades. When you trigger the battle, you can spot whether you've got Jackals or Grunts; and if it's the latter, you can revert to try again. Better, try to get Jackals that spawn relatively far from the Marines (spawning locations vary).
Marine management
Here's some advice about managing the Marines, particularly in regard to activating Pelican Marines and getting everyone into the crashed Pelican area.
Marine behaviour and activation
Once you link up with the Marines, which simply requires entering a certain area sufficiently low down (below treetop height), the active ones will follow you around, at least until you trigger the battle in the crashed Pelican area. If the Pelican Marines were inactive, one or two of them may activate when you enter the link-up area, maybe acknowledging your arrival or saying something like "Whoa!" as if having a delayed reaction to spotting the enemy. I think this may depend on whether one of them sees you before the non-Pelican Marines though. Your proximity to the Pelican Marines definitely seems relevant.
When you trigger the crashed Pelican area, you generally find that four Marines run towards and over the step, and very often those four will include any Pelican Marines that had remained inactive. Any Marines that don't head over the step will just stop where they are but you can easily get them over later (see below). Once in the next area, all Marines seem to behave as normal.
If any inactive Pelican Marines fail to activate after you've triggered the next area, it's usually no problem because you can just revert to the upfield checkpoint you probably got near the end of the first battle and try again. However, another plan is to instead avoid linking up with the Marines, so everyone remains back at base. In that case I find that when the next area is triggered, the four Pelican Marines almost always activate and head for the step. The other Marines will remain at base, so it'll take longer to get them over the step, but that's no great hardship - just a bit more driving. This is the most reliable plan if you care to use it.
Getting active Marines over the step
As for any active Marines that don't run over the step, you can pick them up in a hog to drive them over or let gunners dismount over the edge so they fall down. When a gunner dismounts, there's a risk of some other bozo hopping aboard before you drive clear of the step (they can jump up onto the gun or the passenger seat), but you can help minimize that by taking a look below to avoid driving clear while there's anyone close. Also, try not to have the rear of the hog hanging over the edge. Another option is to drive four Marines over the step in the Scorpion, having brought it into the first battlefield in advance (you can get it up the step at the left; see here for details).
Pelican Marines pick-up tip
If the Pelican Marines are invisible to the enemy, one good use for them is to get one or two aboard a Marine-retaining hog for later use, so it won't get targeted when you leave it. Good for support fire. If you want do do this, here's my advice. Avoid linking up with Marines when you trigger the first ground battle. Wipe out the enemy then move the hog to or over the step, ideally without triggering the crashed Pelican area yet (e.g. you could blast it over the step from high up with a Banshee). After triggering the area and helping out, get two of the imminently arriving Pelican Marines aboard as soon as they come over the step (they won't board any earlier), before any other Marines close in. If you want the sergeant but he doesn't initially board, there's potentially time to get him before the other Marines close in; or you could get him later.