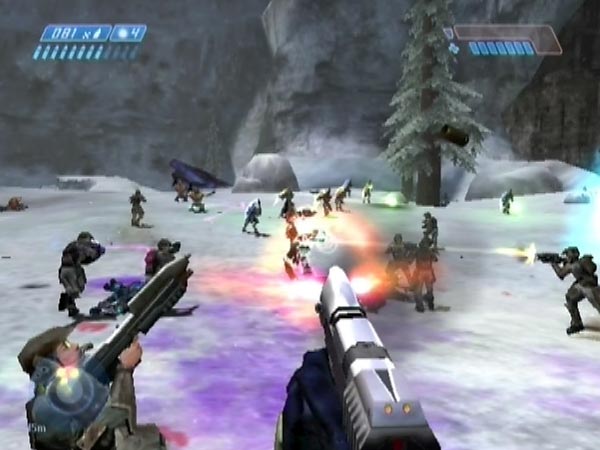
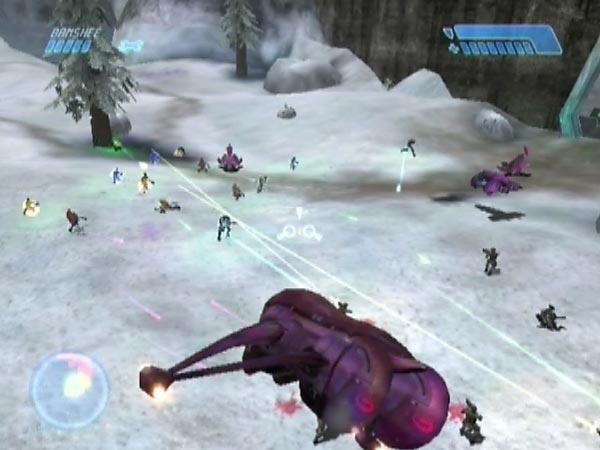
Mob battle in the first snowfield
Posted July 28th 2006, expanded April 2019
Associated movies
- BCM346 - Heroic; Ten Marine set-up plus combat intro (6:18)
- BCM347 - Heroic; Mob battle with ten Marines, x6 (6:49)
- BCM348 - Heroic; Mob battle solo with pistol & needler, x6 (6:32)
- BCM349 - Heroic; Mob battle with ten Marines, vehicle support x6 (6:56)
- BCM350 - Heroic; General set-up plan (7:12)
- BCM351 - Heroic; Mob battle with five Marines, x6 (6:56)
- BCM352 - Heroic; Mob battle solo with plasma rifle & pistol, x5 (6:33)
- BCM353 - Heroic; Modifying a save (6:23)
- BCM355 - Heroic; Solo play set-up via modification (6:28)
- BCM356 - Heroic; Ten Marine set-up with a Wraith (6:10)
- BCM357 - Heroic; Mob battle with ten Marines and a Wraith, x5 (6:50)
- BCM358 - Heroic; Set-up, early Wraith flipping (3:34)
- BCM360 - Heroic; Adding a gold Elite (6:50)
- BCM361 - Heroic; Low checkpoint via drop method (3:20)
- BCM362 - Heroic; Adding two Hunters (6:52)
- BCM363 - Heroic; Mob battle with two Hunters, x6 (6:33)
- BCM364 - Heroic; Mob battle solo with two Hunters, x6 (6:26)
- Introduction
- Ten Marine set-up
- More about finalization options
- General set-up plan
- Solo play set-ups
- Enemy numbers
- Extra covies
- Modifying a save
- Battle remarks
- Battle plans
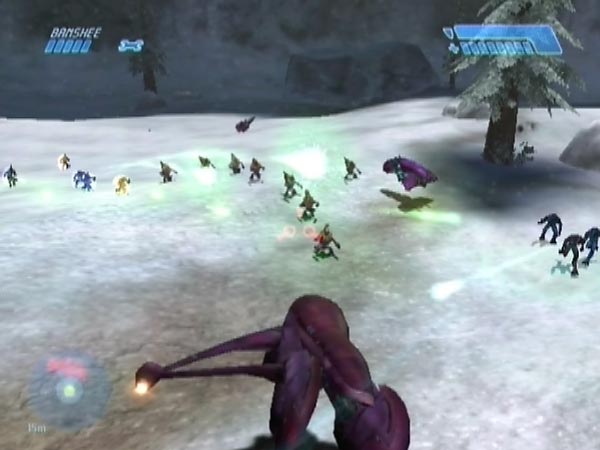
Introduction
This article is about transforming the rather spread out first ground battle into an absolute blast of concentrated action. Using a special set-up which starts off with the enemy largely collected in a big chasing mob, you can quickly get into all sorts of intense battle situations, either fighting solo or with the assistance of up to ten Marines. With typically 16-18 covies it's not quite a megabattle, but it's similar in spirit, with lots of ways to play it and lots of creative potential in setting things up. If you like hot action, don't miss this!
Things can be set up with seven extra Marines by doing a Banshee grab at the bridge and triggering the ground battle fast, but there's also my general set-up plan which usefully gives you all the time you want to make various preparations (and you can still get some extra Marines). I'll detail the former set-up first though, as it's simpler and I suspect most folk will like the idea of having ten Marines.
History
This is something I came up with while investigating the business of getting extra Marines. So thanks again to Boris for getting me started on all that! Many years later in 2019, the article has been heavily revised to take account of the Banshee grab, which now provides additional set-up options. I've also gone into much more depth.
Ten Marine set-up
This method of setting up, which is demonstrated in BCM346 (and also BCM356, and see BCM358 too), is the fastest and also gives you seven extra Marines, making a squad of ten, including either Stacker or Johnson brought in by the Pelican (randomly settled at the loading point before the bridge). You need to use Heroic or Legendary because a Banshee grab is required (there's no Banshee on Normal or Easy). Here we go!
Prior to the bridge
By the time you reach the bridge, be fully loaded with grenades for the later battling, and have the weapon combo you want, well stocked with ammo. In a typical set-up this will be what you start the battle with, though there is a possibility of switching before your final checkpoint. Also have full health.
Grab the Banshee and go to the far end
Grab the bridge Banshee and promptly fly to the far end of the bridge, going along the side to avoid triggering any covies in the middle area. As you reach the far end, blast a Shade off so you can land the Banshee near the door - ideally with the back facing the door. That's just a speed consideration. There's a bit of time pressure because you're going to need to trigger the ground battle before the Pelican Marines finish their runs (otherwise they'll go inactive, and although some might reactivate later, some won't).
Trigger the second room and save a checkpoint
Head into the exit passage. When you turn right, a checkpoint is triggered. Keep it delayed by jumping as you continue far enough to trigger enemies in the second room (go to the end of the long middle section of passage), then return to the Banshee. Get the checkpoint when near the Banshee, and save it for safety, in case your set-up turns out to have a shortcoming which you only realise later (e.g. maybe you find that some of the Marines got killed). Incidentally, delaying the checkpoint is just an efficiency measure, bearing in mind that if something goes badly in the following work, you may want to revert for another try.
Note: the resulting save can be used as a base save for producing various different final saves, oriented towards different ways of playing. So, you might like to keep a copy for that.
Overturn the Shade and trigger the battle
Fly down towards the door. On the way, blast the nearby Shade over so the gunner will end up on foot, unable to barrage the Marines. Actually, blasting it over is easier said than done, because the Shade quite easily settles upright. You need to land a shot in a good place. Aim near the front of one of the front legs (you might even like to memorize a particular target point on the ground, to get more reliable).
Dismount near the door, and trigger the battle by going through the door. As already mentioned, that needs to be done before the Pelican Marines finish their runs. That shouldn't be any problem; you can be triggering the battle even before the Pelican has touched down.
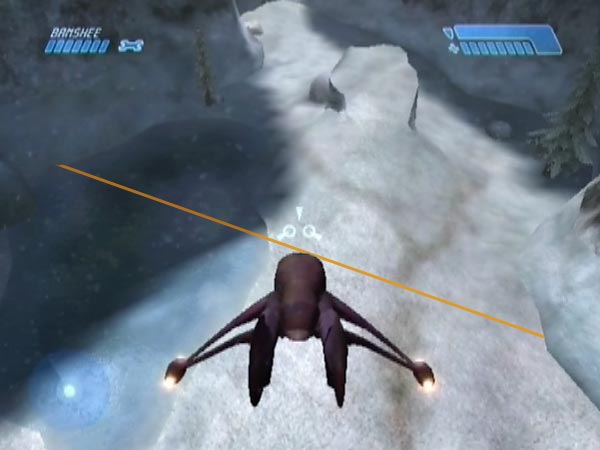
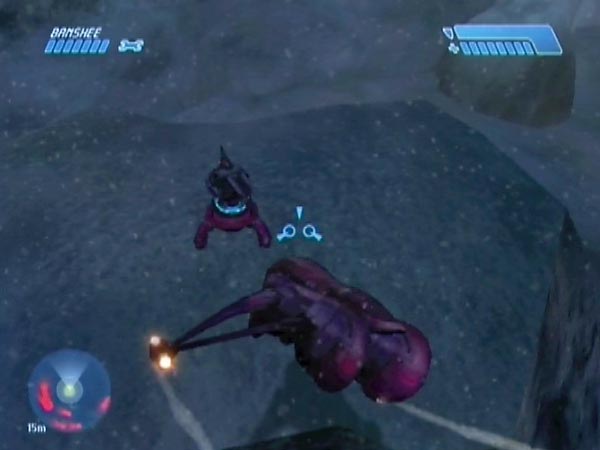
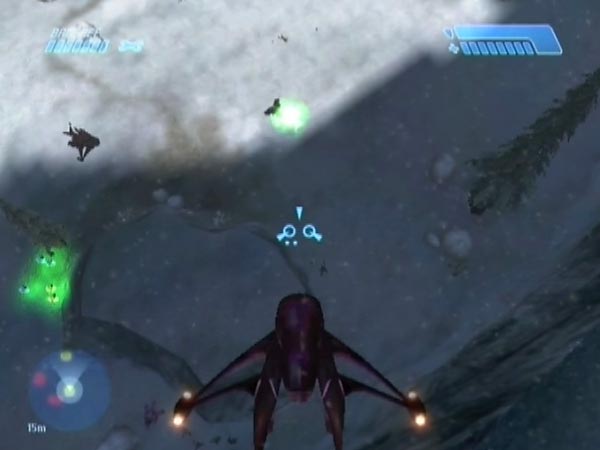
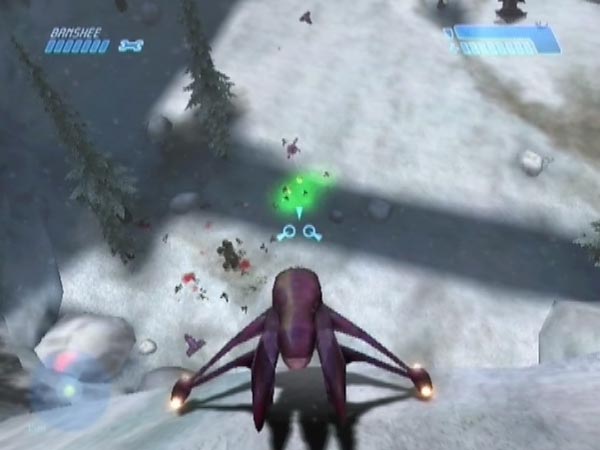
Trigger chasing behaviour and keep a checkpoint delayed
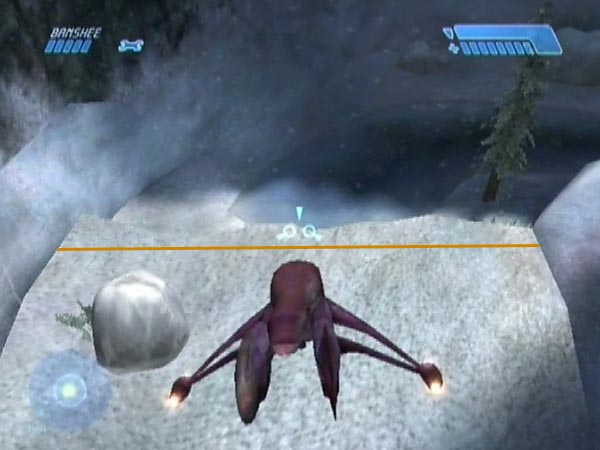
Reboard the Banshee and quickly head up the battlefield relatively low down (below treetop height or thereabouts), to cross a trigger line that goes across the field around halfway path the ice patch (see pic). Among its effects, the trigger gives most of the covies new behaviour, namely to chase you. As such, the ones attacking the Marines will start backing off to come after you instead. Hopefully everyone survives that brief clash (this is why you want to trigger the retreat fast), but you can check later. This chasing behaviour is the crucial thing that makes this whole mob battle business work.
Also a checkpoint is triggered. You need to keep it delayed, to eventually use as your start checkpoint for the mob battle. Enemy threat will provide a delay as long as you don't fly much higher than the first ledge. Giant plasma balls in the air provide another delay cause.
Note: in heading for the trigger line, you might like to fire an early salvo at the Wraith to grab its attention before it fires on the Marines. I'm not sure how effective this is, and the Wraith will probably soon see you even if you don't fire on it, but it might help.
Also, finalize things
There are various things you can finalize, but three in particular. There's a Grunt in a Shade, there may also be an Elite who boarded a Ghost, and there's also the Wraith pilot. All these folk can add to the mob if you eject them (optional in all cases). To eject the Grunt, push his Shade off the plateau, being careful not to splatter him. To eject a Ghost pilot, land a blast to the side of a front wing, preferably far enough away that he isn't hurt (no blood). Wait for it to become stationary first, and be careful not to blast any other covies by accident. To eject the Wraith pilot, ram the front low to raise the nose, then push it up and over (there's more detail on that technique here).
Note: While the Wraith or a Ghost remains manned, it presents a splattering hazard to covies on foot. If you notice anyone getting killed you'll need to revert for another go, assuming you want a full mob.
In pursuing those three goals, here's a possible routine as seen in BCM346. After triggering the chasing behaviour, head for the Shade. If you see the Elite running to man a Ghost, either fire some plasma to get his attention (he might drive towards the Marines otherwise) or overturn both Ghosts with a fuel rod blast so he can't board. Eject the Shade gunner then retreat to a deeper position to eject the Ghost pilot if any. As for ejecting the Wraith pilot, draw the roaming covies away first, to keep your Banshee healthy and to minimize the chance of covies getting damaged by friendly fire.
However, with that routine, flipping the Wraith can be relatively hard and take patience. It'll be moving around, often on the snow, and when you fail you usually have to draw the mob away for safety before you can make another try. Also there's an ongoing danger to the mob from the Wraith fire. An alternative plan is to flip the Wraith first thing, as demonstrated in BCM358. The Wraith is conveniently on the ice patch and often stationary, making flipping very easy. But even if it's a bit lively, you've still got a good chance. There's a risk of being blasted as you arrive, but on Heroic at least, the Wraith doesn't often fire a dangerous shot like that. If you fail you can just revert for another quick go.
Doing this early Wraith flip slightly delays your triggering of the covie retreat from the Marines, but only by a few seconds, which probably won't make much difference. It's definitely the best plan if you're not adept at Wraith flipping in general.
Get your battle start checkpoint
Finally, get the checkpoint that was being delayed. It becomes your battle start checkpoint. You need to get sufficiently clear of covies.
One option is to get the mob gathered below you somewhere well away from the Marines (e.g. near the middle of the battlefield), then just climb up high like I did in BCM346. However, you can get a lower checkpoint by using the 'drop method' I demoed later in BCM361. This lets you get into action faster, and is now my stanard choice. But either way you have a good general starting point with the potential for all sorts of battles, including solo.
Another option is to draw the mob a long way off from the Marines, then fly to the Marines using Banshee fire to keep the checkpoint delayed until you've reached them and perhaps dismounted, and perhaps even picked up the rocket launcher and/or sniper rifle. With that option you're already linked up with the Marines at the start of battle. There are other options too. You have quite a bit of design potential.
More about finalization options
Here's more talk about finalization options after triggering the covies' chasing behaviour. Incidentally, it's not ok to get tunnel checkpoints for consolidation during finalization, just in case that idea crossed your mind. The Marines would lose their cyborg following ability, and the supplies would vanish.
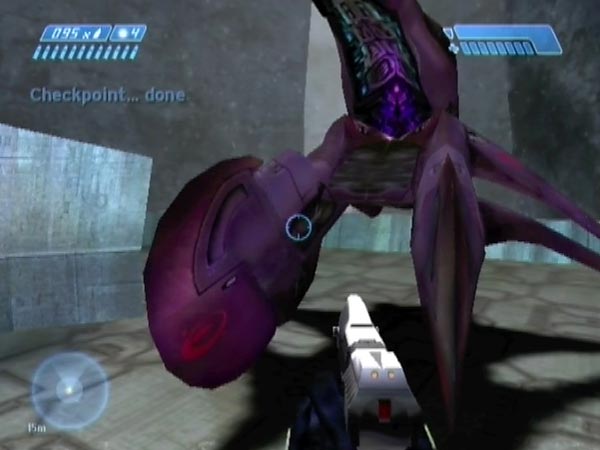
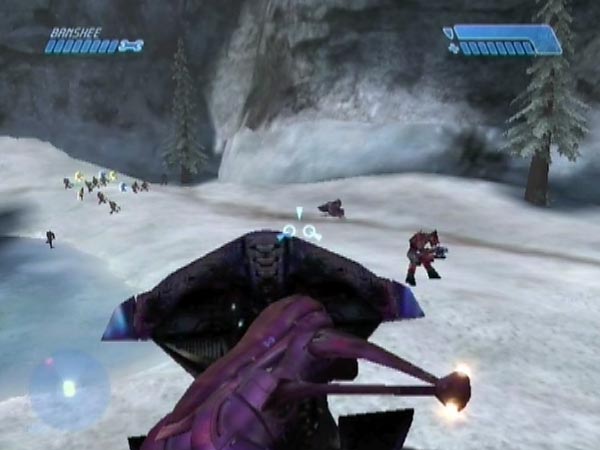
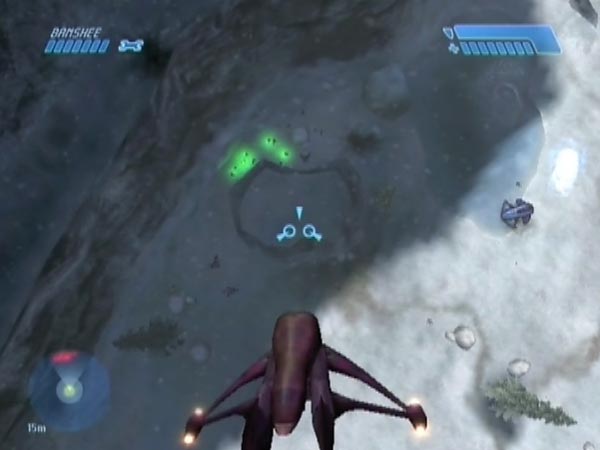
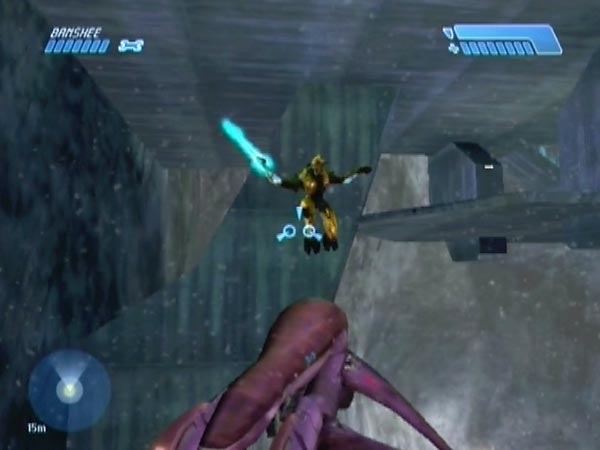
The back Elite
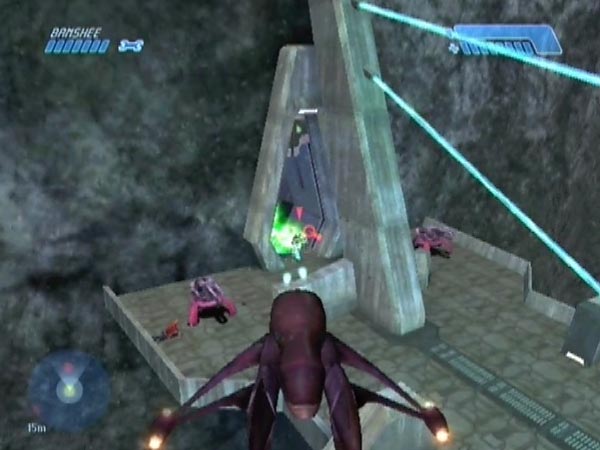
All enemies on foot can chase you freely, with one exception. There's an Elite who normally stays at the back, in and around the corner depression. But if he happens to get hold of a Ghost, he'll join in the attack. One way you can provision for that is to arrange for an overturned Ghost to be near him, so that each time you start a battle you'll have the option of whether to blast it upright so he'll board and come after you (see pic), or leave it alone so he doesn't.
To get a Ghost into a suitable position, you can blast one all the way over to his area, taking care that nobody boards it along the way. There's a demo of that in BCM350. To save a lot of blasting you could instead eject a pilot near the area, as seen in BCM346, but that will damage the Ghost of course, making it less resilient in battle. Use the former option if you want the Elite to always have a fresh Ghost, which can take more punishment.
Using AR supplies
At the Marines area there's an AR plus ammo packs all newly spawned with the battle, which are actually outside the link-up area. That enables you to utilize those supplies without linking up with the Marines. Thus you could top up or get an AR, then fly off and the Marines won't follow. You'd best draw the covies far away beforehand though, to be sure you can make your getaway before they get near the area.
Ghost options
In regard to the two Ghosts newly spawned with the battle, I've already mentioned the usefulness of having an overturned one in the vicinity of the Elite at the back. What about the other Ghost though? In the set-up created in BCM346 I simply left it in place, but that means that whenever I want it to get manned by an Elite at the start of battle, I first need to draw Elites towards it. That slows things up, so here's an idea. Instead of leaving it there, blast it closer to where the mob will be at the start of your save, and have it overturned. Then you can more easily get it manned when you want. You won't have to make such a diversion. That's what I did in BCM350 and BCM356.
There are other things you could do with one or both Ghosts. For example you could blast one to a position near the Marines and have it overturned, so that in battle, you'll have the option of righting it to let a Marine board - or you could board it yourself. Another idea is to get one or two Elites into Ghosts in advance, just before getting your checkpoint. Mind you, there's a risk of covies getting splattered before you get it.
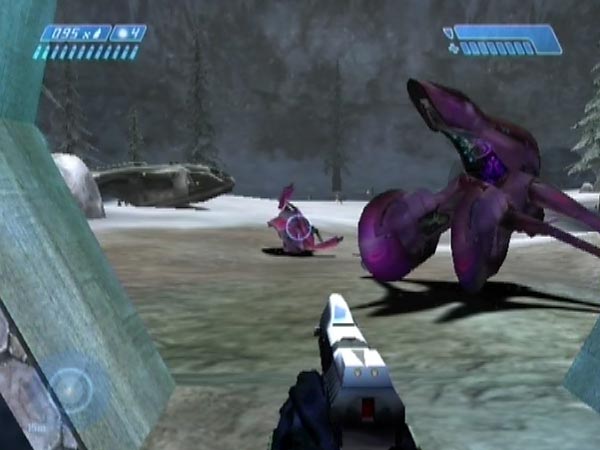
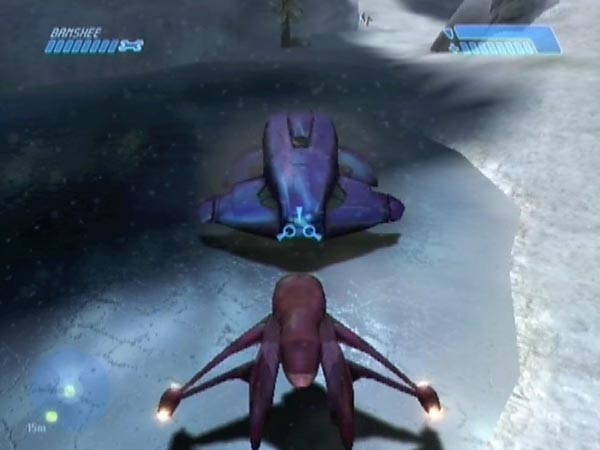
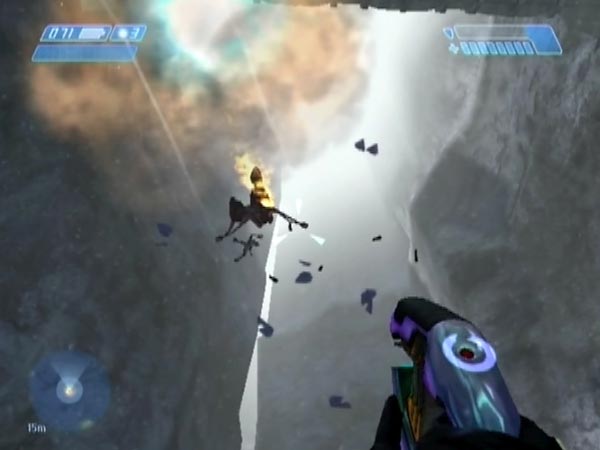
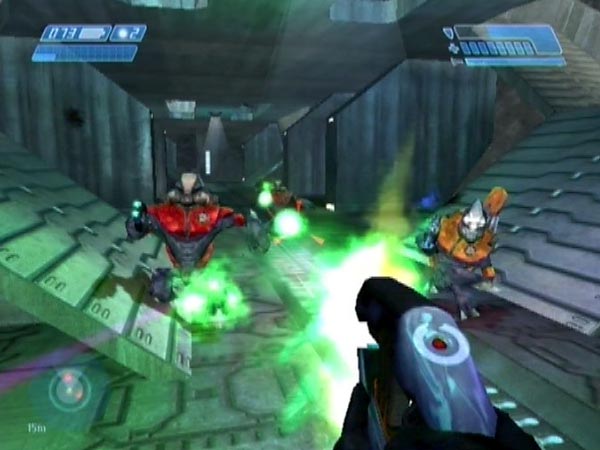
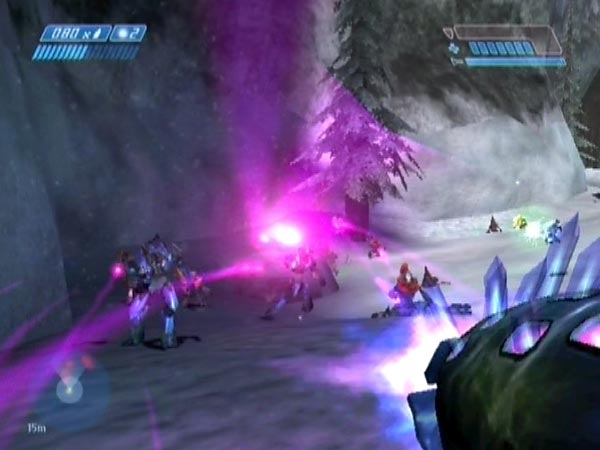
Keeping the Wraith for battle
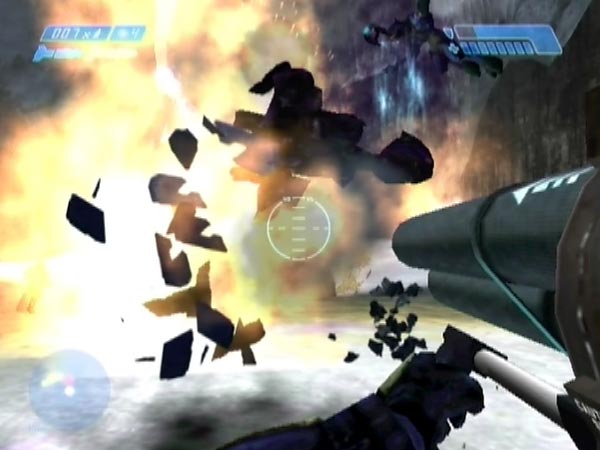
Instead of ejecting the pilot, you may like to leave the Wraith manned, for the fun of having giant plasma balls raining down during battle (see pic). The mob will have one less Elite, but the Wraith adds atmosphere and you can look forward to destroying it repeatedly. Also you'll sometimes see enemies taken out in a friendly blast, which is always good for a laugh. See BCM357 for some example battles involving a Wraith.
If you do keep the Wraith however, you'll need to stop it firing before you can get your battle start checkpoint. One way to get it is to briefly go around the corner into the crashed Pelican area (not too low or you'll trigger the battle there; stay above the trees), but that's not a very convenient place to get it. For a more usual checkpoint, initially go around the corner for a few seconds, but keep the checkpoint delay going with Banshee fire. When you return, hopefully the Wraith will have stopped firing (although there's a danger it'll spot the Marines and start again, in which case you should get its attention quick and try things again). It's ok to let the mob see you, and that may help keep it together as you try to draw it somewhere, but don't let yourself get spotted by the Wraith before getting the checkpoint (fly high, around bridge height). In my Wraith demo BCM356 I essentially got the checkpoint using the 'drop method', though I hadn't yet explicitly recognized that technique.
Killing bridge troops
After you grabbed the Banshee, there were still a few covies on the bridge. You didn't have time to hang around and kill them (or not all of them anyway; there may've been time to get one or two), but you could do it during finalization if you like. One reason is that it'll reduce the game's workload. Another is that it'll eliminate tracker dots caused by bridge troops (dots which could spook you in battle). Another is that bridge troops can hinder your ability to get your battle checkpoint where you want, due to their threat.
While doing the killing, be careful that you don't cause the mob below to start attacking the Marines. If you stay in a suitable area on the left side of the bridge the covies safely collect near the Shade plateau (see pic), something you can see in BCM356. However, overturn any Ghosts there first, or Elites could hop aboard and cause trouble. You can always blast them back upright later if you want. Note: when the patrolling Elite is on the lower deck he can be difficult to target, but an alternative is to briefly fly under the deck in Shark style, to make him dive off.
As for when to do the killing, it's perhaps easiest when the Wraith is still firing plasma balls at you, because that automatically keeps the checkpoint delay going. You could instead leave it until after the Wraith is disabled though (if you are going to disable it), in which case you'll sometimes need to use Banshee fire for delay continuation, namely when you think there might not be sufficient enemy threat from bridge troops.
All in all, it's a bit of a fiddly operation which I wouldn't advise a casual player to bother with (that's why I didn't include it in BCM346), but it's worth doing if you want to optimize your set-up.
Moving the Warthog
Using Banshee blasting you can potentially get the Warthog upright and moved without linking up with the Marines. That could facilitate safer and faster pick-ups. Be careful not to hurt any Marines of course, and draw the covies well away beforehand, so they don't get close.
Getting a fresh Banshee
If you want a fresh Banshee for battle, you could switch with the platform Banshee. Use Banshee fire during the excursion, to keep the checkpoint delay going. Also, stay sufficiently high that you don't trigger the crashed Pelican area. Staying above the trees will do.
General set-up plan
My 'general' set-up plan, demonstrated in BCM350, is for when you're not looking to have a ten man squad. Accordingly there's no rush to trigger the battle, and as such, you have all time you want to make various preparations, including the possibility of adding spare weapons, adding extra vehicles, building blockades, and getting a few extra Marines. Aside from the new Banshee grab option, this plan is essentially the original one I gave, back in 2006.
Get a Banshee
At the bridge, either (a) do a Banshee grab or (b) do a descent trick and get a Banshee from later in the level (the first accessible one is the 'twin bridges Banshee' from the area with twin bridges overhead). Either way, the point is to end up with a Banshee. If you're going with (b), also destroy any enemy Banshee. You can get a fully charged plasma rifle from that.
Do various prep
Take all the time you want in making various preparations (during which, it's ok to get tunnel checkpoints if you ever want to consolidate). For one thing, overturn the Shade so the gunner won't be able to man it (he'll still spawn near it though). Also, preferably kill any bridge troops left. I mentioned three reasons for this in the earlier set-up plan (in which the task had to wait until after triggering the battle), but another reason now is that the troops can provide you with spare weapons. You can kill them on foot to minimize risk to your Banshee (though you can always replace it later).
You can add spare weapons to the battlefield, giving yourself more options at selected defence locations or whatever. Plenty are available from the early bridge troops and from the first room. Just throw them off the bridge and move them wherever you like. Get needlers full on ammo before throwing them off. Plasma pistols on 100% charge can be obtained from Grunts on Shades. There are some other possibilities too. Of course, some of these acquisitions could instead be used as the weapons you start the battle with.
If you want an AR or more AR ammo, you can potentially kill one of the inactive Marines (due for later vanishing) without being declared a traitor. But there are also supplies in the second room later.
If you fancy having two or three extra Marines and maybe an extra Warthog, do the appropriate arrangement as described in Two or three extra Marines and a hog (I get two in BCM350). But you should also blast the Shade a good distance away from the door, so the Grunt ideally won't get into conflict with the Marines when they emerge later.
If your Banshee has damage, there's the option of getting a fresh one. The platform Banshee is the nearest. You can just fly to it and switch.
You can bring extra vehicles to the battlefield. The Scorpion for example. In regard to Ghosts however, note that NPCs won't attempt to man them (according to my testing). They'll only be usable by yourself. Aside from combat potential, vehicles can also be used to form a blockade, to create a novel battle situation. Or to act as cover, or as targets to rocket when covies are nearby (potentially using them as cover). There are 13 Ghosts available, providing a lot of creative potential. Shades can be added too. There were four on the bridge of course; you can blast them down.
Optionally, add extra covies to the battlefield. Not easy though! Note also that if you're going to get a Hunter from the second room, and you also want to get extra Marines, you need to do the prep for the Marines before getting the Hunter. That's because once you've triggered the second room, the act of going through the ground-level door (from outside) would trigger the battle.
Save a checkpoint, ready to trigger the battle
Working towards getting the battle triggered now, there are a couple of options. The standard one is as follows (used in BCM350), and assumes that you haven't yet triggered the second room.
Put your Banshee by the ground-level door so you'll be able to board quick when you come through later. Go inside to the lift, bring it down and ride up, then go through the room and get a checkpoint in the passage beyond (just past where music starts). Now resume normal play. There are supplies in the room if you want them (you can get a full pistol, a decently stocked AR, frags, and a health boost). Fight your way back down and to the exit passage. Early in the passage there's a checkpoint (triggered just prior to the long section which contains the loading point). Save it for safety. The save can also be used as a base save.
Another option for triggering the battle will be to go through the ground-level door from the outside, subject to having previously gone through the bridge's exit passage far enough to trigger the second room. In regard to saving a checkpoint for this case, use the exit passage checkpoint if you haven't had that yet, else use a tunnel checkpoint. Either way, delay it until ready to step through the door. Something to bear in mind with this nonstandard trigger method is that you'll be getting extra Marines (if no Marines have been killed beforehand). Specifically, the original trio and some or all of the Pelican Maarines (a new trio spawns along with the covies). However, some of the Pelican guys may've vanished when you crossed a loading point earlier, and of the ones which remain, some may fail to activate, and all will be invisible to the covies.
Trigger the battle and finish as before
Trigger the battle, then follow a similar procedure as in my ten Marine set-up plan. It may be a bit different though, thanks to preparations you've made (which weren't possible in that other plan).
Solo play set-ups
Solo battling provides some of the best action, and you can get plenty of it with a normal save featuring Marines. But the Marine presence will limit you in various ways. For the most part you'll need to keep clear of the base area, and keep the roaming covies clear of it too. Also you generally won't be able to access the rocket launcher and sniper rifle, because the Marines would tag along after you and get into the fight. For maximum freedom in solo battling, you need a set-up with no Marines (another benefit of which is that the game's workload is reduced). Such a 'solo play set-up' can be obtained in various ways.
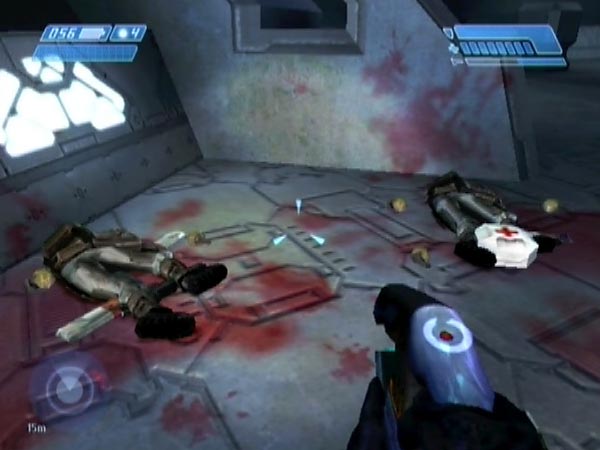
Option 1: modify a normal save, killing the Marines
If you have a save featuring Marines, modify it by killing the Marines and re-checkpointing (either with the bridge checkpoint if still available, else a tunnel checkpoint). There's a demo of this in BCM355.
How to do the killing? If you don't have too many Marines, you can land and attack on foot, perhaps also taking the opportunity to splatter a few before dismounting (you can splatter several if you don't mind taking Banshee damage; you can get a fresh Banshee afterwards). If you've got too many to be able to do that safely enough and fast enough before Elites arrive, you could instead kill them from distance with Banshee fire. If you hover around the height of the lower ledge above the door, you can bombard the Marines from there and the covies will collect below at a safe distance from the Marines. However, when a Marine goes into rage mode he'll run towards them. Watch out for that, and finish him with a fuel rod blast before he gets close enough to do harm to the covies.
Option 2: adjust a normal plan, killing the Marines during finalization
Follow either of the usual set-up plans, but once the battle has been triggered add an extra finalization task before checkpointing: killing the Marines.
Option 3: use the general plan but vanish the Marines
The neatest way is to incorporate the trick described in my article Marineless first ground battle. I'll outline the overall procedure. Initially follow the general set-up plan. As part of the prep you can kill the existing Marines if you like (three new ones will get created later when you trigger the battle). It's not necessary, but one benefit is that it will give you some ARs to use as spare weapons.
When it comes to triggering the battle, work as follows. Land at the far end of the bridge, go inside and trigger the second room (unless you've already triggered it, that is). Return, fly down and dismount near the door. Go through, triggering the battle, and continue inside to the lift. Bring it down and ride up, causing normal checkpoint structure to be resumed, then come back down (causing the removal of the Marines outside) and kill the covies which have now spawned in the room (without losing health of course).
In the exit passage you'll trigger a checkpoint. Save it for safety (this save could also be used as a base save). Now head outside and work pretty much as usual. This time there won't be any Marines though, which removes any urgency about triggering chasing behaviour. It doesn't even need to be the first thing you do, and you might like to eject the Wraith pilot first (you have a good opportunity). One thing you can do in the remaining set-up work is get the rocket launcher and/or sniper rifle if you want.
Note: with options 2 and 3 your resulting save has an advantage if you still haven't triggered the bridge checkpoint. Namely, that checkpoint remains available for creating modifications. However, you can always use a tunnel checkpoint instead, so it's not a huge advantage.
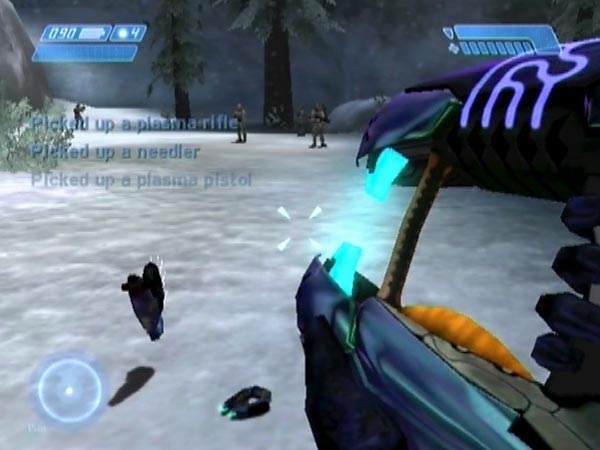
Enemy numbers
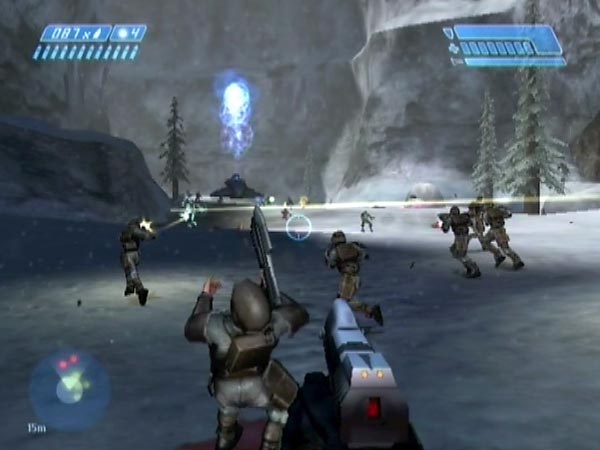
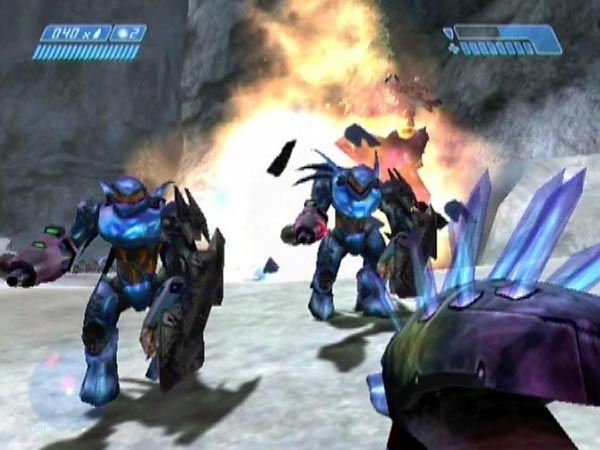
Here's the detail on the enemy numbers you can expect, including the Wraith pilot (but not including the possibility of extra covies, which can be added with special work).
Expressed as 'Elites + Jackals + Grunts', the breakdown for a given difficulty level depends on whether the Marines are initially being attacked by 2 Jackals or 3 Grunts, which is random and which can be quickly observed when the covies spawn. On Heroic you respectively get 4 + 7 + 5 = 16 or 4 + 5 + 8 = 17 (see pic). I favour the latter 'Grunt-heavy' composition, as Grunts are more fun than Jackals and they move faster too. On Legendary there's an extra Jackal. On Normal and Easy there's an extra Grunt but one less Jackal, making 4 + 6 + 6 = 16 or 4 + 4 + 9 = 17.
Incidentally, these numbers are a few less than what you'd get when playing through the area normally, killing enemies as you go. Played normally, you'd encounter an extra two pairs of Jackals near the end of the area. Collecting a mob though, you don't get them, presumably because the game is trying to keep a lid on how much it has to cope with.
Reds and blues
One other aspect of enemy numbers is the Elite breakdown into reds and blues. Reds are much more fearsome than blues; so the more reds you have, the tougher the battling will be. On Heroic I think the most likely outcome of the random spawning is that you'll get two of each. But if you want things tougher, keep retrying the set-up work (from the battle trigger onwards) until you happen to get three reds. Or even four, though that's very rare.
Note: If you left the patrolling red Elite alive on the bridge, maybe that'll tend to lower the number of reds you get down below? I'm not sure.
Extra covies
When using the general set-up plan, as many as five extra covies can be added to the battle during the prep phase, if you have PAL Xbox. Namely the patrolling red Elite on the bridge, the gold Elite who spawns at the far end (see BCM360), and on Heroic or Legendary, the two Hunters from the second room (see BCM362), and the Banshee pilot if you did a Banshee grab and he didn't die. They won't acquire the chasing behaviour of the mob but they can still play a part, which I'll say more about in a moment.
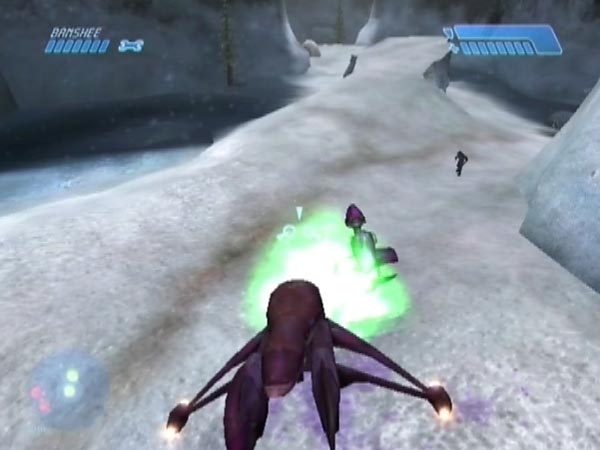
Adding a covie
How do you get a covie down to the battlefield? Get him to the lower bridge deck and tempt him into attacking so he goes off and either bounces off the ledge or stops on it, from where you can get him the rest of the way down. On PAL Xbox he can survive all the falling. With all but the gold Elite, it's best to have him bounce off the ledge rather than stop on it, as getting him off the ledge wouldn't be easy.
In all cases, ideally you want a handy delayed checkpoint for making tries at getting him down. With the gold Elite you can use the bridge checkpoint triggered along with the Elite. Otherwise you can use a tunnel checkpoint. For a Hunter or non-gold Elite, you need to dodge a melee attack on the edge of the deck (see here for the patrolling Elite). For the gold Elite there's an easier option, demonstrated in BCM360. Hover close in a Banshee, to tempt him into leaping off (see pic).
Active Marines can present a problem, attacking and killing your covie when you do get him down (and bear in mind, the covie may be quite weak after the falling), so you might want to move them in advance, as seen in my Hunter set-up demo BCM362. It depends where your covie will be landing.
In regard to moving a covie once he's down, you can let a Hunter or gold Elite run after you. With a normal Elite you can repeatedly make him dive, using a Banshee or Ghost or the Warthog.
NB: Once a Hunter has been brought outside, you mustn't go back across the loading point or he'll vanish. Therefore, (1) for triggering the battle you'll need to use the nonstandard option, going through the ground-level door, and (2) if you want to add both of the Hunters to the battlefield, you need some careful work. Use the routine shown in BCM362 for maximum ease. Incidentally it doesn't matter if Hunters melee or blast each other in the extraction process, as that strangely doesn't damage them at all.
Battle considerations
In battle these covies won't be part of the roaming mob. They don't acquire the behavioural change which creates the mob, and they'll initially just stand around. They can still join an attack through, under certain circumstances. The Elites are able to man Ghosts, in which case they become free to chase you around (same as the back Elite). The gold Elite is also able to chase on foot if you first get close enough to trigger raging (e.g. with a close fly-by). Hunters will chase if weakened enough to start raging (you also need to be low enough). I'm not sure about the non-gold Elites.
Of course, you don't necessarily need these guys to chase you. If you're creating a set-up dedicated to a specific battle area, you can simply make sure your extras are suitably located so they'll play a part.
Using NTSC or PC
With NTSC/PC, I think a covie will typically die before reaching the ledge. That's based on what people reported in connection with some of my bridge descent methods. However, I'm pretty sure you could get the gold down by giving him some cushioning with the Banshee to slow his fall. Tricky but not impossible (I've sometimes slowed him by accident).
Modifying a save
In the course of creating a battle save, it's advantageous to avoid triggering the final group of bridge troops (the guys who come through the door), because then that leaves the associated 'bridge checkpoint' free for potential use in creating modifications of your save. In essence, your save will have dual use: not just being a battle save itself, but also forming a base save from which to produce other set-ups.
One idea for a modification is to have the mob in a different starting place to make it easier to engage in certain types of battle. Another example: you could be landed and dismounted at a particular place, ready to defend. Another example: killing the Marines to enable you to do solo defence in and around that base area. Another example: getting different weaponry.
The modification process goes like this, demonstrated in BCM353. After making any initial desired adjustments (e.g. a weapon change), trigger the bridge checkpoint (note: you need to've triggered the middle group of bridge troops first), and keep it delayed. Preferably kill the newly spawned bridge troops, for reasons mentioned earlier. Then finish off, getting the checkpoint where you want. While doing all this though, take care to keep the mob away from any Marines, as you don't want anyone getting hurt yet.
In regard to triggering the checkpoint, one way is to fly suitably low across the trigger area, but I generally prefer to hover near the door, ready to send in a fuel rod blast when it opens (or shortly after) - and then remain fairly close to kill any survivors. It's usually all over quite fast. If you're keen to totally avoid Banshee damage though, it would be better to keep more distance.
Eliminating the middle group in advance
With the possibility of modifications in mind, it would be handy if the middle group (or second group) of bridge troops was already triggered and eliminated during your original set-up work. That's what I deliberately did in BCM350. The group comprises four Grunts sleeping on the lower deck, two patrolling Jackals up top, and two Grunts sleeping behind the wall at the end of the bridge.
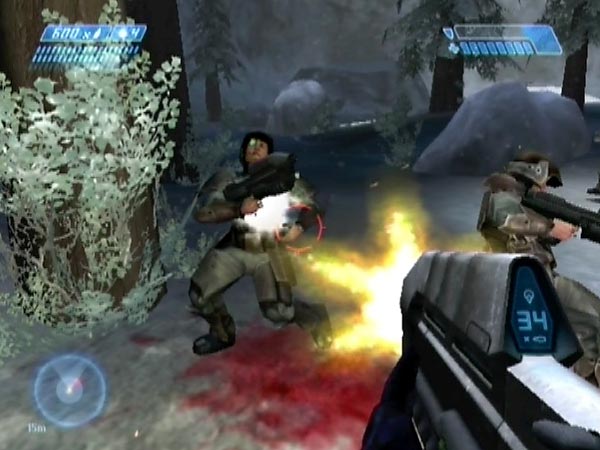
Especially useful for difficult set-ups
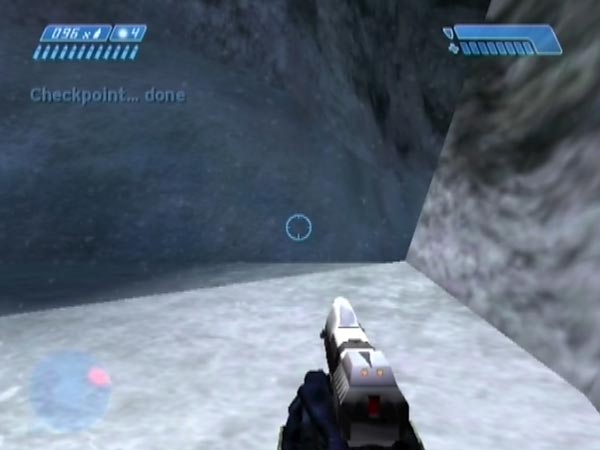
This modification method is particularly useful for creating a set-up in which it's relatively hard or risky to get the checkpoint where and how you want. I'm especially thinking of set-ups in which you're on the ground and the enemy is quite near, allowing you to get into battle fast at a specific location (see pic). The trouble with engineering that, is that the ongoing checkpoint delay may not end in time before the covies get too close (they might also be firing blind, which can likewise prevent the checkpoint). It's hard to control, and may take multiple tries before success. Hence, it makes sense to use this modification method, because it reduces the amount of time needed per try (the business of forming the mob is already done).
Another good use for the modification method would be in getting a set-up in which both Ghosts are already manned by Elites and they haven't splattered anyone yet.
Using a tunnel checkpoint instead
You might wonder whether a delayed tunnel checkpoint could be used instead of the bridge checkpoint. It's generally not suitable though. When you return from triggering it (having been careful not to trigger the crashed Pelican area on the way), you'll find that the Marines have lost their ability to follow you around the battlefield, and the rocket launcher and sniper rifle have vanished if left behind. However, if your save has no Marines and you've already acquired the rocket launcher and/or sniper rifle if you wanted them, a tunnel checkpoint is absolutely fine as an alternative, aside from needing a longer trip.
Battle remarks
Just before I get to some battle plans, here's some general talk on the proceedings.
Prior to hostilities breaking out, you can broadly control enemy and Marine movements by drawing them here or there. This gives you considerable creative potential in shaping a battle. But you can also trigger movements after the shooting starts, and that too can be useful.
During battle, beware of triggering the crashed Pelican area inadvertently. If you're on the ground (or airborne but low), keep sufficiently clear of the step or else the covies will lose their mobility (and there's a behavioural change in the Marines too, if you have any). See the accompanying picture for the trigger line. There's a rock nearby but it's possible to use it for cover without crossing the line.
Sometimes, members of the mob who've lost track of you may break off to go and join the back Elite. If that happens, it's probably because that Elite is closer to them than the mob Elites chasing you (Grunts and Jackals are drawn to Elites). More generally, if covies lose track of you, the mob can get fragmented to some degree, because there's less guiding force on their motions.
Happily there's no checkpoint at the end of the battle; so you'll be able to revert to start another without needing to rush.
Battle plans
Here are some general battle plans or ideas to use.
Fixed defence
After suitable leading of the mob and/or Marines, land someplace and try to hold out there. The Marine area is an obvious place for this of course, but that's only one example. Try other places too. If you're involving Marines you'll be a bit limited in terms of location as they won't be able to move far from base before the mob attacks, but with solo battling you can defend from all over. Plenty of places offer some degree of cover, which is generally desirable (especially in solo battling), but you can also choose to fight without.
There are some places where the enemy gets bottlenecked, and these can be great to exploit, in what might generally be called a bottleneck or choke point defence. In particular, if you get the mob into the corner depression near the end of the battlefield, it's great fun to fight from beneath the end of the ramp-like hill. That's pretty special and you can wreak absolute havoc. See BCM353 for some of this, using pistol and needler. There's also one play in BCM352 and one in BCM364. A much tighter bottleneck is the short passage between the Shade plateau and the cliff wall. You can see that being used in BCM364.
Here's a general point. If the mob is coming from afar, they'll tend to arrive in three waves due to their different speeds. First come the Elites, then the Grunts, then the Jackals. For the most intense battles, start the mob off from relatively near your defence spot so the waves don't become so pronounced.
Roaming defence
Lead the mob to some starting point, fly to your Marines to link up with them, then start roaming around the battlefield. Your Marines follow and the enemy closes in. Keep on the move, perhaps circling around. Pretty soon the Covenant and Marines should be all mixed up in a big trigger-happy stew. A fine recipe for chaos. Circling the enemy in a Ghost is great fun as you can continually strafe the enemy caught within, creating a scene of utter devastation. Circling in a manned Warthog is pretty good fun too.
Banshee defence
Banshee play is worth a special mention, although it potentially overlaps with some of the other plans (it's just that you're airborne). Supporting Marines in a Banshee is excellent fun, but going solo is good too. For solo play you might be best off using Normal or Easy so you can do more flying close to the covies. On Heroic you can't do much of that before getting toasted. The enemy fire is fierce.
Fall-back defence
This is for solo play. Lead the mob to some starting point and land somewhere not too distant from them. As you get pressured and return fire, gradually fall back to keep things from getting too critical. Then when it's safe enough you can move in to mop up the remainder. Excellent fun, especially for pistol fans.
Up-close chaos
Another solo plan. Drop yourself in the middle of the mob, or very close. All hell breaks loose. See if you can survive. Actually, even on Heroic it can be quite possible. You'll probably want to have a plasma weapon ready. Go for the Elites first, while keeping on the move so a lot of enemy fire hits their own guys.
Covie sandwich
Lead the mob to some starting point, fly to your Marines to link up with them, then zip off to some distant defence position. As the enemy head your way they'll tend to have a bunch of Marines coming up behind, and they'll end up getting grief from both sides. Amusing. I love it when the covies don't know which way to turn! There's an example of this in BCM347 around 5:41.
Actually, this sort of battle comes in different flavours, depending on how you time things. If the enemy don't get close to the Marines to begin with, they'll potentially focus only on you, and it's not until later that the Marines arrive and attack from their rear. On the other hand, if the enemy gets close to the Marines as you whizz off, that may provide the brunt of the fighting, and your role becomes more one of supportive distant fire as the enemy slowly moves your way while fighting off the Marines. This latter situation is great for the rocket launcher. Send some unsuspecting covies sky high!
Note: when you head off to your defence position, you don't have to still be in the Banshee. You could maybe switch to the hog and pick up a gunner to help you out.
Dual chain-gun fun
If you got an extra Warthog, you can have great fun defending with dual chain-guns (a special case of a 'fixed defence'). There are various ways of setting it up, but here's the simplest.
Assuming you came through the door in a manned hog, leave it there to immediately switch to your Banshee and complete your save. The passengers won't get out while you're gone. Once you've got your save, you can fly back to base, pick up a gunner in the second hog, then link up with the original. Or, fly to the manned hog, drive it back to base, then set up a gunner in the second hog. Either way, you've got two hogs waiting. If the hogs are close together, try standing between them to get the full earth-shaking experience of two chain-guns rattling away.
Note: you'll be able to get out of the second hog once the enemy is close. The gunner seems to stay aboard while the situation is threatening (though in other parts of the level, he may dismount even when in a firefight).
Stationary mob
Lead the mob to some starting point, then briefly fly low over the step that leads to the next area, to trigger the battle there. Enemies lose their chasing behaviour and stop, though they may subsequently group closer together for solidarity. They make a great target to attack (possibly from a long way off like up on a ledge, with rockets). This isn't really a proper mob battle, but it was worth mentioning.
There's fun to be had with Marines too. When you triggered the next battle, four of your Marines (if you've got that many) will have suddenly started running towards it, with the aim of jumping down into the next area. If the enemy lies in their path (which is easy enough to arrange), you can join the Marines on the ground and enjoy battling through; or perhaps take up a separate supporting position (e.g. on the high end of the long ramp-like hill).