Far area defence
Associated movies
- BCM2 - Heroic; Far area defence with lots of needling (2:48)
- BCM52 - Heroic; Far area defence with a large squad, pistol & needler (3:50)
- BCM53 - Heroic; Far area defence with a large squad, AR only (4:28)
- BCM67 - Heroic; Far area defence with plasma rifle & needler, x2 (6:39)
- BCM101 - Heroic; Far area defence with pistol, x2 (5:24)
- BCM102 - Heroic; Far area defence with plasma combo, x2 (6:34)
- BCM129 - Heroic; 12-man far area defence, needler & plasma pistol x2 (5:46)
- BCM130 - Heroic; 12-man far area defence, plasma rifle & AR x2 (5:34)
- BCM131 - Heroic; 12-man far area defence, sniper rifle & pistol x3 (6:17)
- BCM132 - Heroic; 12-man far area defence, AR x2 (7:07)
- BCM133 - Heroic; 12-man far area defence, pistol x3 (6:42)
- BCM149 - Heroic; 12-man far area defence, needler & plasma pistol fast x3 (6:37)
- BCM150 - Heroic; 12-man far area defence, needler x3 (6:49)
- BCM168 - Heroic; 12-man far area defence, needler x3 (6:55)
- BCM169 - Heroic; 12-man far area defence, sniper rifle x3 (6:23)
- BCM197 - Heroic; 12-man far area defence, AR x2 (6:35)
- BCM198 - Heroic; 12-man far area defence, needler x3 (6:55)
- BCM237 - Heroic; 12-man far area defence, plasma combo x3 (6:35)
- BCM238 - Heroic; 12-man far area defence, AR x2 (6:11)
- BCM256 - Heroic; 12-man far area defence, pistol & AR x2 (6:00)
- BCM257 - Heroic; 12-man far area defence, needler x2 (5:34)
- The basic idea
- Using a normal set-up
- Using a horde set-up
- Positioning
- Fast decision making
- Pistol work
- Needling
- Other weapons
- Chain-gun support
- Assorted remarks
- Extra Marines
The basic idea
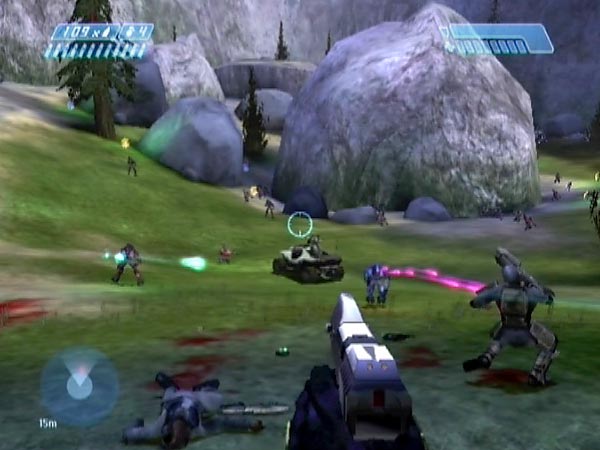
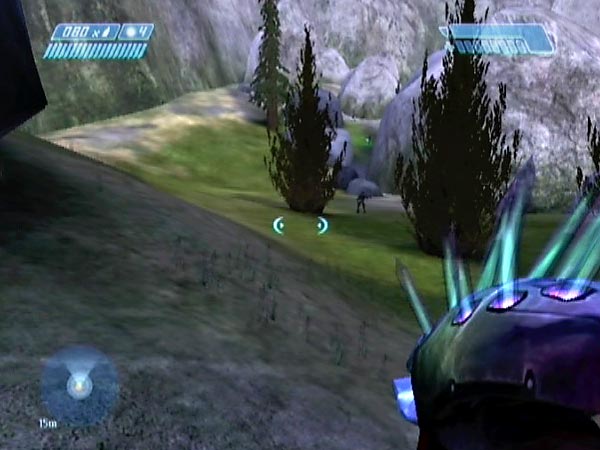
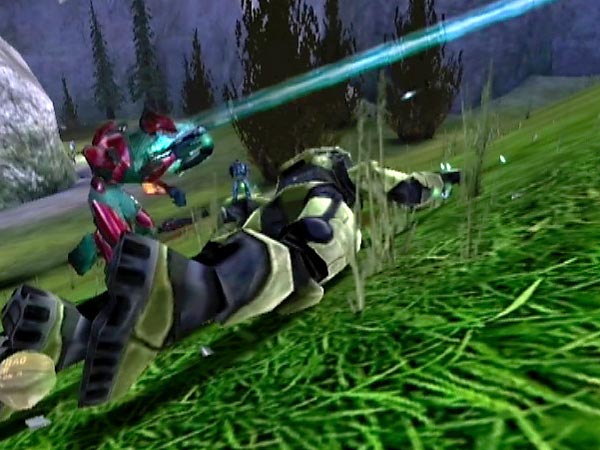
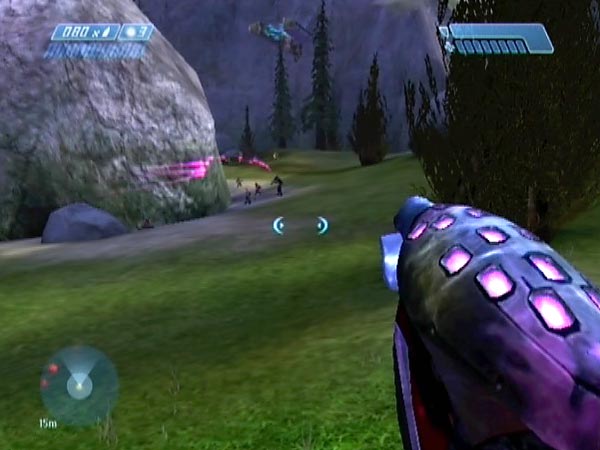
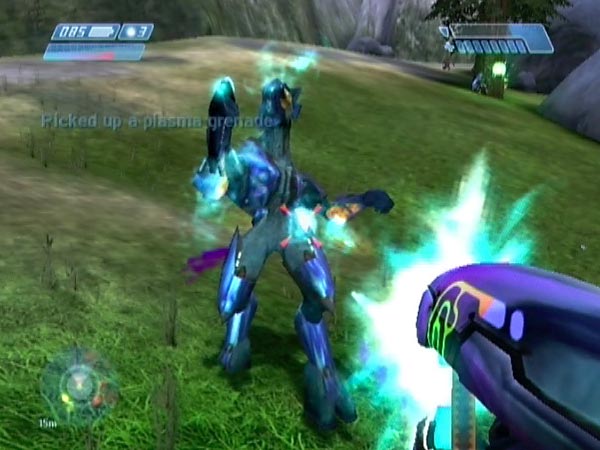
Welcome to pistol heaven and my favourite combat scenario of the whole game. The far area is the big open saucer-like plain in which dropships 1 and 3 deposit their troops. The basic idea is to take up a position well back from the rockslide and try to survive as the enemy closes in across the plain - though there's also scope for getting proactive and making advances towards the rockslide when the threat level is low enough.
Most of the time you'll probably be defending from right up near the cliff wall. But with no cover or fallback position, things can be seriously scary when you've got multiple Elites bounding your way! At its most intense you'll be desperately fending off numerous enemies as they close in on you from multiple angles. You'll be turning this way and that, having to rapidly weigh up which threat to deal with next and handle it fast. Get it wrong and you could be toast. Even Grunts can be dangerous here, closing in viciously when your shield is bleeping.
I'm not sure there's any other battling that has made me sweat so much. On Heroic it's a battle for which you really need to grit your teeth. It's a truly remarkable scenario which in my books gives easily the best medium to long range pistol fun in the game, but you can have great fun with other weapons too, especially the needler. So take my advice and don't miss it!
Enemy overdrive
When you get into trouble and your shield is bleeping, the enemy tends to become extra vicious, with Grunts and Jackals advancing more boldly and raising their rate of fire. They've flipped into overdrive and it can be quite murderous, but don't give up! I've squeaked out of many a near-hopeless situation by sticking at it and trying to keep a cool head, prioritizing my targets and dodging fire as best as possible. Overdrive can sometimes be triggered if you're briefly dashing forward to grab a dropped weapon; so watch out!
Getting the right challenge
The battle intensity can vary quite a bit depending on the pattern of enemy arrival. With some set-ups I've created, things have been uncomfortably tough and multiple Elites attack in unison, many of them red. My shield is bleeping in no time and it's a struggle to regain control; and if I do regain control I'll probably be down to a single health bar with blood pounding in my ears. Not good! Other times the Elites arrive more gradually. I've got longer to work on them before they get close, and things are just right. So what I want to say is this. If you create a save and find things too tough to survive without chain-gun support (or a sniper rifle), try another set-up and things may turn out just right, i.e. providing a tough challenge but with a good chance of survival if you perform well. It'll be worth persevering to get such an ideal set-up, because the combat experience is just amazing. Hopefully you'll find out what I mean!
Using a normal set-up
When using just a normal rockslide megabattle set-up, it's best to be re-entering the area from the right entrance (the valley entrance rather than the waterfall entrance) within a few seconds of getting the final dropship checkpoint, more or less as dropship 3 is departing.
Drive to the far area, but preferably taking a detour through the central part of the rockslide in order to release the lifeboat group and hopefully suck everyone into the battle (see Sucking in the enemy for more explanation). The fighting will be much more intense that way, giving you the full experience. The commotion you stir up during your detour also seems to make the final dropship land immediately rather than hovering lazily for a while, and this too should add to the intensity.
When you reach the far area you'll hopefully find it empty of enemies, with the troops from dropship 3 having headed off for the lifeboat. At any rate, you want the area to be pretty empty, so you'll have time to prepare before you start coming under heavy fire. Park up and get ready for the onslaught!
Mild version
If you don't draw everyone into the battle as mentioned, you'll only get a comparatively mild version of the battle and will be left with plenty of stragglers to go and find after the main enemy attack. But that can be fun too. Aside from the lifeboat group, you may sometimes find a group in the rockslide, under the Marine plateau. They'll be standing around in a close-knit group having a quiet natter, discussing the price of needlers or whatever, and then along you come, raining your entire stock of grenades down on them, closely followed by explosive streams of pink needles. Oh how we laughed. Or maybe you'll enjoy luring them back to the far area to finish off, perhaps giving your Marines another crack at the enemy. Compared to the usual intense version of the battle though, the mild version is like a relaxing stroll in the park. Not the real deal, but it could be a way of easing yourself into that, keeping things manageable while you build up your skills.
Troubleshooting
If you're finding that there's a group of covies in the far area on your arrival, you could try adjusting your drive-in route by first going close enough that they see you. With any luck that will shift them and you'll find the far area relatively clear after completing your usual detour to suck all enemies into the battle. Alternatively - and certainly better in the long run - use another set-up entirely, in which the far area is already clear (or clearing) as you enter the battlefield. In my elaboration of setting up a rockslide megabattle I gave a tip about making sure that's the case; see the clause about including a brief return.
Using a horde set-up
Much later on I found a new way of setting things up, giving a very intense and fast-starting battle. I'm namely talking of the modified far area horde set-up, which is good for some other battle plans too. As you enter from the left you've got stacks of enemies not far off, but the relative emptiness of the far area gives you chance to get into position without being immediately overwhelmed. Ideal! Some of the horde to the right will head directly your way, while others are likely to split off into the rockslide and end up coming at you from other directions. This set-up method has given me a lot of great action, so is highly recommended if you're really into your far area battling. That said, you might find it too severe - depending on your skills and the weaponry you try to fight with.
Elite ambush
In the saves I've had for this, the lone dropship 4 Elite has been just ahead as I enter. He tends to be standing around, intermittently running back and forth. When I want to tackle things solo, typically I leave the Warthog at the entrance and run in, taking him down at distance with a pistol or needler, or if he's looking away from me, tagging him with a plasma grenade or sneaking up to whack him on the back of the head. The stealthy approach is usually pretty easy as he's not terribly alert! But there's also the option of driving in and squashing him of course, though you'll want to be quick about it so you can then get ready for the imminent attack. Drive to one side to make him dive, then swerve to intercept. SPLAT!
Distant chain-gun support
One other thing you can do is leave the hog near the entrance, sufficiently advanced that a chain-gunner is able to provide a bit of crossfiring support from your flank. Should be a nasty shock for some of the marauding covies!
Positioning
For a standard defence, be well back along the cliff wall. The enemy will have to cross a large area of ground to get up close, giving you longer to gun them down with a pistol or pile needles into them, or whatever your pleasure is. You'll also have the best chance of keeping any buddies alive. Near the left entrance you've got high ground in the vicinity of a massive rock, then it sinks down into a dip where the grass becomes yellowed. The further along towards the dip you are, the more easy it'll be for the enemy to launch quick attacks from your left, but on the other hand they won't get such good benefit from the tree cover to the right. Try different locations along the cliff to vary your battles.
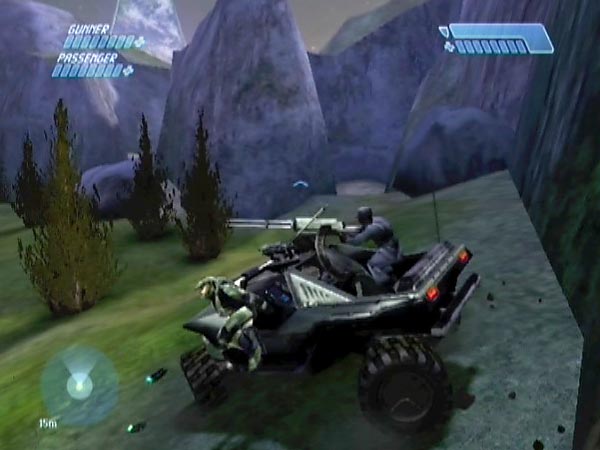
Parking and preparing
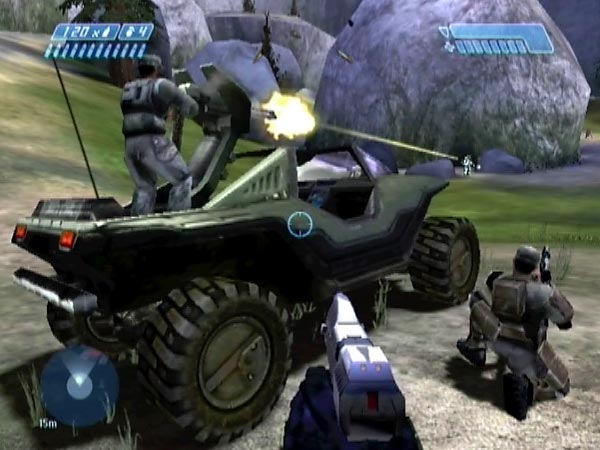
When bringing in Marines, I typically drive right up to the cliff wall, park with a swerve and make them get out, then move the hog well out of the way - usually by quickly driving it a short way down the hill. It's also possible to let it slide down after a few whacks if the ground is steep enough, or if you slightly bounce it off the wall so it's already heading down when you dismount. The main reason I don't want the hog nearby is that I might accidentally end up boarding it in the heat of battle when merely intending to reload. But also, Marines can easily end up hidden behind it after rolling around, which would pretty much take them out of the fight.
In some set-ups there may not be enough time to move the hog though; Elites may be too close already. In that case you could swing the hog around so the Marines at least start off unblocked by it.
If you've left some spare weapons somewhere and you park near them, you may be able to do some weapon swapping as you circle the hog to get the Marines dismounted (such as seen in BCM2), leaving you ready for action as soon the hog is moved. You'll need to've left the spares in a good position for this though, to make it easy. I'd suggest leaving them about one and a half hog lengths away from the cliff. That's a nice sort of distance to have them in the battle too; they'll be just in front of you, easy to see and pick up when you want to. Another option for swapping is to leave it until after getting the hog moved (such as seen in BCM101).
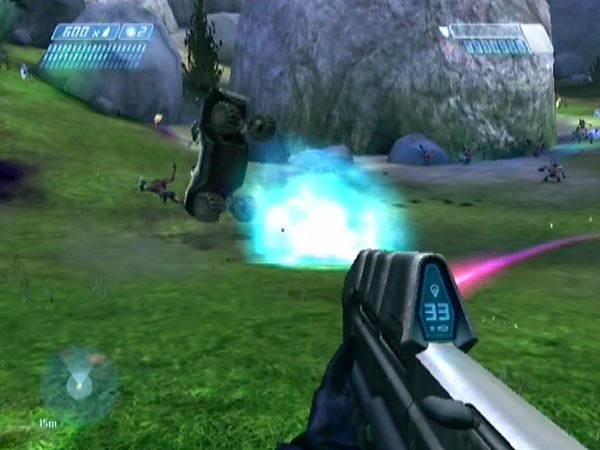
With the hog left out in the open as suggested, Elites will tend to gravitate towards it for cover, giving you a fine target for a grenade. Sneaky! Even better, sometimes a grenade sets off a big chain reaction that sends the hog spinning through the air, which is good fun. I'm pretty sure I saw that thing do a quadruple somersault once. I hope the UNSC isn't going to ask me for the bill! If you've got enough time you could move the hog further, using it to block the main entrance to the small semicircle of rocks that the Elites like to use for cover.
Other ideas
If you want to shake things up, try defending from further away from the cliff wall than normal. The further away you get, the harder it's likely to be to survive - and to keep your buddies alive if they're out there with you! Enemies will be coming at you from a wider range of angles and you won't have so long to work on them. They'll also get much closer. Up at the cliff wall they tend to be a bit standoffish, but if you're out in the open they'll be only too happy to get up close and personal.
Another idea is to defend from on top of the massive rock by the entrance. Its geometry varies but sometimes it's very easy to clamber up, with good cover on top. The down side is that your view of approaching enemies will be partly obscured by a few trees. Still, it's worth a go!
Talking of those trees, how about trying to defend from that area? You can easily use them to selectively shield yourself from enemies on one side or another. A suitably positioned hog could give you additional cover.
Fast decision making
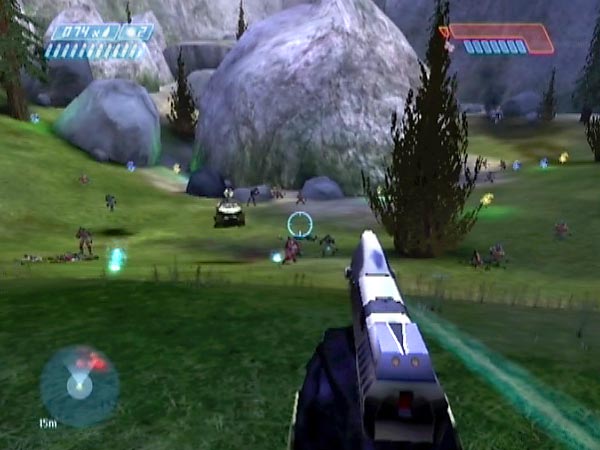
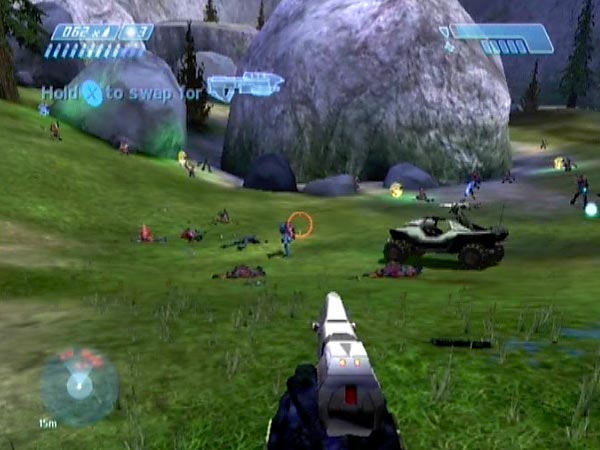
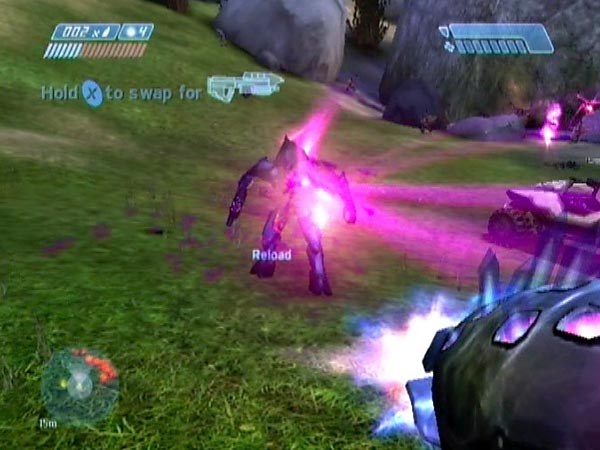
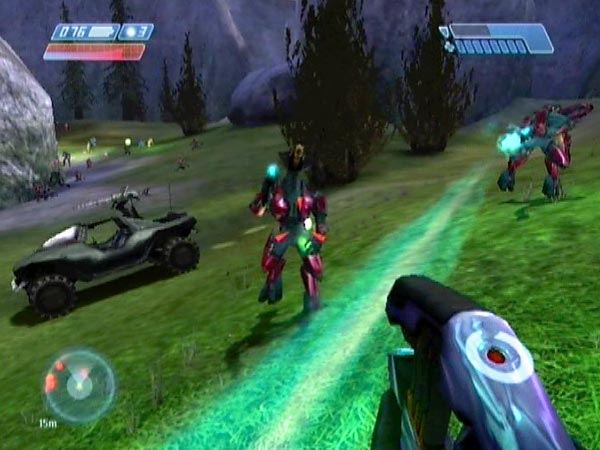
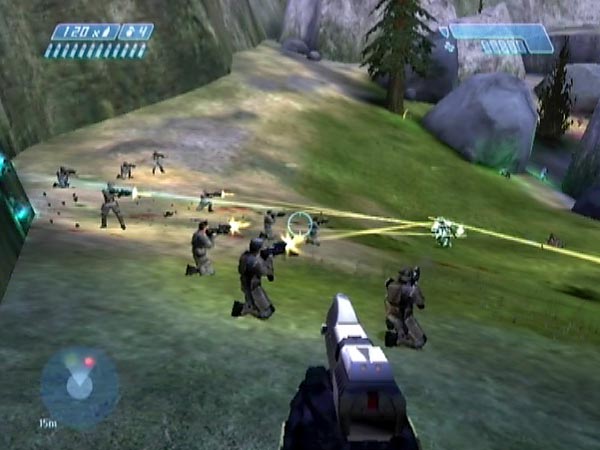
In this battle the sort of thing you can be up against looks like this. Two Elites are closing across the plain towards you, a few lurk further back, and yet more are starting to arrive on the scene. A swarm of Jackals is approaching from the right, while another two are sending in shots from the left. And those pesky Grunts are everywhere. On Heroic (without the aid of a chain-gunner or sniper rifle) you'll be doing pretty well to survive at all, let alone keep your fragile buddies alive. Your survival chances will partly rest on your ability to quickly weigh up and prioritize the threats, and decide how to deal with them.
This decision making is a major aspect of the battle and really adds to the mental pressure. I really can't think of any other combat situation where I've felt this element so strongly. Not surprising really, as there are relatively few situations where you've got enemies closing in from multiple angles - and certainly not in such numbers as here! There's also an accompanying feel of multi-tasking in which you're juggling multiple targets, considering more distant threats, weighing up whether it's time to reload or switch weapons, and so on. Sometimes you might be dodging incoming plasma balls and needles just by sound, while busy dealing with some other threat. An added factor is if you're making a definite effort to keep Marine buddies alive (indeed, you can make that the main challenge if you like). In that case you'll have to consider the threats to them as well. All in all, it's a really great situation for raising your game and your all-round awareness.
Efficient grenading
Judging good grenade targets is another aspect of the decision making. The situation provides superb intensive practice for grenading, and hopefully things will become quite instinctive, with grenades flying to good spots almost automatically. Especially watch for enemy concentrations, to try and get maximum benefit. You can cause some great chain reactions too, in view of all the grenades that tend to litter the ground after you've killed a lot of Elites and Grunt.
Covies often take cover behind the small semicircle of rocks but you can lob a grenade in, to either catch them in the blast or force them out where you can continue working on them. Elites are pretty good at moving clear, so if you have enough grenades to spare, it can be worth throwing a couple in quick succession, trying to hem your target in, so that if he moves away from one grenade, another might get him. This 'bracketing' tactic can be very useful on Elites out in the plain too.
Frags are especially good for getting rid of shielded Jackals fast, which can be quite an urgent matter if they've gone into aggravating rapid-fire mode. Moreover, you can often take out a couple of Jackals at once as they tend to clump together.
Pistol work
The pistol is a great choice for fighting this battle (see BCM101 and BCM133), partly due to its long range which gives you a chance of keeping enemies back, most importantly the Elites of course! Even if you've only got time to pepper them a little, that often causes them to pause and hold back or perhaps divert their course to seek cover in the small semicircle of rocks, all of which gives you more time to finish them off. The perfect defence would be when you manage to keep everyone back, though that's unlikely to happen if you're playing at a sufficiently challenging difficulty level.
The most important thing is to get to work on covies early while they're still far off, especially the Elites. Don't start off in a laid-back manner, lulled into a false sense of security just because there aren't many enemies around to begin with. They're likely to be flooding in pretty soon and things are going to get much hotter! If you've taken out a good few Elites from the strongest part that attack, that can make all the difference to your survival chances. So get that pistol running hot as soon as you can, with decisive long-range shooting!
Conserving ammo
In view of the enemy numbers, there's a definite possibility of running out of pistol ammo before you've polished everyone off, especially if you're not making much use of a backup weapon or grenades. With this in mind you may need to be fairly disciplined about your shooting, to minimize wastage. For example try to headshoot a Grunt rather than sending in a wild volley of shots. Of course, a rapid headshot is the ideal tactic against a minor enemy anyway if you can pull it off, as it minimizes the amount of time you spend on the target.
If you want to dabble with self-imposed grief, it can make an interesting challenge to survive without using a second weapon at all - and maybe even without using grenades if you can bear to forego that pleasure (or, you could impose some grenade restriction, such as allowing yourself frags only). You'll really have to watch your ammo and work efficiently!
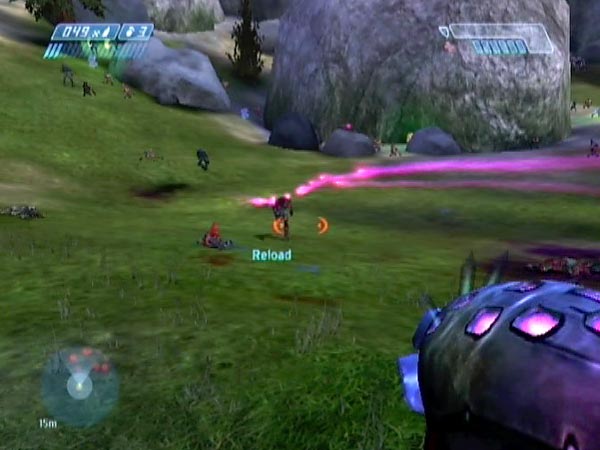
Needling
My favourite accompaniment to a pistol is a needler; see BCM53 and BCM52 for example. It's great for taking out Elites with a bang, and can even be used as your primary means of defence if you're skilled enough with it. For example see BCM129, BCM149, BCM150, BCM168 and BCM198, all involving a squad of 11 Marines in support.
As with grenade throwing, if you're under heavy pressure you generally shouldn't stand around watching for your action to take effect. Once you send out a stream of needles and you reckon it's going to do good, you should probably get busy with the next target! You can listen out for the bang and death cry (if looking elsewhere), as confirmation that you got your kill.
Distant Elites
You don't have to wait until an Elite is getting close. The needler has quite long range - perhaps further than you realized - so exploit it if you can. Try to get Elites when they're still hanging back, unsure about advancing. In this case I tend to fire quite long streams - sometimes a whole clip. Ok that's going to take me through my ammo fast, but I don't want any messing around with a job only partially done. I want that bang and I want it fast so I can concentrate on the next target.
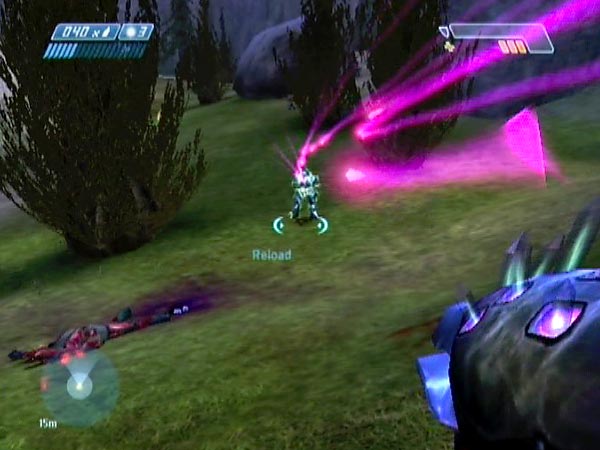
Closing Elites
Needles can also be devastating against closing Elites of course, and on a good day you can kill one after another with gloriously satisfying bangs. When you're trying to get a closing Elite though, a lot depends on his run angle and how clever he is about dodging (reds are smarter than blues). If he dodges, you can end up facing a healthy eight-footer at dangerously close quarters. Not a good prospect if it's a red with a plasma rifle! If you start to see that your needles are missing, you'd better switch tactics fast. Typically it'll be safest to back off and resume pistol work or whatever, but you could also consider throwing grenades to interrupt his movement. Another plan is to close the gap and maybe change the angle to have a fresh attempt at driving needles into him. Or lure him into taking a swing at you, then tag or needle him as you backstep or dodge. But such an advance can be risky due to other enemies of course.
I don't want to make needler use sound too risky against closing Elites though. You may feel a bit vulnerable at first, but your effectiveness and confidence should grow as you become used to their approach behaviours and get the feel of how best to position and move yourself. When I first got into far area battling, I think I was mostly focused on pistol work, tending to reserve my needler for Elites I spotted hanging back, not moving about too much. Nowadays however, I take great pleasure in aggressive close-range needling. If you want a more visceral experience than long-range pistol play, that's certainly the way to go.
With so many Elites coming at you, it's worth remembering that you can potentially take down a pair together, with a single clip fired non-stop. As long as they're in almost the same direction, just flick your aim midway through the clip. If all goes well you'll get two nice bangs out of it. I often use this technique, usually with an aggressive thrust-firing manner. You can see that technique in action in BCM2 at around 00:41. Sometimes I add a grenade for good measure if it looks like one fellow might not quite get finished off.
Minor enemies
Another good use for the needler is to fire a short stream at a retreating Grunt or Jackal. You know they're going to go bang, and you can switch to the next target right away. Fire and forget.
Marine distraction
Sometimes an Elite may be focused on your Marines. That's an excellent time to pile in a stream of needles; he's unlikely to dodge when distracted like that.
Other weapons
I've already mentioned my liking for the needler as a companion to the pistol, but what about the other weapons? Here are my thoughts.
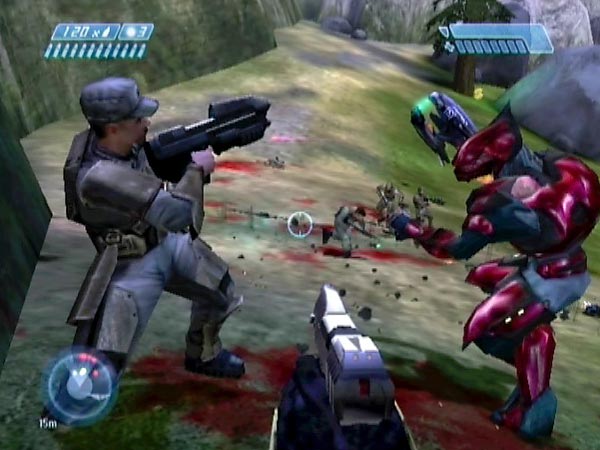
Plasma rifle
When Elites start getting close to you, a plasma rifle makes an excellent friend (see BCM67, BCM102, BCM130 and BCM237). Not as delightfully explosive as a needler of course, but probably more effective and certainly more predictable. Better for melee work too. Used well, it can also be effective at quite long range.
The plasma also has a bit of a stun effect which you can exploit. While your quarry is briefly rooted to the spot, it's relatively easy to tag him with a plasma grenade if he's close - or possibly let a frag grenade finish him off. Not only does this save plasma and forestall an overheat, it also lets you move on to the next target as quickly as possible.
Another option for finishing an Elite off is to deliver a firm whack to his ugly great head. Quite often I'll be charging at my target anyway, drilling the plasma into him with maximum aggression, so a finishing whack comes very naturally. As with tagging, it saves you a bit of plasma and gives your weapon a chance to do a bit of cooling.
It's usually pretty easy to pick up plasma rifles from Elites that get close to you. If I haven't already left one on the ground as a handy spare, that's often what I'll do if I'm starting to run low on needles or if I just want a change.
Plasma pistol
For me the slow shot speed of a plasma pistol makes it less favourable than a plasma rifle against close Elites. It's relatively hard to hit an Elite moving across your field of view (or even a Grunt or Jackal), and that makes it a bit risky to rely on. If you've got an Elite coming more or less straight at you however, or if he's stationary (possibly focused on a Marine) or you read his dodging moves well, rapidly pulsed fire can be devastating.
You've also got the chance of getting him with a plasma ball. However, it's quite easy for a plasma ball to fly over an Elite as he runs forward, or to miss as he runs across your field of view. So actually, scoring plasma ball hits can be quite challenging.
When a mid-distance Elite has stopped running, he tends to do a sort of ducking sidestep move as he faces you. When you see him making that move, that's a good time to pile in a stream of plasma or fire off a plasma ball, aiming for the position he's about to end up at. You know he's going to be there for a few moments. Your volley should be enough to get him nicely stunned. You could possibly add a grenade to finish him off, leaving you free to get busy with other targets right away.
For a long time I mostly only picked up a plasma pistol after all the Elites were dead. It then provided good sport in removing Jackal shields, ready to drill the beaky freaks full of needles. Nowadays I use it more often, but would normally pair it with another weapon. For example see BCM102 in which I pair it with a plasma rifle (a good movie for showing how effective it can be), or BCM129 and BCM149 in which it forms a backup to a needler, with 11 Marines in support.
Assault rifle
The scatter-firing assault rifle makes it a relatively poor choice on Heroic. You'd need to be drilling an Elite almost point-blank to have any rapid effect, but that would generally require rushing up to them, which could take you closer to other enemies who may then increase their aggression. So unless I'm trying to make things extra tough for the challenge, I wouldn't normally be using it as my primary. It can be more viable if you've got a lot of Marines in support however, as seen in BCM53, BCM132, BCM197 and BCM238 - or if you're only playing on Normal or Easy. In general it makes a good backup to bring out for close-range combat. For example see BCM130 in which I combine it with a plasma rifle.
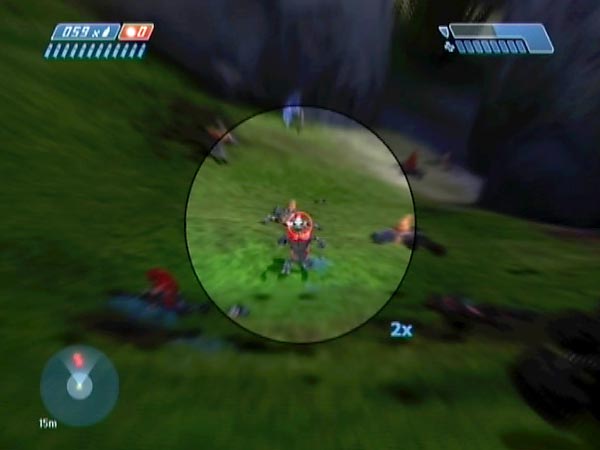
Sniper rifle
The sniper rifle makes things relatively easy but there's obviously some great shooting to be had with it if you want. Partly due to the wide range of angles from which the enemy are approaching, this is possibly the best sniping scenario in the whole game, though the twin bridges megabattle is great for sniping too. At any rate you can have a field day picking off one enemy after another. Check out BCM131 and BCM169 for example. See here for advice on getting a sniper rifle topped up for the battle.
If you want to keep things challenging you could limit yourself to a certain number of rounds. Even half a dozen would be very valuable, allowing you to drop most of the Elites or at least bring them close to death's door, ready to be polished off with pistol fire. Especially those nasty reds!
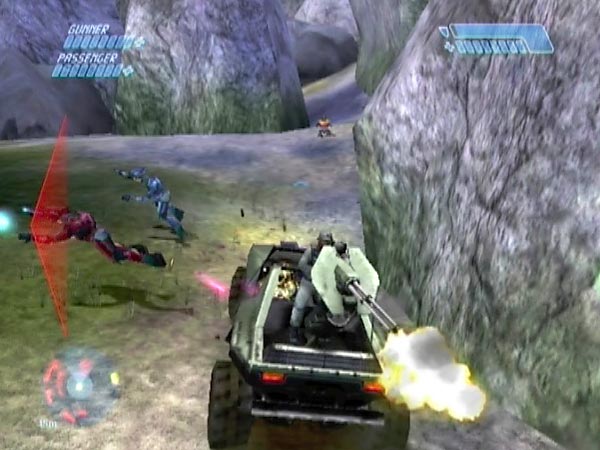
Chain-gun support
I don't normally play this battle with chain-gun support but I have to admit that it can be a lot of fun to have a Marine rattling away, preferably Stacker or Johnson as they have the best vocals. It's a welcome luxury after a punishing session of hard fighting. It's also good fun to track the gunner's targets with a sniper rifle, to enjoy watching the havoc he wreaks. The way enemies recoil on taking bullets is a real testament to the craft in this game. And look at all that earth flying up as the bullets thud into the ground! Great stuff.
Crossfire and other ideas
Chain-gun support needn't mean making things too easy though. With the right arrangement it can be used to give you help without completely dominating. One way of doing this is to set up a crossfire. In particular you could place the chain-gunner near the left entrance, then take up a position further along towards the rockslide. When covies go for you, your gunner will be able to rake fire across the battlefield to help you out, and to give you more of a chance against those devilish Elites. This could be a nice way of making things more manageable if you're having trouble coping.
Another arrangement is to place the chain-gun back against the cliff somewhere, then take up a more advanced position some way down the hill. The more advanced you are, the tougher it'll be for you. The beauty of this is that if things get too hot you can back off for a while, obliging covies to have to get nearer that deadly chain-gun.
One other idea is simply to allow yourself support to begin with, then get the gunner dismounted when you think you can tackle the rest of the covie horde without his help.
Assorted remarks
Getting a fresh covie weapon
If you're getting desperate for a fresh covie weapon and you don't want to risk a quick dash 'n grab for fear of stirring up the enemy, you could try putting a blue Elite into rage mode so he'll bring his weapon to you. That's nice of him eh? Personal delivery service! I wouldn't be so keen to try it with a red though; he'd probably be through my shield before reaching me. If you do try a dash 'n grab, the best time for it is right after you've killed an Elite and got the nearest Grunts and Jackals running away in panic.
Using enemies as shields
When you've got an enemy close, especially an Elite, he can act as a shield between yourself and other attackers if you move around appropriately. He may even end up taking a bit of friendly fire! I use this valuable tactic quite a bit, mostly during the hectic phase of the battle when Elites are attacking close up; and especially if I'm trying to take on two Elites fairly close together. See Enemies as shields in my combat tips section, for a little more chat on the general technique.
Tough combos
On Heroic, pick any two weapons from among the assault rifle and plasma weapons, and I'd say you've got a pretty tough survival challenge on your hands. I had to work hard to achieve my first victory with plasma pistol and AR. Much harder than if I'd had a pistol and needler. Good fun though, and I plan to explore the use of such combos further, to see if I can up my game. Give it a go! Obviously the most powerful duo here would be the two plasma weapons, so you might like to start with that.
Sheltering in the dip
When you're defending from back near the cliff with the hog moved clear as I suggest, you're completely exposed and this can make things pretty scary and desperate when multiple Elites are bounding your way. That's part of the fun and challenge of course! However, there's one place you can sometimes get a little shelter. Along the cliff the ground forms a shallow dip where the ground is yellowish. If you crouch at the back of that dip, you can just about be out of the line of fire of covies in the low ground. In an emergency this can give you enough time to recharge your shield if you're lucky.
It's saved my skin a few times, but bear in mind that while you're cowering in the dip your Marines will probably be getting massacred, and you still have to worry about possible fire from the left, often from Jackals near the tree. A lot depends on how aggressive the covies are feeling, and on whether your Marines are still alive, distracting the covies. So all in all, it's very much a last resort.
Mopping up
With so much open space, you can have great fun going on a cyborg rampage against Grunts and Jackals once the worst of the enemy attack is over. Careful you don't underestimate the dangers though. Once you're in among them, they can get pretty aggressive!
Marines vs Grunts
Marines are terribly weak of course, and like nothing better than getting hit by slow-moving green plasma balls from distant Jackals. "Ow! I'm hit!" they'll say. "You're allowed to dodge, fool!" I reply, but do they ever listen? Hell no. So one thing you might try is to kill off all the Elites and Jackals, then see if your Marines can at least handle the remaining Grunts. This also gives you a good opportunity for watching Marines though a sniper scope, for a close-up of the excellent animation. If you like a good bit of watch mode, you may even like to set this up on Easy so your guys really have a chance.
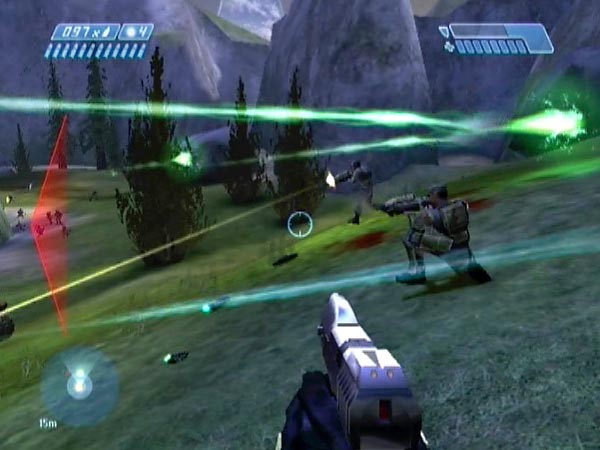
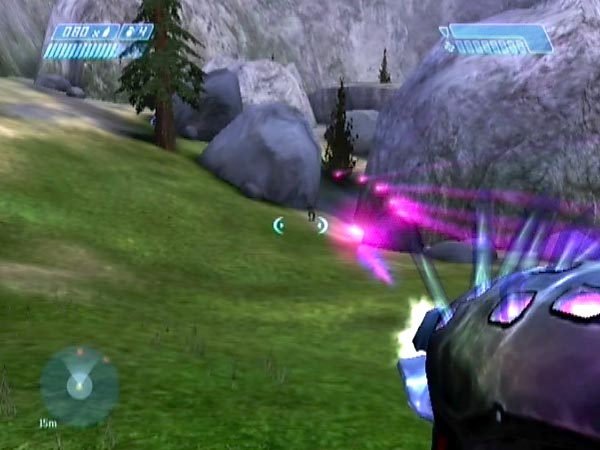
Long-range enemy fire
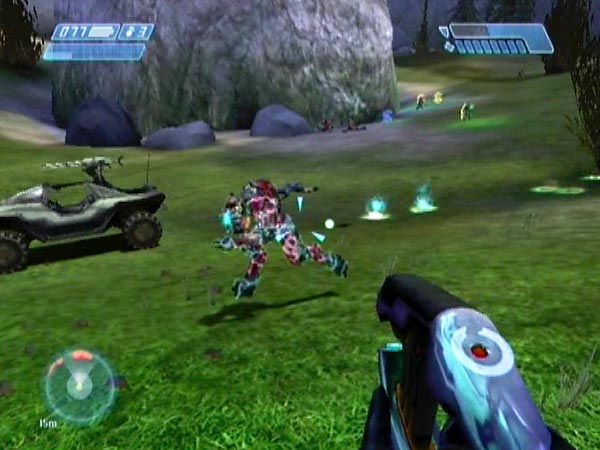
When the final dropship lands, its cargo includes a bunch of Jackals (five on Heroic). These guys sometimes engage in some impressively long-range fire as they trudge across the plain towards you, sending out rapid pulses of green plasma which look almost like tracer rounds. Quite a sight, if you're not too busy to admire the show. It's no great danger to you of course, but it may get your Marines off to an unhealthy start. I've also seen Elites do a bit of long-range fire with plasma rifles. One guy was a good twenty metres into the rockslide yet still able to pulse some plasma our way (we were well back, up at the cliffside), which was quite surprising.
Extra Marines
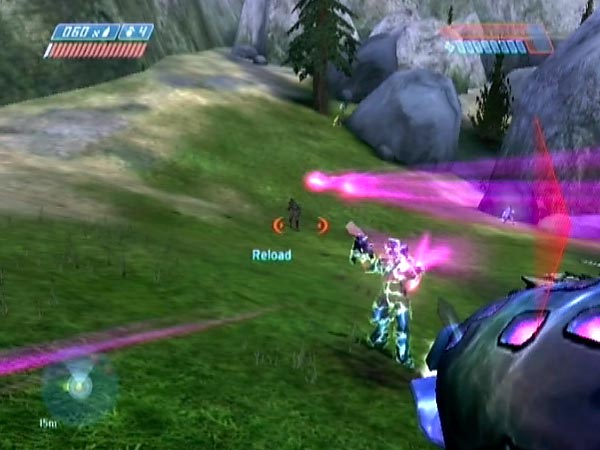
The far area is a great place to arrange lots of extra Marines for support. With a large squad the battle will have quite a different feel and I highly recommend it. Expect a whole lot of hollering and mayhem, with Grunts running around in a semi-permanent state of panic. On Heroic you can have a squad of up to 11 Marines ferried in from outside; see BCM52 and BCM53 for examples of two different Marine layouts. I find this enough to be able to survive the battle against stiff opposition using just a feeble AR (plus grenades of course). That makes for an excellent challenge, something you can see in BCM53, BCM132 and BCM197.
When you've got a large squad it's relatively easy to take a breather when you need to. Just get behind the squad or move off to the side and you'll generally find that the covies will focus on the Marines. If you want, you can even just enjoy watching for a while. Let those roughnecks earn their pay! On Heroic a large squad can even put up a decent fight against a couple of Elites.
Squad formation
Once the fighting starts, your squad tends to get spread out pretty quickly due to all the rolling around they like to do. So if you tried to have them in a nice concentrated formation to begin with, I'm afraid it probably isn't going to last long. One other point on squad formation. When I arrange a squad I usually have the Marines well back, close to the cliff wall. If you want to move them further away from the wall when you drive into battle (just to make things different, and probably a bit tougher), that's possible. Just drive slowly along the wall (angled against it and making contact seems easiest), and hopefully they'll all dive clear.