Plateau front defence
Associated movies
- The basic idea
- Grenading delight
- Death from on high
- Joys of the assault rifle
- Behind the Marines
- Danger! Marine with grenade
- Grunty threat
- Warthog positioning
- Elite knockout
- Getting pushed back
The basic idea
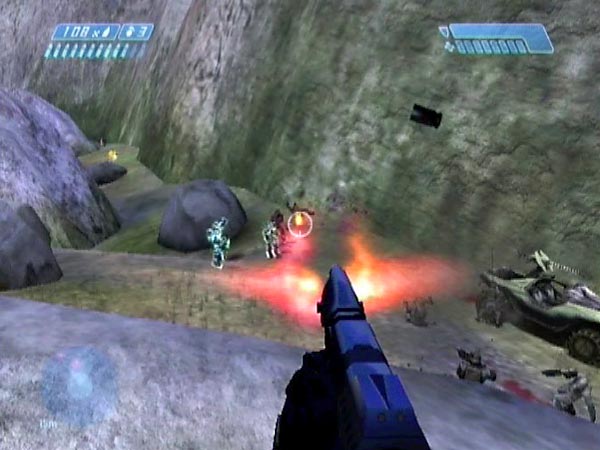
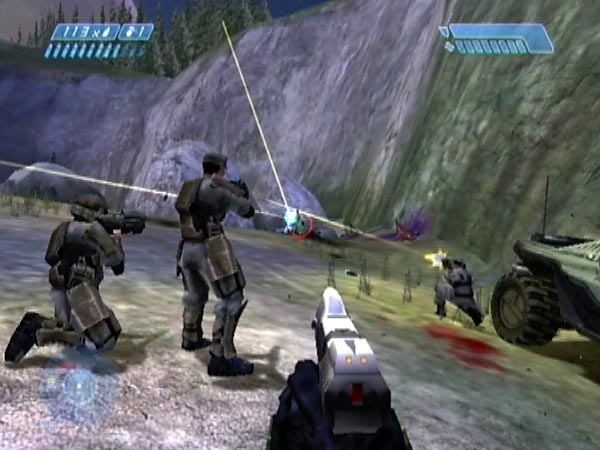
Get to the Marine plateau and try to hold off the enemy as they feed in from either entrance. This is the most obvious plan for protecting any survivors who've retreated to the back of the plateau, and gives some of the most intense battling of all. Make your passengers dismount unless you really want the gunner to help tip the odds your way. You can add to the fun by having arranged a few extra Marines to join in your defence.
The best fighting is obtained when the enemy attack is mainly from the left, and that's really all I'll be talking about here. Not only do you have better firing positions and cover, but it's also easier to obtain because the left seems to be the enemy's preferred approach. To help encourage them however, you should head in via the left entrance yourself. The simplest route would be to drive in around the left cliffside, but you could always vary things by cutting through the rockslide to some extent - either because it's a more entertaining drive or because it does a better job of drawing the enemy after you. See Routes into the rockslide for some illustrated elaboration.
Grenading delight
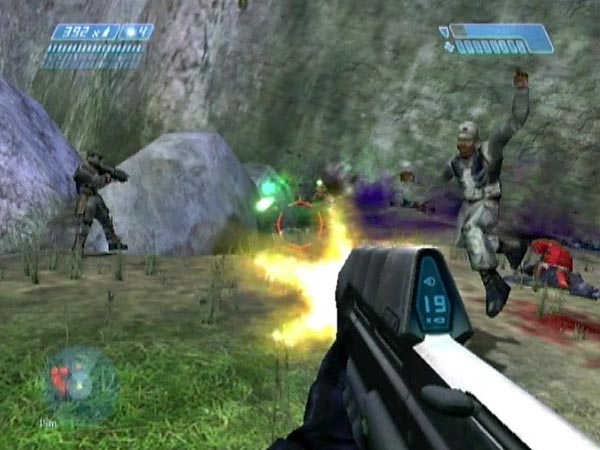
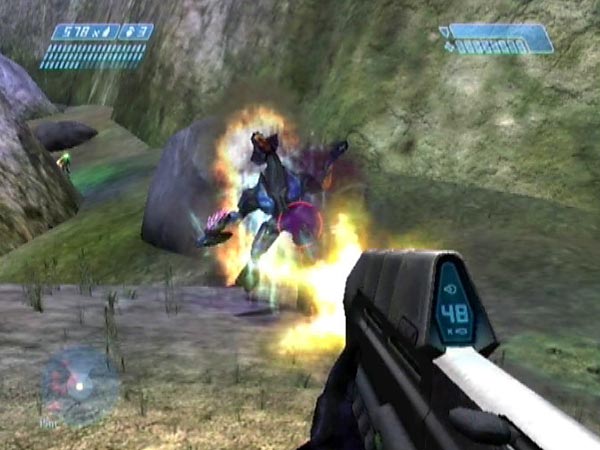
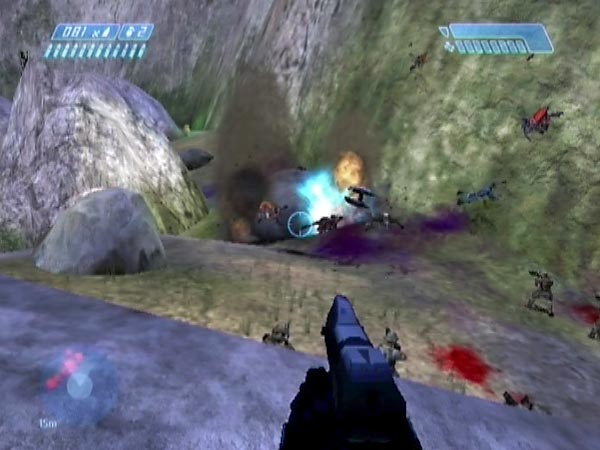
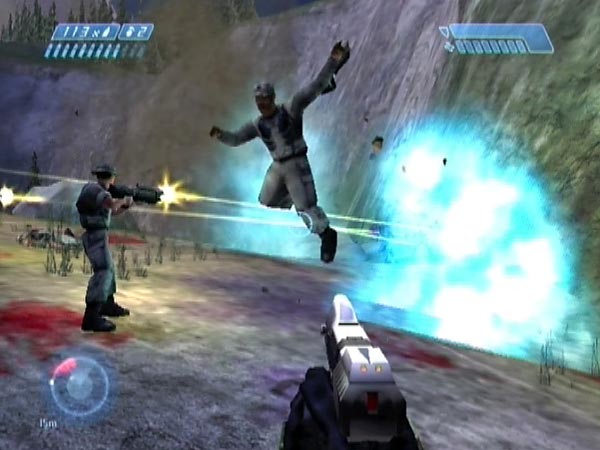
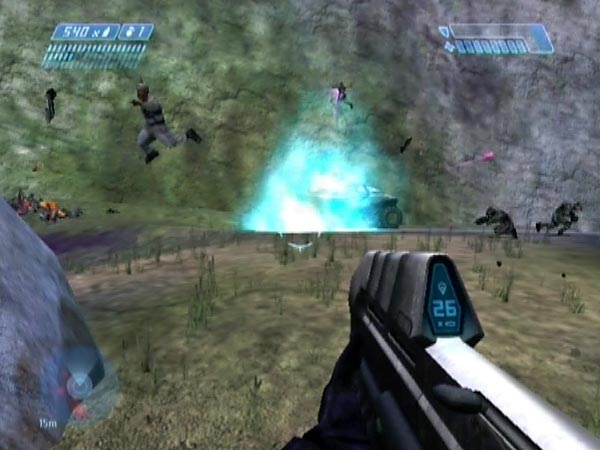
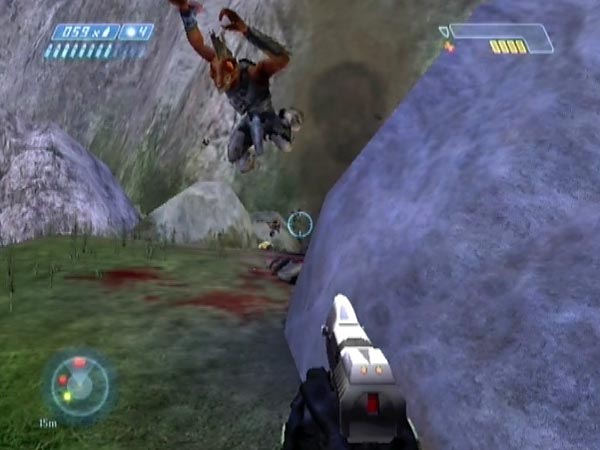
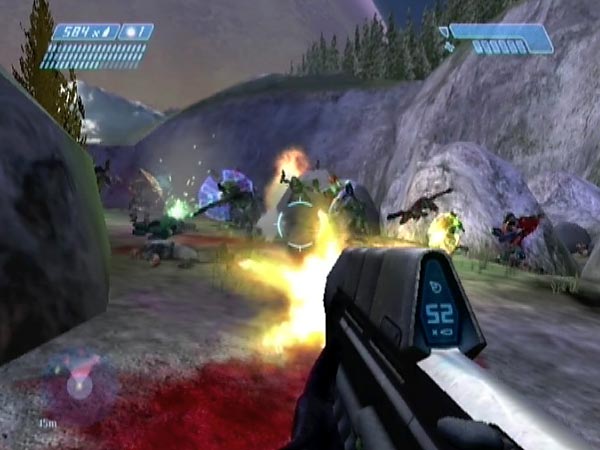
This plan is a grenade thrower's paradise and the chain reaction explosions you get can be absolutely superb, with multiple bodies flying everywhere. You rarely get explosions this good in normal Halo play. It's not uncommon to see a Jackal or Grunt go flying over to beyond the lifeboat, or launched high enough to almost reach the cliff top. I've even seen a Marine sail clean over, his trajectory sending him up almost parallel to the cliff face. He'd been standing a bit too close to the approach, and absolutely rocketed up when the blast went off.
You can help engineer huge explosions by waiting until plasma grenades litter the area, before finally sending in a grenade. If you want to really go overboard on that (for a bit of fun), it can help to keep your Warthog buddies in the vehicle so they don't spoil things by lobbing a grenade early. A pistol and plasma rifle would be a good combo for dropping enemies fast, so the grenades mount up. Or you could man a chain-gun yourself of course, though you'll be in trouble if any covies come up behind you; especially the grunty sort, with plasma grenades.
Grenade bouncing
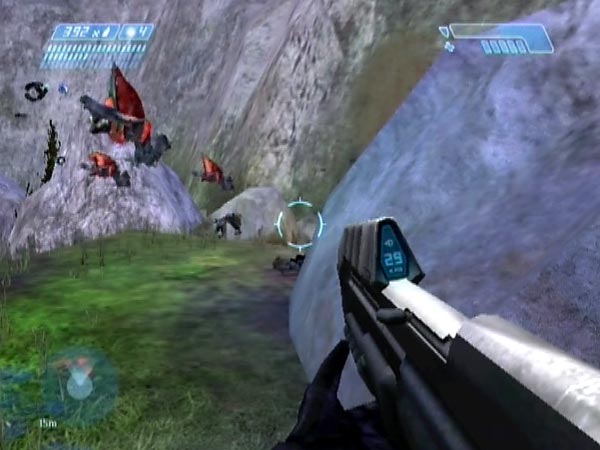
Just before the left entrance is a rock which the covies often use for cover, when it's big enough. I call it the covie cover rock. You can enjoyably bounce frag grenades off it so they land among unseen approaching enemies, or blast Elites hiding down the side of the plateau while trying to recharge their shields. Sometimes I also bounce a grenade high off the cliff wall with similar effect. In some set-ups however, the rock can be so low that it offers Elites no significant cover. In this case they tend not to try using it for cover, and are more likely to recharge down the side of the plateau. Although a low cover rock is nice for giving you an unblocked line of fire at enemies approaching along the cliffside, I prefer to have a decent rock for the Elites to use, as it keeps them more accessible to grenades and gunfire. I think it keeps things livelier.
Nasty surprise
When you hear an Elite approaching up the side of the plateau or see the red dot coming in on your motion tracker, one tactic you might like to try is to time a frag so it goes off behind him just as he's come up into full view. The idea is to get him blasted forwards (ideally your way), letting you easily finish him off with some AR drilling or whatever. You do need to get the timing right though. Very satisfying when it works! Other times, maybe he won't get blasted your way but hopefully he'll at least be badly weakened, so you'll still have a good chance of finishing him off.
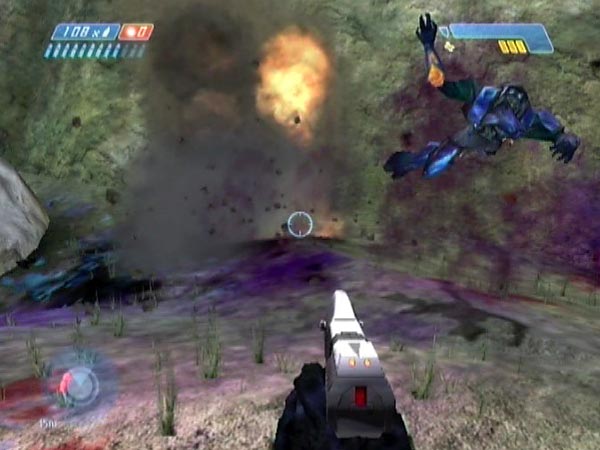
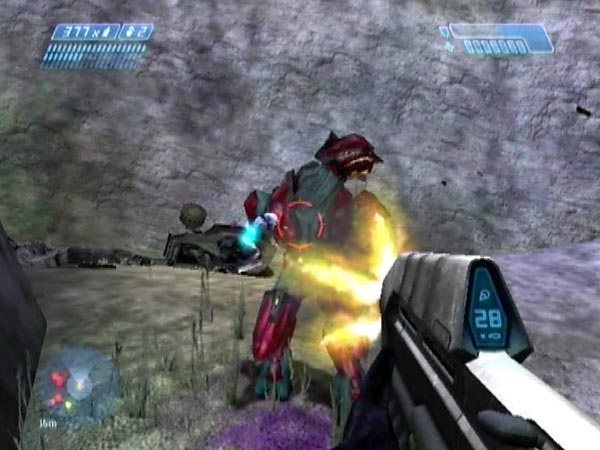
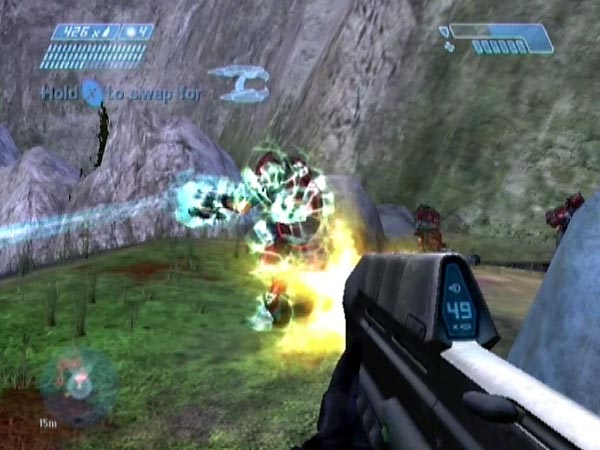
Flying Elites
When a big bang goes off near the covie cover rock, it can send an Elite airborne along the face of the cliff still alive - shield now flickering or gone. Sometimes they sail over your Marines and land on the other side, behind you. When you see an Elite launched like this, I suggest you follow up quick, perhaps trying to shoot him in mid-air or just chasing after him to finish him off at close range. Another idea is to anticipate his landing spot and make sure he gets grenaded before he recovers.
Finishing off raging Elites
Quite often an Elite out of sight has taken a grenade blast and gone into rage mode. When you hear his raging cry be ready for him to come into view, and try to take him down as quickly as possible before he does any damage. Don't be caught reloading.
Jackal pressie
When you've got masses of enemy streaming in, there's quite a temptation to expend your entire stock of grenades. But if they start to drive you back you can end up having a difficult time against shielded Jackals, who often cluster two or three abreast. For this reason you may want to hold a few frag grenades back so you can blast approaching groups of Jackals to kingdom come. Which is a lot of fun, obviously.
Death from on high
One novel tactic is to get on top of the plateau's central rock overlooking both approaches, and fire from there. That's if you can get up. Remember, rock geometry varies. Two of the five designs for this rock are easily climbable, and one has a nice flattish top with a slight depression which offers good cover. It's well worth getting a save with that flattish design, because it's so great for defending from. A third design is too high to climb but can be ascended with a grenade jump without much trouble, if you've practiced.
Pistol and frags only
One of my favourite tactics is to be up there using pistol and frag grenades, aided by a squad of Marines down below, some ferried in earlier (see Extra Marines and hogs). For my money this is the best short to medium range pistol fun in the game. You definitely shouldn't miss it if you're a pistol fan. You can see an example in BCM44, though to be honest that play was a bit easy as I had a lot of Marines helping and they lobbed a load of frags.
Most of the shooting will be short-range, concentrated on the enemy's attempts to push forwards, but you've got a great view which also allows you to pick off more distant Grunts and Jackals when time permits. Try not to let your clip run dry when Grunts are present, as they're pretty quick to whip out a grenade and lob it towards your troops. Oh, and when dodging incoming plasma balls from the Jackals, watch out that you don't fall off!
Hog and Marines too!
If your central rock is the low design with the flattish top, it's actually possible to drive the Warthog up and still get low enough elevation on the gun to be able to mow down the enemy. That's not really a serious plan, but you can still have a bit of fun with it. It's also possible to get passengers to dismount on the rock, then get the hog out of the way and join them. The Marines are oddly dark up there, presumably by some quirk of the game engine, but you can illuminate them in front of you by having your flashlight on.
Joys of the assault rifle
Another of my favourite tactics on Heroic is to defend with just an assault rifle and frag grenades (and no chain-gun support, as usual). Needless to say, this makes life pretty tough - even with a few extra Marines to help out (which I usually have). You really have to work hard to stay alive, and be disciplined with short accurate bursts as you dodge in and out of cover. Over on the front left corner there's the left cover rock which is ideal for this, but watch out for stray friendly grenades - it can be a hazardous place!
Sure I could mow down those Elites far more easily with a plasma rifle, but that's not the point. It's optimal enjoyment I'm after, not simply the easiest route to victory. And that means arranging things for the right amount of challenge. It's also why I make the gunner dismount; he's just too powerful otherwise. Then again, I'm talking about Heroic here. On Legendary you're likely to need all the help you can get!
Best AR fun in the whole game
This challenge is where I finally learnt to use the assault rifle effectively and start giving it some respect. For me it's the best AR fun in the whole game. It may take you a while to refine your tactics and get on top of things, but stick with it. See my combat tips section for advice on using the AR. Once you get proficient, see if you can even manage without the frag grenades. But ouch, that's gonna hurt!
Behind the Marines
Yet another of my favourite plans is to fight from behind a squad of Marines with my pistol, being careful not to shoot any friendlies in the back. Ok so I shot Sergeant Johnson dead like this once, but hey, not even a cyborg is perfect! The right approach will be behind you, and when necessary you can dodge left to use the central rock for cover. I don't say it's the most effective defence, but it is another way to have fun with a pistol, and it's also quite a lot of fun having the Marines in close sight and trying to avoid shooting them in the back as they dodge around.
One thing you may find is that you get more covies coming up behind you than usual. That's because you're closer to the right approach and they're presumably being drawn by the sound of your gunfire. So keep an eye on your motion tracker and listen out. Most of the covies should still approach from the left however.
You could use other weapons from back here too of course; it doesn't have to be a pistol. I'm thinking plasma weapons, or a nice shiny needler to take out those advancing Elites with a bang. Actually, maybe the needler isn't such a good idea, as Marines could easily end up too close to the bang. Then again, that's their look-out, right? The assault rifle would be a bit weak on Heroic, but it could make for a good challenge. There's also the sniper rifle to consider. If you fancy trying that, you might like to get even further back from the Marines, perhaps back along the raised edge so that the right approach is now somewhat to your right. However, if any covies manage to push forward and move off to the left, they'll be blocked from your sight by the central rock.
Danger! Marine with grenade
With plateau battles in particular, one of the biggest dangers is your own Marines, who've rather foolishly been entrusted with grenades by the UNSC. When you're out front and close to the enemy, you need to listen for when Marines are lobbing grenades, indicated by a variety of phrases such as "Frag out!". As soon as you hear this, make sure to get well clear, or look to see where the grenade is heading. It can be somewhat annoying to have your shield blasted to shreds by the very people you're trying to save, but bear in mind that maybe they can't see you.
Even if you're away from the enemy, friendly grenades remain a danger because quite often a grenade goes astray after a Marine is hit whilst throwing (maybe hit in the back by some other bozo). Grenades can also get blown back by earlier bangs, especially when multiple Marines are chucking frags together - which may look good but is really not a great tactic!
In the worst scenario a Marine may drop the grenade on the floor, taking out most of the squad. For this reason you'd be wise to keep your distance from the Marines when they're under heavy fire.
With practice, you should find yourself able to pick out the sound of a frag grenade falling nearby above the hubbub of the battle, and move away instantly. That can save your life now and again.
When Marines do good
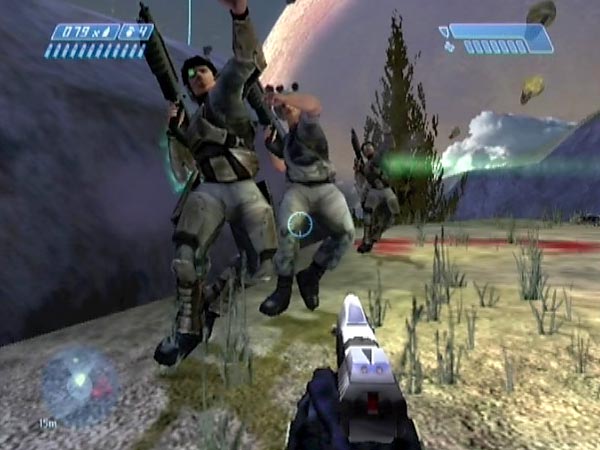
I make fun of them but of course it's not all bad news. Most of the time the Marines actually do a pretty good job of grenading, and it's amusing to hear the taunts they call out after sending the enemy flying. "Ow, that's gotta hurt!". Sometimes a supporting squad will go a bit grenade-crazy and lob a whole load in, which gets pretty hilarious. Not for the covies though. You may even get frags sailing over from Marines at the back of the plateau - which is pretty impressive as they probably can't even see their targets!
Grunty threat
Grenade-lobbing Grunts are a particular danger to the Marines, who seem remarkably keen to let themselves get blown to smithereens. Because they're so poor at getting out of the way, you should make it a high priority to prevent Grunts from making a good throw. With this in mind, try to avoid running out of ammo just when a Grunt is arriving on the scene, otherwise there's a good chance he'll lob a grenade before you can reload. That's agonizing to have to watch, whilst fumbling about with a new clip. Be clever about when you reload. If you have a friend handy, have them whack you hard across the chops each time you let a grenade come in. That should help reinforce the message.
Sneaky tactic
If you're a confident shot with the pistol, you can deliberately wait for a Grunt to pull out a grenade before taking him down, so the grenade falls among the enemy. But the safer option is probably to bring down Grunts the moment their grunty little noses poke into view. If you're already somewhat busy with Elites though, you could quickly adjust aim and pepper Grunts just enough to make them run away for now.
Warthog positioning
Usually I'm driving in around the left cliffside, and once I'm at the plateau I'm expecting an onslaught from the left approach in mere seconds. There's not much time for anything fancy in regard to parking the hog, so I usually just let the it slide to a stop against the cliff wall. I've just got time to get the passengers out and move to my chosen position.
If you've got a little more time, there are some other things you might try. Sometimes I've angled it against the cliff wall so its rear left corner gently backs into the wall. When I make the occupants get out, they're ready to support me in focusing on the left approach, while the hog protects their backs from the right approach. If an Elite comes up the right, it'll be harder for him to whack a Marine on the head and it gives me more time to take him down first.
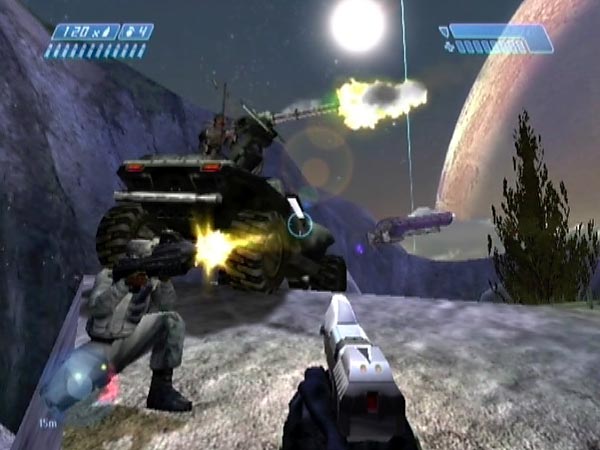
Of course, there are plenty of other ways to position things if you like dwelling on tactics and if you've got time. If you want a chain-gunner, one tactically interesting place for the hog is along the raised edge above the right approach. From there the gunner gets a decent view of both entrance areas, and if you position yourself over towards the left entrance you've got a good crossfire set up.
Elite knockout
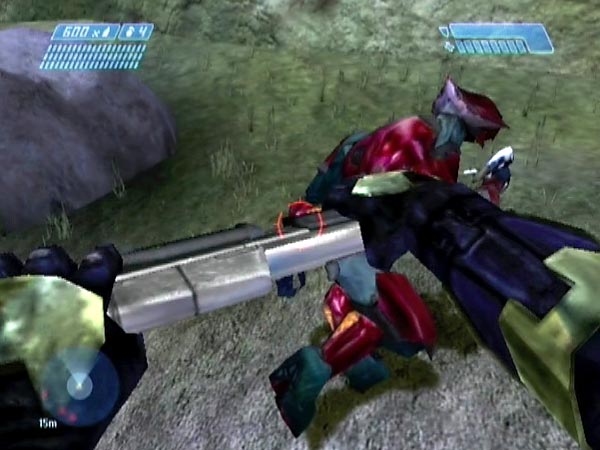
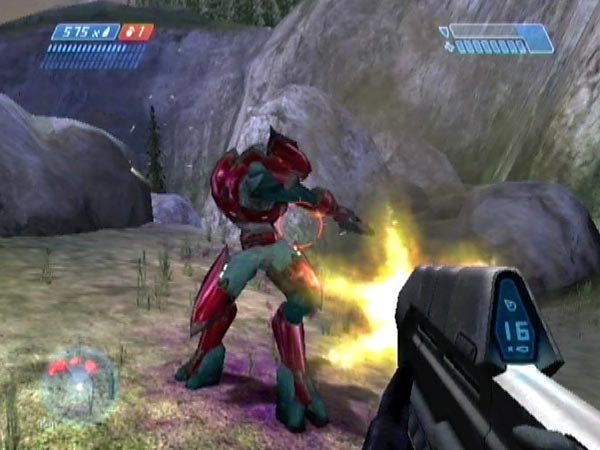
Quite often an Elite will be the first enemy to approach. It's possible to drop him with a melee attack from the side just as he reaches the corner. You don't have to hit from behind to kill him; surprising him from the side will do. Feels pretty slick when it comes off. Judge his approach from your motion tracker and the sound of his footsteps, and deliver a firm running whack just as he comes into view. Hah! Never knew what hit him. On a good day you might drop a second Elite the same way a few moments later. One time I had a chance for three in a row, but fluffed the last whack and got blasted. Oh well, maybe another day.
Just in case you get it wrong and it's one of those nasty reds, be ready with a backup plan, rather than becoming plasma-toast. This depends on where he's gone and how close the rest of the enemy is. If you've got time, you might drill him full on with an assault rifle and finish him off with the whack you intended. But if he veered off around the nearby rock, you'd probably better just get back under cover, maybe after lobbing a grenade his way to buy a bit of time if he's seen you.
Getting pushed back
If things go badly and you start getting pushed back, which can often happen when your Marine support gets wiped out, the natural fall-back position is the big central rock, assuming you're trying to do your best to keep the covies off the surviving Marines at the back. It should give you a good chance to recharge if needed, and it's a pretty good defensive position for fending off the advance. You'll often have covies heading around both sides however, potentially making you the meat in a cyborg sandwich! So you'd better fight smart.
This fall-back battling can be really enjoyable with a lot of scope for skillful play, not just in your weapon use but in the decisions you make. Things can easily become quite desperate, especially if there are still multiple Elites to contend with, but with a bit of tenacity you might be surprised at the scrapes you can get through.
A pistol is great for holding back the minor enemies, though for the Elites it would be nice to have a plasma rifle, especially when they get close. Dropping grenades into the path of a left advance is one nice tactic, and if you back off around the rock - or maybe you're forced back by a grunty grenade - you can surprise them by firing into their sides as they reach the top of the rise. It's also worth noting that Marines at the back of the plateau can do some impressive fragging of advancing enemies on the left. Just watch out that you don't get caught up in the blast!
Advancing Elites
With the aid of your motion tracker, you should keep very aware of any Elites heading around the back of the rock. They very often do that, and the last thing you want is a red Elite turning up behind you. Usually I'd try to give them a nasty surprise instead, meeting them head on. Often the best thing to do is get close fast, tempting them into taking a swipe at you. That stops them firing, and you can dodge while continuing to attack. Just take care of things as fast as you can, so you can get back to fending off the main attack from the left. Once covies push over the rise, the situation can be a lot harder to retrieve.
Sometimes you'll find yourself up against a well advanced Elite with supporting Jackals and Grunts hanging back. If possible, keep moving so the Elite is between you and the Jackals, so they can't get a clear shot. It's quite possible that a plasma ball will take down the Elite's shield by mistake. This is widely recognized as being a good thing. Sometimes an Elite may have supporting Elite buddies coming up behind. Ouch! It's a scary situation but again you can try to use the front guy to shield yourself against auxiliary fire. Ok it's going to be more difficult, but it can be done and it's kept me alive on occasion. Do try to make sure your shield is fully recharged before leaping into action though. And then go in hard!
Attacking from behind
Once the enemy has pushed you back, it's quite common for the Marines at the back of the plateau to come under fire from a wall of Jackals and Grunts to the left. One thing I like doing is going around the central rock to attack from behind (possibly in a pre-emptive strike before they're at the rise). They don't like that at all. If there's only a few you can have a lot of fun rushing up and mowing them down, as long as you haven't just heard one of your Marines lob a grenade. If things are a bit too hot for that, you'll at least still be able to distract them from pummelling your Marines, and with any luck some may panic and retreat.
Using the right cover rock
Way over on the front right corner of the plateau is the right cover rock, which can come in useful if you've had to retreat. You can potentially then use it to surprise enemies from the side or rear as they head past towards surviving Marines at the back of the plateau. Incidentally, Elites often use this rock while recharging their shields, and you can surprise them at close range by squeezing around the cliff-edge. Or just lob a grenade over of course, to blow them clean off or make them jump.