Glasshouse battle
Posted August 27th 2006, major update December 2019
Associated movies
- BCM393 - Legendary; Set-up and three plays (6:28)
- BCM394 - Legendary; Three more plays (6:30)
- BCM395 - Legendary; Battle x3, sniping and more (6:47)
- BCM396 - Legendary; Battle x3, needle special (6:33)
- BCM397 - Legendary; Stealth challenge (6:36)
- BCM398 - Heroic; Adding extra covies (6:25)
- BCM399 - Heroic; Boosted battle x4 (6:33)
- BCM400 - Heroic; Boosted battle x3, needle special (6:34)
- BCM401 - Legendary; Extra covies via rear trigger (6:34)
- BCM402 - Legendary; Boosted battle x3 (6:41)
- BCM403 - Legendary; Boosted battle x3, AR challenge (6:54)
- BCM404 - Legendary; Boosted battle x2, no grenades (5:53)
- BCM405 - Legendary; Boosted battle x2, no grenades (6:52)
- BCM406 - Legendary; Speed stealth challenge (5:55)
- BCM407 - Legendary; Advance weapon placement (4:57)
- BCM408 - Legendary; 40-covie battle x3 (6:46)
- BCM409 - Legendary; 40-covie battle x3 (7:04)
- BCM410 - Legendary; 40-covie battle x3, rocket special (6:32)
- BCM436 - Legendary; 38-covie battle x3, plasma combo (6:22)
- BCM437 - Legendary; 38-covie battle x3, rocket launcher & AR (6:45)
- BCM438 - Legendary; 38-covie battle x3, needler & plasma pistol (7:43)
- BCM572 - Legendary; 38-covie battle x3, rocket launcher & AR (6:44)
- BCM573 - Legendary; 38-covie battle x3, plasma combo (6:42)
- BCM574 - Legendary; 38-covie battle x3, needler & plasma pistol (7:15)
- BCM575 - Legendary; 38-covie battle x3, AR & pistol (6:34)
- Introduction
- Setting up
- Basic battle talk
- Tackling the glasshouse from outside
- Attacking across the room
- Stealth challenge
- Other challenges
- Adding extra covies
- Extra covies via rear trigger
- Advance weapon placement
- Starting from the rear
- Further set-up talk
Introduction
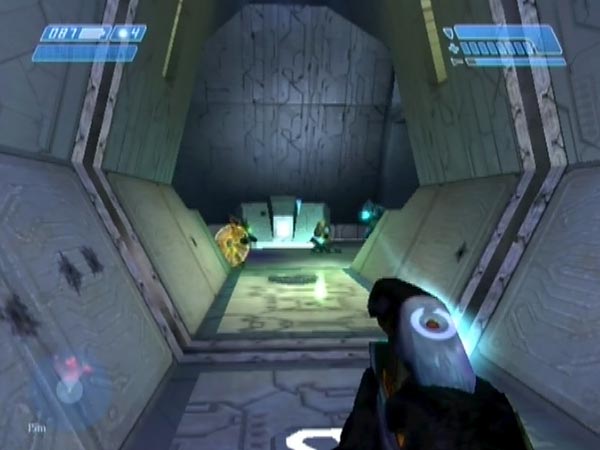
Just before the second of the twin bridges in level 5, you reach the seventh octagonal room, which for me is easily the best in the level. Featuring a raised inner housing that I call the 'glasshouse' on account of the big breakable windows, the room is jam-packed with covies and there are so many entertaining ways of tackling them. It makes for a great battle; the 'glasshouse battle' as I call it. But even better, you can actually add extra covies, boosting enemy numbers considerably and bringing a nasty new enemy attack dynamic to the proceedings!
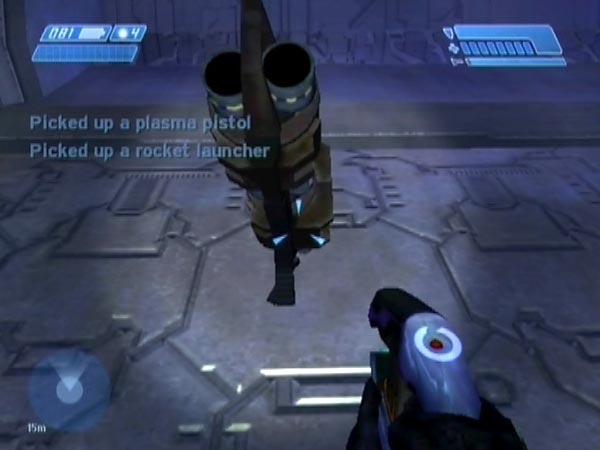
The room comes just after a long passage manned by Grunts and Jackals. And just before that there were supplies which included a rocket launcher, which might just come in useful! Indeed, you can set things up so you've got spare weapons handy, for battling in different ways.
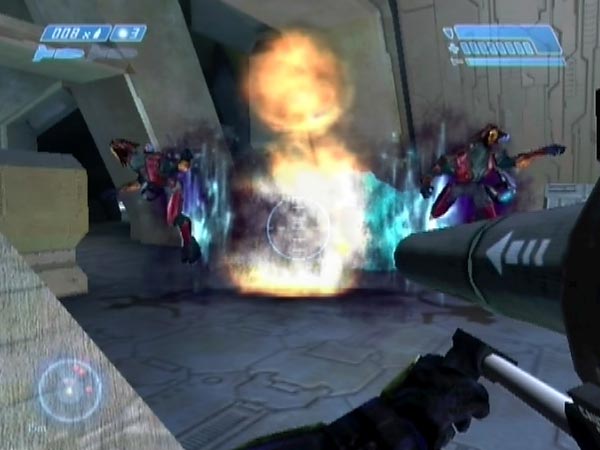
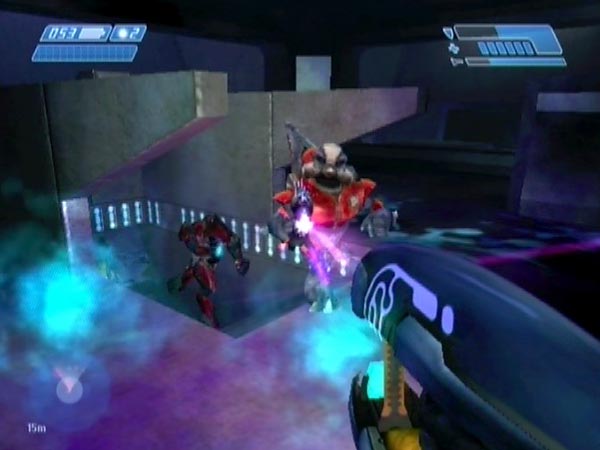
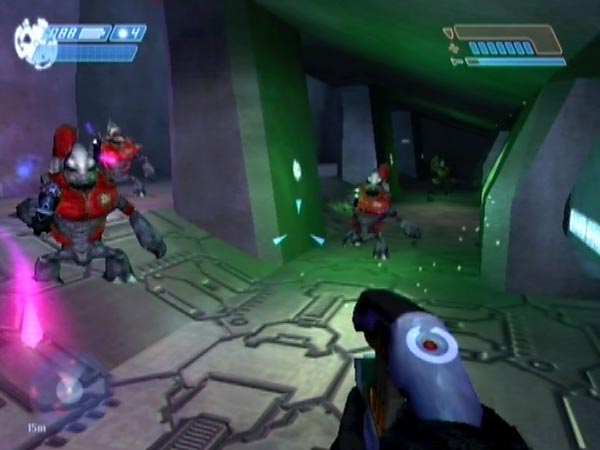
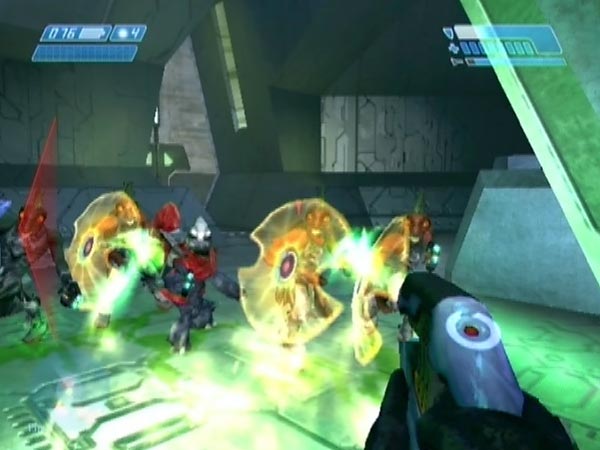
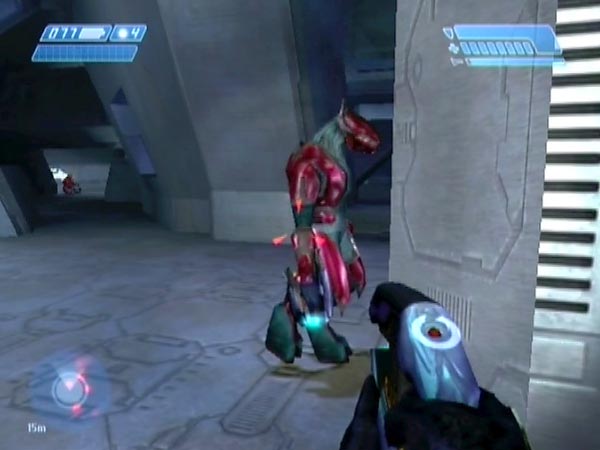
As you approach the glasshouse room on Legendary, there are 2 Elites patrolling just ahead, though they'll often be heading off around the outside or through the inner area (the initial pattern is random). There are 6 dozing Grunts around to the left, another 6 around to the right, and 4 Jackals patrolling the far side. In the glasshouse there are another 6 Grunts sleeping on the job, plus 3 Elites. Thus you've got 5 Elites, 4 Jackals and 18 dozy Grunts, making a whopping 27 covies in all.
On Heroic it's 3 Elites (2 in the glasshouse), 3 Jackals and 15 Grunts, making 21 in all. Still pretty good although the Elite presence is considerably reduced. Meanwhile on Normal there are another 3 fewer Grunts.
With the addition of extra covies however, you can boost the Legendary enemy count to as high as 40, while on Heroic you can have 30. But I'll cover such boosted set-ups later.
Note: originally the article was titled 'Seventh room', but after returning to the topic in 2019 to add movies, I introduced the term 'glasshouse battle' and made a title change to match. It's good to have a name for the battle, and this ding-dong is certainly worth naming! I also now generally call the room the 'glasshouse room' (there's actually another glasshouse in the level's final octagonal room, but there aren't so many covies around). The article has also more than doubled in length, much of that due to the major additional topic of adding extra covies.
Setting up
Here's a basic set-up routine (briefly indicated at the start of BCM393). After killing the passage troops, build a collection of weapons near the end but avoid triggering the room yet. The trigger line is at the final pillar on the left, about a third of the way along the pillar's base, so stay back from there (you could throw weapons beyond the line if you want though).
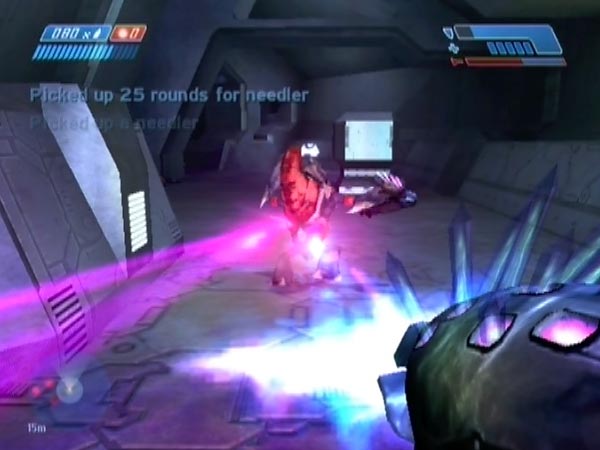
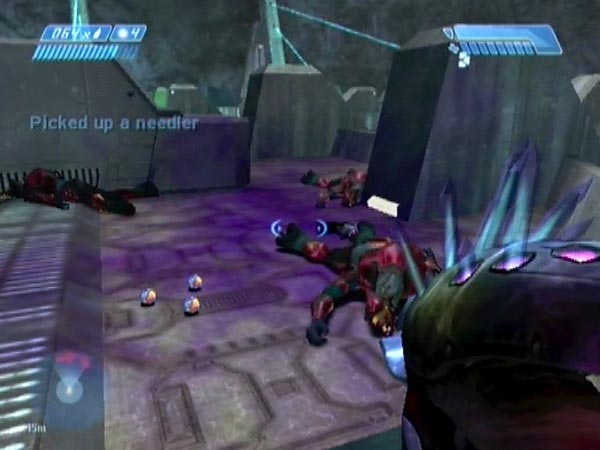
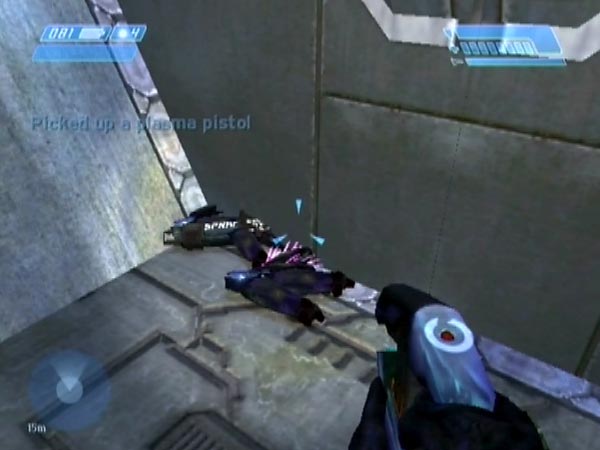
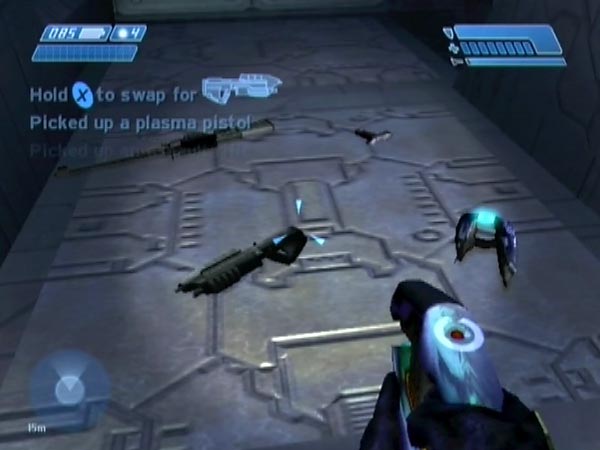
In regard to provisions, the passage guys can provide a full needler (sometimes even two on Legendary, depending on the random ammo counts assigned to dropped needlers) and a plasma pistol. The Elites from the previous room can provide a plasma rifle, and the supplies there can provide a full rocket launcher, pistol and AR. There's sniper ammo in the supplies, but if you want a sniper rifle (a good idea) you'll need to've brought one along from earlier.
You'll also want to've preserved four frags from earlier, as there are none in the supplies. Have four plasmas too of course, and full health (there's a medkit at the supplies if you need it).
Once you're done and you're carrying your preferred combo (my default is a plasma pistol and needler), cross the trigger line to spawn the room and get the checkpoint. Each time you revert to this point to start tackling the room again, you'll have the option of selecting from your handy weapon collection. Nice!
Other options, by using checkpoint delaying
The spawn checkpoint is (like most checkpoints) fully delayable, thus you have the option of keeping it delayed a while (by jumping), to set things up differently. You could for example wait until any nearby patrolling Elites have wandered off. Perhaps to a particular area - something which will affect the battle dynamics you get.
Another idea is to move weapons to a more advanced location, although it's awkward doing this while also jumping to continue the checkpoint delay. You could even move them into the room itself - e.g. putting some spare needlers around the place if you're a needler freak like me. Of course, you'll need to be careful not to be spotted. May take a bit of patience.
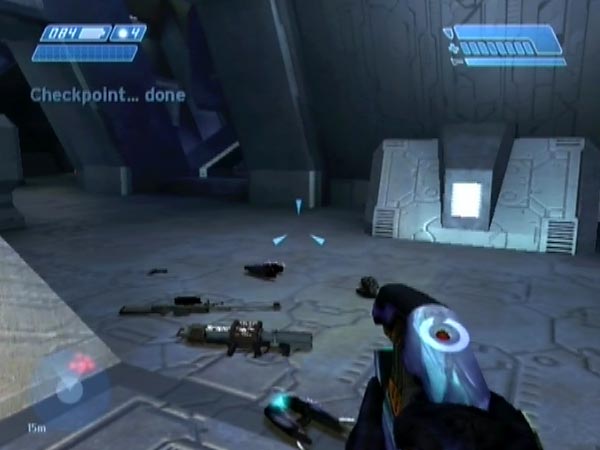
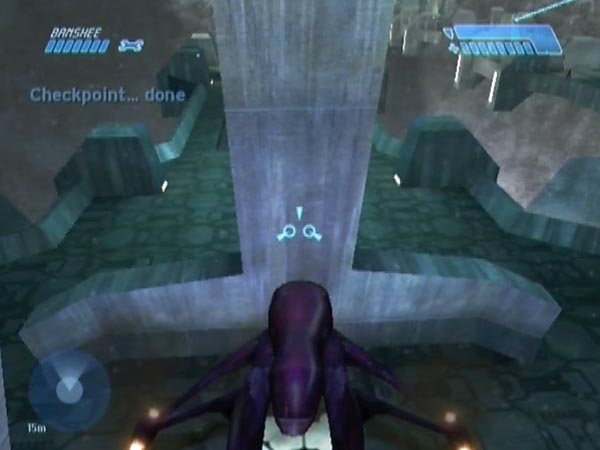
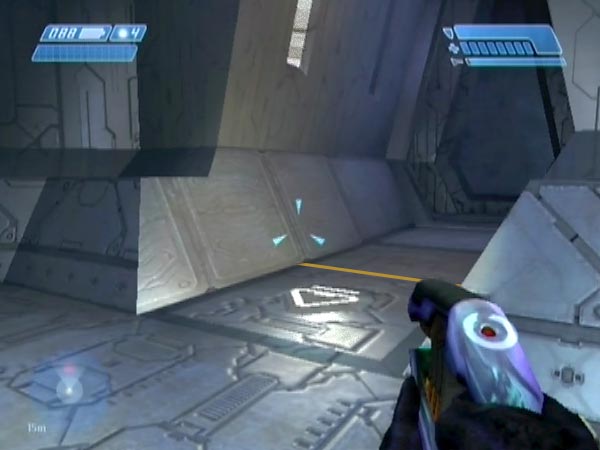
As long as you're not under enemy threat, you could get the checkpoint somewhere in the room (see pic for an example at the start of the room). Actually you could even get the checkpoint beyond the room, in the exit passage - though you'll need to take care if you want to avoid being spotted by the Jackals when you make a dash for it at the end.
Tunnel checkpoint option via Banshee
Instead of delaying the spawn checkpoint, there's another option for getting your final checkpoint. You could go back to the bridge where you thoughtfully left a Banshee, then fly off to bring back a delayed tunnel checkpoint. That's the option I recommend if you want to do a lot of weapon moving (and particularly if you want to advance weapons deep into the room, which is a tricky business), because you'll be able to so without having to simultaneously delay a checkpoint. Much easier!
Using a pre-spawn checkpoint
In regard to my basic set-up routine, a drawback is that the two patrolling Elites will always have the same initial movement pattern, which was randomly settled when the spawning occurred. Here's an idea which allows for more variation. Instead of using the spawn checkpoint for the set-up, use the preceding checkpoint, triggered with the passage troops. Keep it delayed (this will be taken care of part of the time just by enemy threat), and after building a weapon collection (which is awkward when you're also having to jump), get it a short way back from the spawn checkpoint. Save it, to finish.
Each time you fire up this save and advance, the room guys will spawn afresh. This will give you variation in the initial movement pattern of the patrolling Elites (as well as their types: red or blue), and also in the locations of the dozing Grunts. And incidentally, this save can also be used as a base save for producing set-ups in which the spawning has occurred.
Basic battle talk
There are lots of ways of fighting the battle and I'll detail some specific tactics later, but here's some basic talk to begin with.
Patrolling Elites
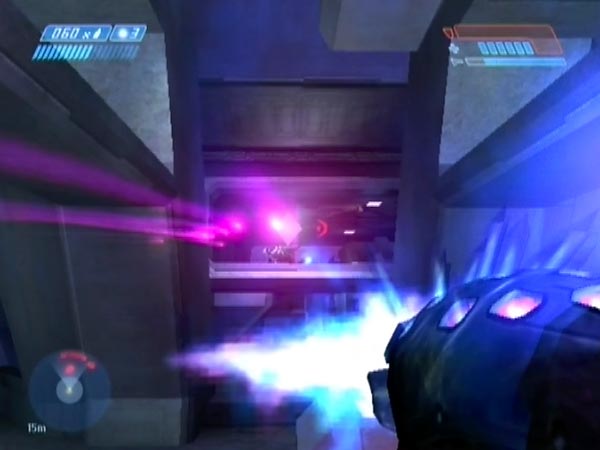
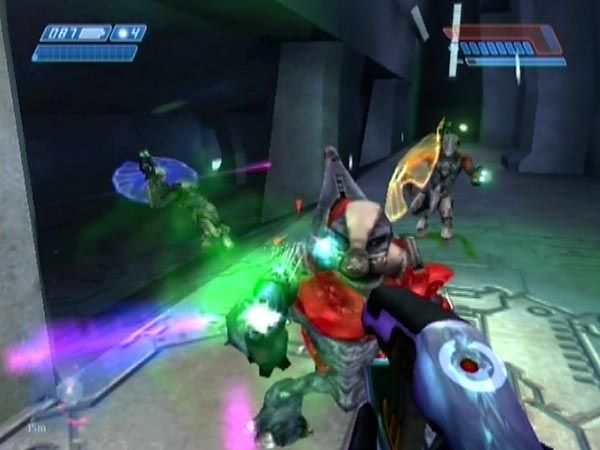
For starters the two patrolling Elites are ripe for ambush, whether that be via tagging, whacking, rocketing or whatever. One particular way of taking out an Elite on Legendary is to rocket the ground beneath him as you close in, then switch to a plasma pistol and finish him off with a firm whack while he's still in the air, the rocket having blasted him up a few feet. Takes a bit of practice to get the knack, but it's worth it!
Around the outside
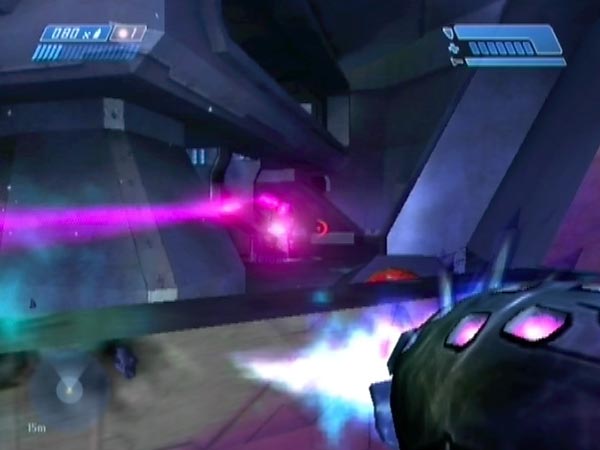
When it comes to all the Grunts and Jackals around the outside, it's huge fun to go around the left or right to tackle them. Plenty of opportunity for gleeful carnage. A plasma pistol and needler combo is tremendous here, with plasma balls used to get rid of Jackal shields. Tagging is another favourite tactic. When you see a Grunt starting to run off, that's the ideal time to tag him, so he'll carry the grenade back among his mates. And then there's always the rocket launcher!
When the Grunts on the left wake up, their instinct is basically to go and join with the Grunts on the right. That creates a large concentration which makes a great target for some intense needling or whatever. I like to make repeated short runs out of cover, each run sending in a stream of needles causing a nasty bang. Sometimes you'll get a big chain reaction. For even bigger blasts, kill several Grunts non-explosively first (pistol headshots perhaps) so the place gets littered with grenades, then set it off to take out the rest.
Inner area
Instead of going left or right, you could head into the inner area of course. It's fun to then attack covies in various directions, and you've got some pretty good cover. Indeed, there are places you can stand where none of the outer covies can get a line of fire on you. Sometimes glasshouse Elites might come down and give you a nasty surprise though, so watch out!
Storming the glasshouse
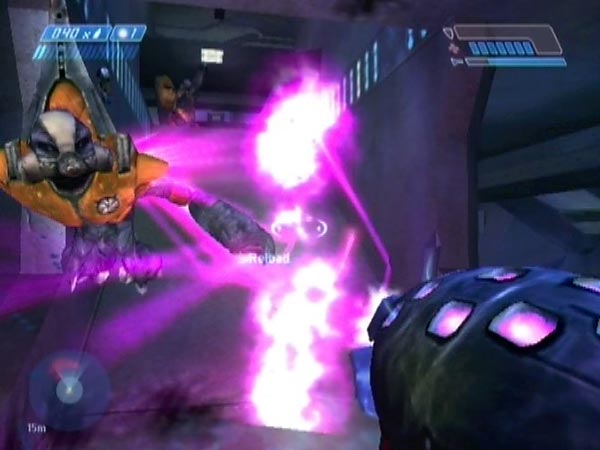
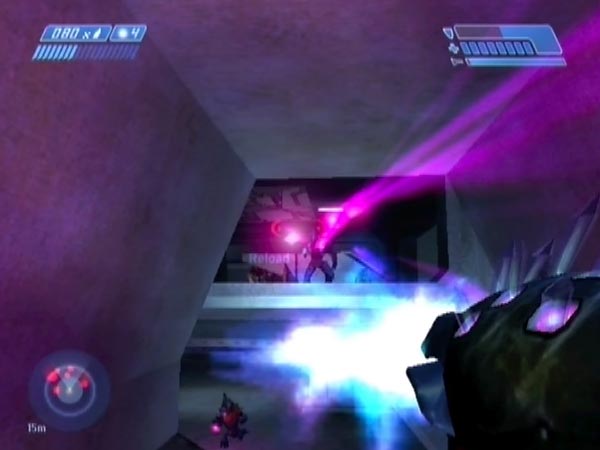
If you fancy a real gung-ho approach, see if you can start by storming the glasshouse, either straight up the ramp or using one of the two side platforms along the right. On Legendary it's a pretty high-risk business but still possible. I suggest you keep on the move and throw lots of grenades, ideally tagging at least one Elite early. A plasma pistol would be a good weapon choice I think, partly thanks to the stun effect of a plasma ball. Or maybe try a plasma rifle. On Legendary I'd say the AR is a bit underpowered, but it can still be ok.
If you're still breathing at the end, you can then have the fun of attacking ground troops from above. It's a fine place from which to fire rockets or throw grenades; or you might like to leap down out of the window with rocket launcher in hand, and blast the enemy as you fall. On Legendary Jackals will fire up at you like crazy which can be fun (see BCM405 for a nice 'plasma fight'), but you've got good cover. You could also venture out onto a side platform for some other high-up attacking, though you're more exposed there.
Ground troop territories
Once the covies are alerted, those at ground level have certain territories they generally move to, if not there already. Grunts collect in the furthest half of the right hand side, though some from the left may dawdle along the way for quite a while. Jackals stay in the back area. Elite territory is basically an arc comprising the start area plus part of the right (short of the pillar).
Tackling the glasshouse from outside
Here's a bunch of tactics for tackling the glasshouse troops from outside. You can have fun with this, and on Legendary it's certainly a lot safer than storming the place!
Using the glasshouse ceiling
There are two ways you can make use of the glasshouse's ceiling. Firstly, you can throw grenades up through a broken window so they bounce off the ceiling and fall to the floor. With a full stock of grenades you can create havoc like this, and occasionally you might see an enemy amusingly get blown out through the window (there's a nice example in BCM396 around 3:06). I also once saw a Grunt dive out, to get clear of a grenade.
Secondly, you can fire rockets at the ceiling, causing major blast damage to anyone nearby. Of course, it helps if you've got some idea of where they are. If you can't actually see them from down below, there's always sound and your motion tracker to help.
Behind a pillar
Outside each of the entrances to the inner area, there's a large stubby pillar which makes some handy cover for attacking from. You can easily attract Elites over to the window with shots into the air. Once the window is broken, you can tag Elites quite easily after edging out of cover a little. The Elites are often looking the other way, which makes things even easier. You can also use weapon fire of course.
Another bit of fun is to jump on the spot and fire as the enemy briefly comes into view over the top of the pillar. You may take a bit of fire this way, but you're never exposed for long, so you should be ok. Plasma balls are good as they home in; you won't have much time to aim after all. You can also explode enemies with needle streams, perhaps fired over the course of a couple of jumps. The pistol and plasma rifle are pretty handy too; and it's huge fun to send a rocket slamming straight into an Elite as he stands there looking out.
Damaged Elites tend to back off or crouch for cover, but you can often continue to hurt them as you jump up and find them briefly in view.
Up on the siding
Try hopping up onto the siding around the outside of the room, on the near or far side. This gets you up high enough to be able to see into the glasshouse and do some shooting with whatever you've got. It's good fun getting enemies with streams of needles, perhaps strafing along the siding in order to minimize incoming fire, which can be intense if there are still Elites there. You can also lob grenades in. See the second play in BCM394 for an example.
Behind a low window
One of the most enjoyable tactics is to stand behind a shattered low window and wait for troops come down the ramp. Attract one down with a bit of fire, then take him out with your method of choice.
Tagging is one idea, but my favourite method is to pile in a vicious stream of needles. The wall gives you fair cover as you fire. The first explosion shatters the long window above, causing a brief waterfall of glass to cascade down onto your first victim. Nice! But plasma is good too. Stun an Elite with a plasma ball and flick to a pistol or plasma rifle to finish him off. Or maybe use a rocket.
Another idea: initially kill some enemies non-explosively to get the place littered with grenades, then catch the next victim in a big chain reaction.
Behind a side platform
Here's a sneaky and amusing tactic. Around the outside to the right, there are two high openings into the glasshouse, with platforms sticking out (platforms which can be used as entry points). If you jump up onto the siding around the outside of the room, you can fire through the opening and kill enemies, who have trouble shooting you. In particular you can send explosive streams of needles in (see the third play in BCM402), taking out one enemy after another, or maybe causing a chain reaction. Rockets should be fun too! Occasionally you may hear an Elite growl and you know he's gone into rage mode. In that case he's liable to come down and around the outside to get you; so you'd best be ready for him.
Back near the passage
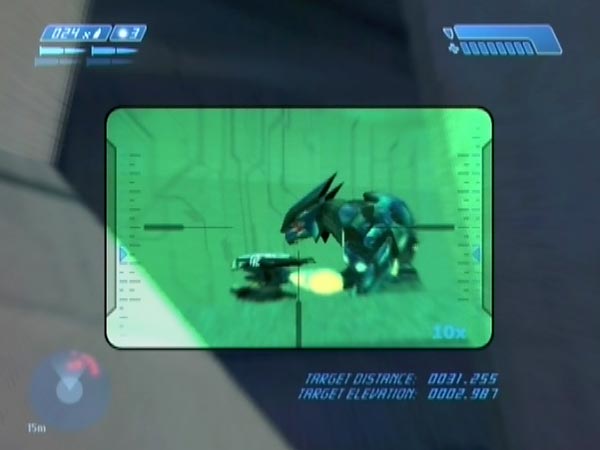
From near the end of the passage, you can see part of the glasshouse's front window. If you fire shots into the air, Elites tend to get attracted over to that corner, and you can then get them with the sniper rifle (see the first play in BCM395). There's very little risk to yourself. Elites can get you with their plasma rifles, but you'll usually get in your shots first; and even if you do start taking plasma, you can get out of the way with a quick step to the left.
You can also have fun firing rockets from that area, and then there's needling too. Fire a stream then switch to a sniper view to watch the target go bang. Nice!
There's something else you can do from here. Throw a grenade so it hits the side of the window frame and bounces into the glasshouse. It can be a nasty surprise to anyone nearby, such as damaged Elites taking cover. A rocket against the window frame is also good.
At the ramps
You can attack the glasshouse from underneath, at the two ramps. Often there will be one or more enemies in view as you briefly look up a ramp, and you can tag them or send some fire up; a rocket, a plasma ball, a stream of needles, or whatever. Sometimes you may encounter an enemy at the bottom of a ramp; and actually, it's easy enough to tempt them down with fire into the air if you want. If it's an Elite, I recommend tagging, followed by a hasty retreat. If it's a Grunt, a nice idea is to damage him enough to make him flee, then tag him as he goes, so he takes your fizzing blue gift back inside to share with his pals.
Each time you attack from one ramp, you could head around to the other one to potentially take the inner guys by surprise. I sometimes attack by continually orbiting around the two ramps, sending in grenades or whatever.
Inside a pipe
On the left side of the inner area there are two deep pipes you can hop into, providing novel places from which to attack. Once alerted, glasshouse troops - and potentially also extra covies you've added - will come to target you. Needling them is one good option (see the final play in BCM400) and rocketing them is another, but other weapons can be used too of course, and you can also use grenades if not too far back in the pipe.
That said, it's quite dangerous as there's no cover from glasshouse fire and you can't dodge around much. The main threats are needles (some of which you may be able to dodge at least) and red Elites with plasma rifles. To survive, it can be important to attack newly arriving covies early, before their fire builds up. If you've added extra covies, some of them may take up station below the glasshouse and try to attack you from there, but you can retaliate of course. Or you could get sufficiently far back in the pipe that they can't get you.
One other thing. It's actually possible to jump across from the pipe into the glasshouse, which is fun. It's not easy though. You need to jump right at the very end or you'll fall short.
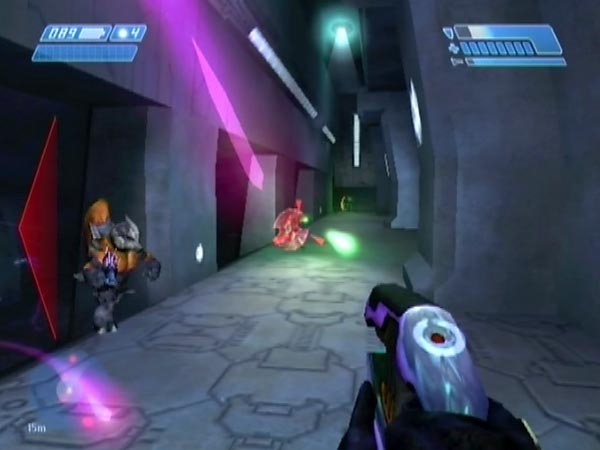
Attacking across the room
If you've killed the two patrolling Elites and cleared the glasshouse, you can have some unhindered fun attacking distant Jackals and Grunts from across the room, back near the entrance to the inner area. I just love sending rockets over from here, but you can have fun with the other weapons too. The needler has enough range. You can send a plasma ball over to wipe a Jackal's shield, then let an explosive stream of needles sail across. For another bit of mischief, see if you can throw grenades so they pass through the glasshouse. That can give the enemy a nasty surprise!
When you use rockets, consider deliberately hitting walls or other surfaces to send covies flying. From across the room, one good blast target is the far pillar (sitting in the outer pathway).
Through the low window
It's also possible to fire through the low window to the left. For this you don't need to've cleared the glasshouse, as long as you don't stand so close to the window that glasshouse troops can get you from the bottom of the ramp.
Jackals will have real trouble hitting you at your window; you've got great cover. Again, the rocket launcher is a delight. If you try firing a plasma ball from a plasma pistol, at first you'll probably find that it tends to get blocked by a support leg of the glasshouse. However, plasma balls can get through if you aim them deliberately off target to the right.
Stealth challenge
See if you can clear the entire room by stealthy whacking. It's a tough challenge on Legendary, which I'll say a few more words about. But see BCM397 for a demonstration, and BCM406 for a speed play (i.e. trying to complete the challenge as fast as possible - which can be fun to pursue).
It's tricky to get the four Jackals on the far side, but it's possible to pick them off one by one if you wait patiently for a good moment to strike. Sometimes when you kill a Jackal, another may get suspicious (alert though they haven't seen you) and stop pacing. That can be tricky to deal with, and sometimes I've had situations where a couple of guys were like that and it was impossible to creep up on one without being seen by another. A tactic you can use in that awkward situation is to throw a grenade somewhere to cause them to look in a certain direction, allowing you to quickly nip in for some bashing. Admittedly that tactic isn't completely stealthy, but it may be the best you can do.
The three glasshouse Elites are trickiest of all. I suggest you hop up onto one of the two platforms that come out of the side, around to the right. Watch the Elites pacing around, and take care not to get spotted. When the moment is right, enter the room via the platform, whacking the glass to break it. The noise doesn't alert the enemy; are they deaf or what? If you picked a good moment you can get your first glasshouse Elite right away. But that still leaves two more. Good luck - you'll need it!
Actually the Elites often get stuck at the top of the ramps, where prongs stick out. This can be a problem for you, especially if there are two stuck at once. A stuck Elite may get free after a while if he alters the direction in which he's trying to move, but after a while he may stop trying to move.
Note: what constitutes "stealthy whacking", exactly? That actually a question I'm still pondering. But whatever rules I settle on (if I get to that point at all), they'll definitely cover the demos in my two movies.
Other challenges
Here are a few other challenges to enjoy - and maybe you can make up more of your own.
No grenades
Achieve victory without using grenades. Normally I use plenty, but doing without is a lot harder, especially if you've added extra covies. Makes for a great challenge, and it really makes you realise what a luxury grenades are. See BCM404 and BCM405 for some tough plays against 37 covies. Of course, you could be less strict if you like, and allow yourself a certain ration of grenades. For example, allow yourself frags only; that's another nice challenge.
AR challenge
On Legendary, achieve victory with an AR. It's somewhat underpowered for the difficulty involved, and when it comes to Elites, you'll want to try and get up close to them if possible (that's when the AR is at its most effective). This makes a pretty good challenge and also encourages good grenade use to make up for the AR's shortcomings - though you could also try getting through with no grenades, an even tougher challenge. See BCM403 for some plays against 37 covies, and BCM405 for a play with no grenades.
Single plasma pistol, no grenades
Achieve victory with a single plasma pistol, using no grenades. Although plasma balls are nice for taking down shields, you won't be able to afford very many. Fortunately though, normal fire is very economical and also very powerful! See BCM405 for a play against 37 covies.
Speed challenges
Clear the room as fast as possible, subject to any weapon limitations you care to impose on yourself. Many interesting opportunities here, to test your combat skill.
Adding extra covies
This section and the next, new material for 2019, concern the addition of extra covies to get a boosted battle, a possibility I realised long ago but am only now describing. I've also now refined things.
As you'll recall, the room is preceded by a passage full of Grunts and Jackals, and before that was a room of Elites. What you might not know is that all these covies can be made to advance to the glasshouse room! On Legendary that's 13 extras (4 Elites, 3 Jackals, 6 Grunts), which would make a total of 40 covies in the room, while on Heroic it's 9 extras (2 Elites, 2 Jackals, 5 Grunts) which would make for 30.
Quite simply, they'll head there when you trigger the room. It becomes their new territory, and within it their behaviour will be to freely pursue you, when they know where you are. That adds an excellent and dangerous new attack dynamic to the battling - because the native guys aren't like that. The natives all have more confined territorial restrictions, making them essentially defensive.
With the extra numbers and new attack dynamic, boosted battles are really the way to go for the serious cyborg. Once you've experienced it, you might not be interested in bothering with mere standard battles any more. That's certainly the case for me.
But you don't have to add all these other covies. You could cull any you don't want, in order to fashion your battle experience. On Legendary for example, you might want to cull some of the Elites, else the battling may simply be too tough! Unless I want to do the stealth challenge, I'd want extra covies every time.
Getting extras in - standard method
On the higher difficulties it's a hazardous job to get these earlier covies to the room though. Here's my standard method, demonstrated in BCM398.
At the start of the Elite room, fire a shot or get spotted. The Elites will now converge to the start. Meanwhile go through the middle to reach the passage entrance. When you now trigger the passage (note: the trigger line is at the tip of the glowing white arrow at the start), pause for the checkpoint so that if you get killed in what follows, you'll be able to try again from there.
Charge into the passage and reach the trigger line for the room, evading as much fire as you can. Firing an initial shot to shock some of the covies can help, and you might want to pepper some covies with fire too (Jackals may roll, which stops them firing for a few seconds). Make good use of the side area down the left, perhaps weaving in and out of it. The passage guys will start leaving and the Elites will soon arrive and do the same (usually overtaking the last of the Grunts). Continue to evade as you head back and get safe.
Some covies may end up dawdling in the passage (possibly because there's a bit of a traffic jam further ahead), but they should soon back off if you mostly stay hidden (but in the vicinity). If they're being slow, it may help to get safely close along the side area.
Subsequent work
With the passage clear you can do some weapon moving as usual - and you might also be needing to use the nearby medkit! In doing this, you could potentially be delaying the spawn checkpoint, if you took care to keep it delayed so far. Alternatively you could work without checkpoint delaying (easier), and subsequently finish with a delayed tunnel checkpoint as mentioned in my earlier set-up section.
In regard to weaponry, note that if you want a needler or plasma pistol you'll need to've brought those along from earlier in the level - unless you care to kill some of the passage troops to obtain them.
Moving extras away from the entrance
With the set-up as described so far, the extras will mostly be clustered near the room's entrance, possibly along with the usual patrolling Elite or Elites if they got alerted. That's not ideal. On the higher difficulties you probably wouldn't even be able to get safely into the room without doing a lot of killing first, from back in the passage. For that reason I recommend adding another element to the set-up work: getting extras moved away from the entrance. That'll allow you to enter the room immediately - possibly even unseen - and get the full benefit of the extras' pursuit behaviour (rather than having to kill most of them before even entering). Here's a plan for how to do it (demonstrated in BCM398 starting around 1:38).
After doing any weapon moving you wanted, go back to the bridge, where you need to've left a Banshee. Fly off and bring back a delayed tunnel checkpoint (unless you've already been delaying the passage checkpoint for this purpose, in which case you can save yourself a long trip). Settle at the locked door on the other bridge, and get your checkpoint, then bump yourself through the door by backing up the Banshee and dismounting (I hit X then instantly start backing up, but I don't know if that's the best way). You may get splattered while trying, which is why you wanted the handy checkpoint.
When you bump through, the bridge will be triggered, just as if you'd come along the passage from the glasshouse room. You could kill the spawned bridge covies now, or later, or not at all. Likewise, you could end the loud music now, or later, or not at all. If you want to end it, briefly get low at the other end of the bridge.
In regard to the main task, go along the passage to approach the room. Get the enemy's attention and maybe fire a few shots. Hopefully, many of the extras will be drawn over, or at least be drawn away from the start of the room to some degree. When you're satisfied (not that it's easy to judge, but the presence of Elites would be a good sign), return to the Banshee.
To finish off, trigger a checkpoint and keep it delayed to use it as your final checkpoint back at your weapon collection. What checkpoint? A tunnel checkpoint is one possibility as ever, but actually there are two handier options. One is the checkpoint that triggers when you bump through the door. It's due quite quickly, so if you want to delay it, be sure to start jumping the moment you're through the door. The other handy option is the 'mid-bridge checkpoint' triggered along with the second wave of bridge covies. To trigger it, just fly low over the middle area of the bridge (and be firing plasma in advance, so the checkpoint will be delayed). Of course, if you're planning to use this checkpoint, you need to've avoided triggering it earlier when killing the guys who spawned when you bumped through the door.
When you get back to your weapon collection, you might perceive that there are still too many extras near the entrance. If you're not satisfied, you can always go back for another try at shifting them (possibly after first drawing them back, to reshuffle things a bit; otherwise there might not be much change).
Note: if the entrance gets sufficiently clear, you can potentially move some weapons into the room. You might need to then get another delayed checkpoint to finish off though. At some point you might also need to get covies drawn away again - and certainly if you're spotted. You can fiddle around with this sort of engineering as much as you like. Delayed tunnel checkpoints are always available.
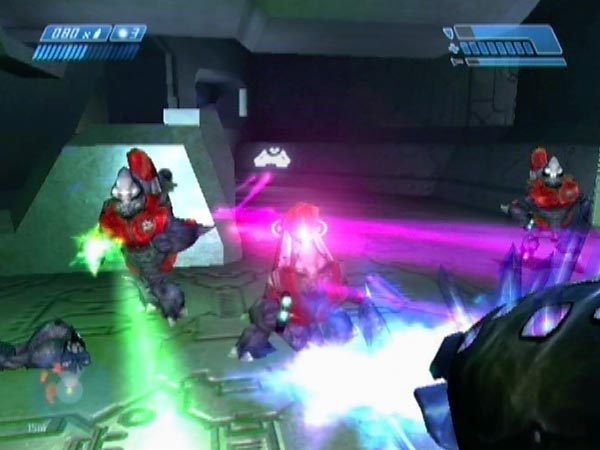
Passage gauntlet on Legendary
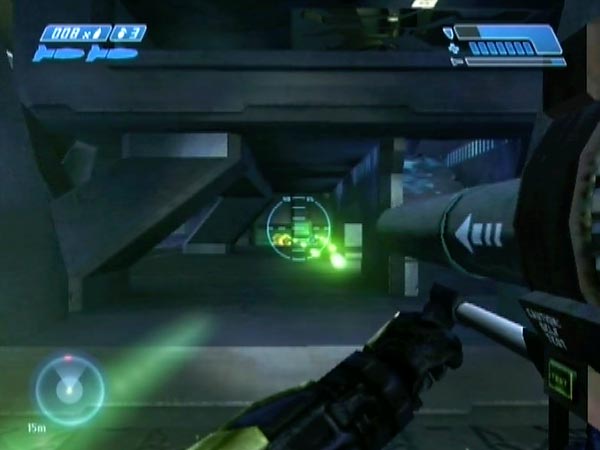
On Legendary the fire from the passage troops is murderous as you run the gauntlet (see pic), and you may be hard pressed to succeed. You could of course make things easier by quickly killing some, though that's hardly ideal. Taking out a few Jackals with an early grenade is one idea, and it might even buy you enough time to recharge at the far end, behind a pillar.
Another way of making things easier is to sacrifice the Elites in the following way. In the Elite room, kill all but one of them - preferably a blue if there is one. Draw him to the start of the room and evade. Trigger the passage but keep the checkpoint delayed, and back off. He'll head to the passage entrance. Put him on the defensive by taking his shield down and perhaps weakening him further, but not so far that he rages. A plasma pistol would be ideal for this. He'll likely take shelter in the passage. Quickly get close and get the checkpoint, for tries at what follows. Charge in and kill him without taking damage. His death will hopefully panic many of the passage troops, making the gauntlet easier.
Extra covies via rear trigger
Here's a sneaky alternative plan for getting extra covies in, which actually saves you having to run the passage gauntlet. You have to run a 'room gauntlet' instead, but it's typically easier and actually has a stealth option too, in which case it can be really easy. On Legendary the rear trigger method is definitely the way to go; see BCM401 for a tutorial. You might also like to use it on Heroic though. A side benefit is that the covies will probably take less damage from friendly fire (especially if you use stealth).
The method
After triggering the passage as before, keep the checkpoint delayed and retreat through the Elite room. It may be best to go around the left rather than through the middle, to try and avoid Elites (you want to keep full health). Go to the bridge, fly to the adjacent locked door, get your checkpoint and bump through (which doesn't trigger the bridge, as the glasshouse room hasn't been triggered yet).
Go through the glasshouse room. A short way into the passage, you enter the trigger zone for the room. This is your 'rear trigger'. The room spawns, and simultaneously the extras will be triggered to head for the room. Get back through the room as best you can (see below for tactics on this room gauntlet). Assuming you make it, the bridge will get triggered. You can now continue from there with the usual elements (weapon moving and so on). Your routine could go as follows. Kill the newly spawned bridge troops, and get rid of the music if you want. Get back to the passage of Grunts and Jackals and make sure any dawdlers leave; you'll normally have a few. Take care of any weapon moving you want to do, then attend to moving the extras away from the entrance, before finishing with a delayed mid-bridge checkpoint.
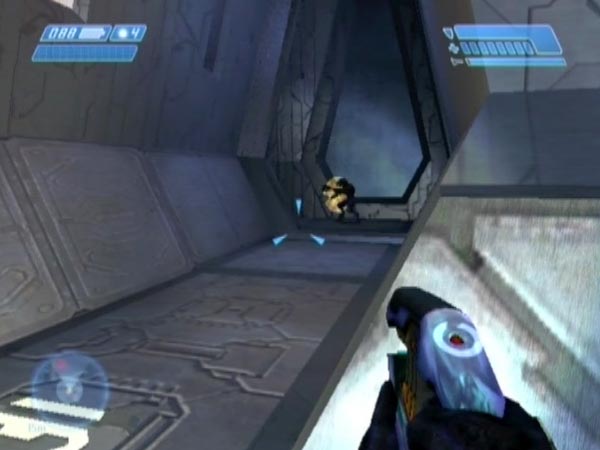
Jackal or Elite near the rear trigger
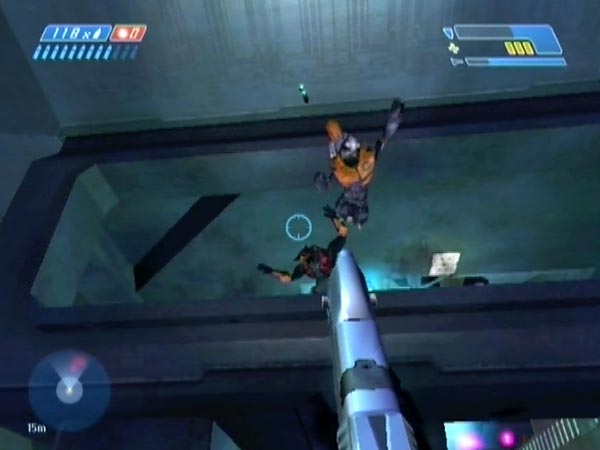
Sometimes when approaching the rear trigger line, you may find that there's a Jackal nearby, up in the corner (see pic). If you were to go ahead and trigger the room, he'd probably spot you and raise the alarm early, spelling trouble. On Legendary, major trouble! If you wait a few seconds however, he may slink off. In fact, I think maybe that always happens if you wait long enough.
It's also possible (though it seems less likely, in my experience) to find that an Elite from the Elite room has run through the passage and is standing near the trigger line, seriously threatening your chance of survival. I'm not sure if that possibility can be mitigated against, but you could always opt to kill him before going for the trigger. If so, I'd suggest a tag.
Tips on the room gauntlet
In regard to the room gauntlet, the simple option is to dash straight into the inner area for starters, possibly taking fire from the two patrolling Elites (two on Legendary, that is) who are quite likely to spot you. If you take serious shield damage you can pause to recharge at a sheltered spot in the inner area, such as just to the right of the far ramp. Mind you, pausing also gives Grunts more time to arrive in the exit area from the left side of the room where they were sleeping, so you may take heavier fire during the final dash. Fire can be very fierce there, and has cut me down on more than one occasion.
There's also an excellent stealth possibility though. Depending on the initial movements of the patrolling Elites, you may be able to avoid getting spotted by them, and then get a long way towards the exit without the alarm being raised. A Jackal will probably see you eventually, but it'll likely be too late to cause you much grief.
If one of the Elites does spot you, you could stun him with a plasma ball to buy you a few seconds of time while dashing into the inner area. Or you could kill him of course. Indeed, you always have the option of killing both, as part of some culling. Tagging them is a neat way, shown in BCM401. A stealth kill of the guy on the right is another possibility, but you normally only get that chance if he goes to the right. If he goes left, you'd have to hope that he turns his head away somewhat; and then you might be able to get him.
Saving a checkpoint before moving the extras
In regard to moving the extras away from the entrance, there's obviously a degree of randomness as to how that turns out. The final covie layout (i.e. when you're at your final checkpoint position) might make for satisfactory battling, or it might not (e.g. if there are still a few covies near the entrance). With this in mind, it's worth taking more care as follows, especially if you're using Legendary with a high number of ground Elites (layout becomes more critical to early survival, in that case). Prior to moving the extras, save a delayed tunnel checkpoint. If you now move the extras and the set-up doesn't turn out well enough, you can just eject the disc and reload, to try again.
The only reason I didn't include this tactic in my tutorial BCM401 was for the sake of simplicity. In fact I now use this tactic as standard. You can also use such a tactic when not using a rear trigger, of course.
Pre-trigger checkpoint option
Let me mention an option regarding the passage checkpoint you were initially delaying. Instead of using it as a pre-bump checkpoint, you could keep it delayed until just about to trigger the glasshouse room. Then it'll be a very handy pre-trigger checkpoint. But of course, this means you'll need to avoid getting killed when trying to bump through the door. If you're good at bumping though, that might not be much of a worry.
Escape via the passage
One other option after a rear trigger is that you go through the passage rather than the room. There's a gauntlet to run, but it's significantly easier than the original passage gauntlet, which was a two-way affair. This will just be one-way. Later, you can carefully hop across to your Banshee via the transparent side-panes.
Advance weapon placement
Earlier I talked about potentially moving weapons into the room, which is possible if there are no covies near the entrance. But actually there's another possibility. Weapons can be inserted into the room before it's even been triggered! As such, you can position weapons at leisure, and as carefully as you like, without needing to worry about being spotted. In fact you can do it prior to triggering the Elite room. That's what I'll focus on here - and you can see a demo in BCM407.
The working
Let's pick up from when you arrive on the first of the twin bridges. Plenty of covies spawn on this bridge, and also plenty of Grunts on the second. As you combat them, make a point of briefly picking up any dropped weapons which you want to stop from vanishing (handling them keeps them in the game). I'm especially referring to weapons on the second bridge, and for this plus other work you'll need a Banshee (you could've landed one on the first bridge earlier, then gone down in the lift).
With the bridges clear, now comes the main work. At the locked door on the second bridge, form a pile of weapons dropped against the door, then fly off and bring back a delayed tunnel checkpoint. Get it at the door, ready to bump through. Bump through in such a way that you can get a boarding prompt on the other side (check for it when through). The prompt will enable you to get back through the door later.
The game gives you pick-up prompts for the collected weapons, thus enabling you to bring them inside. You can then move them into the room - or even into the passage beyond if you care to set up part of a weapon collection there in advance. Once you're finished, use the Banshee boarding prompt to get back outside. If there are yet more weapons you want to add, you could repeat the operation of course.
Once you're content, I recommend saving a delayed tunnel checkpoint just prior to the trigger line for the Elite room (the trigger is more than halfway along the long section of the passage). What you've then got is a nice base save from which to try and create good battle set-ups. The virtue of not having the Elite room spawned yet, is in regard to setting up battles with extra covies. You still have maximum control over the make-up of the Elites you're going to add. For example, on Legendary you might want to make sure those Elites aren't all red. To do that, you could keep triggering the Elite room until there's a blue.
A few details
On the second bridge, only needlers and plasma pistols are dropped. But that that doesn't mean those are going to be the only weapons you can drop against the locked door for moving inside. You'll likely have some weapons obtained either on the first bridge or from earlier. Those can be carried across and swapped for unwanted ('junk') weapons on the second bridge, that you kept in play purely for this. Actually it's also quite easy to blast weapons across with a Banshee; but you won't need to do that if you made sure the second bridge contained enough junk weapons for swapping.
In placing spare weapon around the room, try to avoid places where explosions commonly go off in battle, otherwise your spares are liable to bet blown away, and you won't be able to rely on finding them in place. Also consider where spares might be the most useful. For example, if you want some spare needlers (like me), there's not much point putting them near where a lot of Grunts are going to be, because those guys are going to drop lots of needlers. Instead, put them where needle supplies are likely to be lacking.
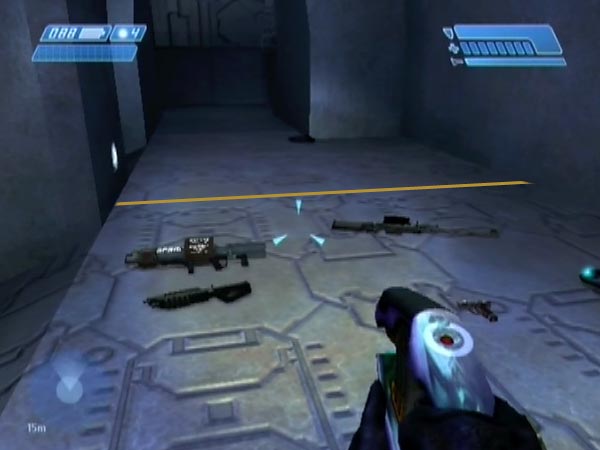
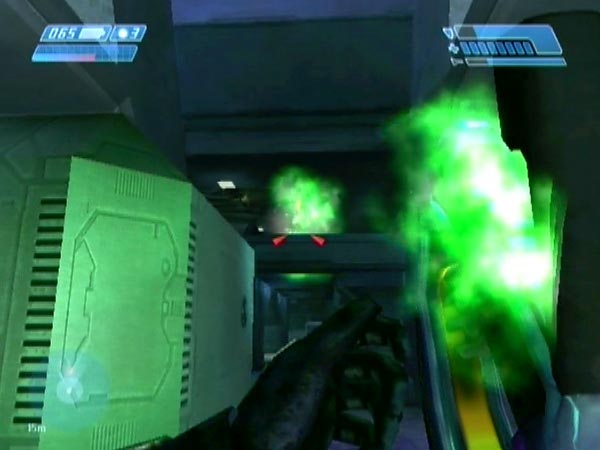
When I create a base save in the manner described, I like to include building most of a weapon collection in the Grunt/Jackal passage beyond the room (e.g. see pic). That's a time saver. Each time I use the base save, all I need to do is add one more weapon to complete the collection; namely the rocket launcher that spawns in the Elite room. Of course, I could've put a rocket launcher there earlier; but if I've only got one from earlier in the level, I really want that one in the room itself.
I've focused here on doing the advance weapon placement prior to triggering the Elite room, but it could be done later if you want. Either after triggering that room, or after triggering the passage beyond.
Starting from the rear
Thus far, my talk has been focused on ending up with a checkpoint near the entrance to the room, with a collection of spare weapons at hand. But you could instead do likewise on the exit side of the room, so you'll be launching your attacks from the rear, giving you different battle dynamics than usual. The Grunts could potentially all still be asleep, or you might've alerted the room.
To get to that side, you could either have gone through the room at some point after it got spawned, or you could've come through the exit passage, sometime after bumping through the locked door on the second bridge (a trick mentioned in the previous section).
In regard to having a weapon collection there, you can exploit weapons dropped by various covies on the second bridge. Some of those weapons you could use directly (covie weapons), while others can be initially used as placeholders to later replace by weapons that aren't dropped there (UNSC weapons).
Further set-up talk
Here are some more remarks on set-up possibilities, with or without extra covies.
Having music
In my talk about adding extra covies, I implicitly mentioned the possibility of having music in your set-up. Specifically, the rather loud music which starts when the second bridge is triggered. But you could equally have that music in a non-boosted set-up of course. The music will make it harder to hear covies, but is well suited to aggressive fast-moving play, such as shown in BCM399 and BCM400 on Heroic.
Now I think of it, there may also be other music options you could arrange, such as the earlier music triggered at the spiral path, and the music triggered with the room of sleeping Grunts and two Elites (this latter music would be a good accompaniment for the stealth challenge). I haven't checked though.
Banshee teleporting
Banshee teleporting (see BCM338 and BCM339) could be useful, either as a way of magically appearing in some particular place within the room (a novel type of battle entry), or as an alternative to bumping through the locked door (in order to get it open). I haven't had the time to explore this at all, but I suspect it's a promising avenue.
Skipping early stuff
In creating a set-up, you don't need to've slaughtered covies through the whole of the preceding level. Once the first ground battle has been triggered, there's a lot of spawning you can skip by flying sufficiently high in a Banshee to avoid the relevant triggers. That will reduce the overall time needed to set things up if starting from scratch. This isn't critical stuff so I won't dwell on it, but I'll mention one major skip. Once you're at the tower area, you can fly high to the first of the twin bridges. Go inside and down in the lift, then through the room and into the passage beyond, and that room will spawn. You can now progress forwards as usual.