Keyes hangar battle
Posted June 10th 2007, updated later
Associated movies
- Introduction
- Game behaviour
- Door ambush
- Platform survival
- Sandwich challenge
- Stop the covies
- Back attack
- Recess ambush
- Platform pillar ambush
- Corner shield fun
- Entry catwalk fun
- Sniping from the far end
- Creating a good save
- Eliminating platform Elites
- Comment on the design
Introduction
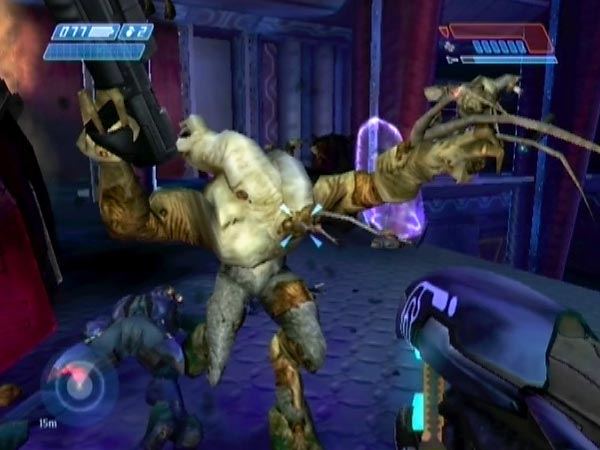
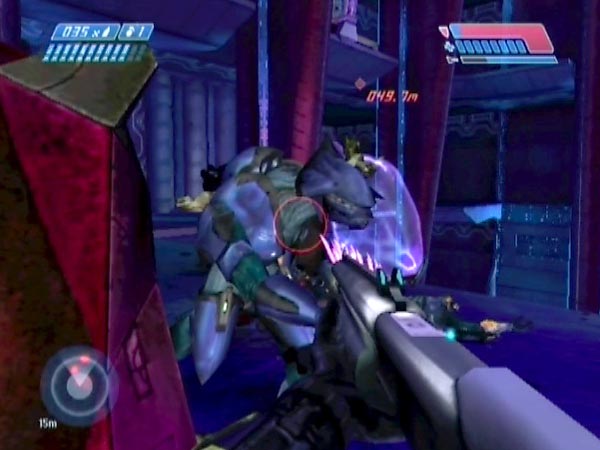
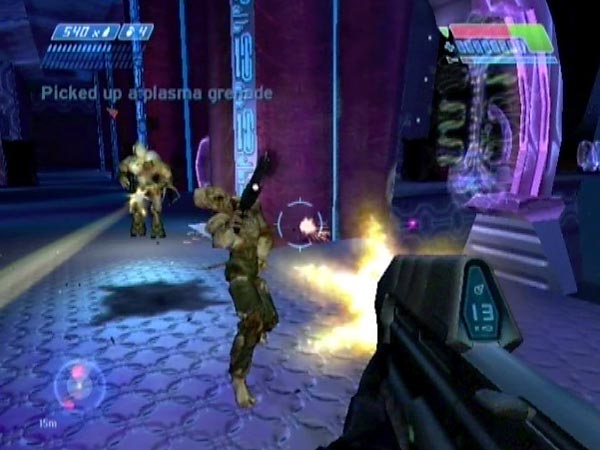
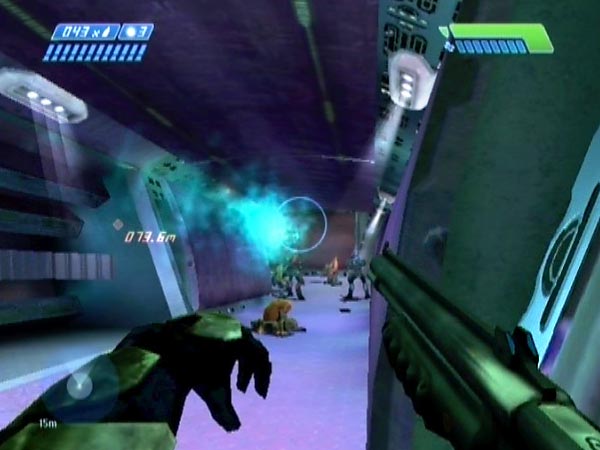
Shortly after reboarding the ship and dropping through a hole, you reach the hangar (or shuttle bay as Cortana calls it) on its second level. To start with there are just four Elites on the central platform plus a few spores below. But when you advance far enough you trigger reinforcement Elites and Grunts from the door on the left, plus combat Flood who drop in from above. It's a chaotic brawl in the making, and normally you'd probably just head past to safety. But if you care to hang around to get your money's worth, you can have a whole lot of fun as I'll detail here. The key dynamic is that each time a Flood or reinforcement Elite or Grunt is killed, another spawns to take his place as long as you're within a certain trigger zone; and this continues until the spawn count reaches 32 or so. Basically then, the place is one big spawning machine!
Shotgun fans in particular will have a field day. One special highlight: blasting 20+ Elites one after another at point-blank range, with barely enough time to keep reloaded! See the door ambush later.
Convenient replaying
There's a handy checkpoint as you approach the hangar, making it easy to revert and play things all over again (bearing in mind that as long as you don't go into the exit passage or too far into the near passage, you won't trigger a new checkpoint). Also it's possible to have extra weapons nearby, allowing you to choose your combo each time you head into battle. You can also have an undamaged overshield, and you can even arrange to fight without music if you want.
My section on creating a good save covers set-up details, but to begin with I suggest you just fire up the game on Normal and whizz through until you get the hangar checkpoint, ideally sporting a healthy overshield and armed with a full shotgun - and perhaps a pistol or AR as secondary. You'll soon be able to try out the fun I suggest, plus anything else you can think of.
Difficulty levels
NB: With a lot of the activities suggested here, Legendary would be too tough and you'd likely be dead in seconds. You'll be heavily pressured even on Heroic, when putting yourself in the thick of the action. In fact I suspect most players will have the best fun on Normal.
Game behaviour
Before we get to the fun, let me clarify the game behaviour. I've put a few reference terms I'll be using in bold.
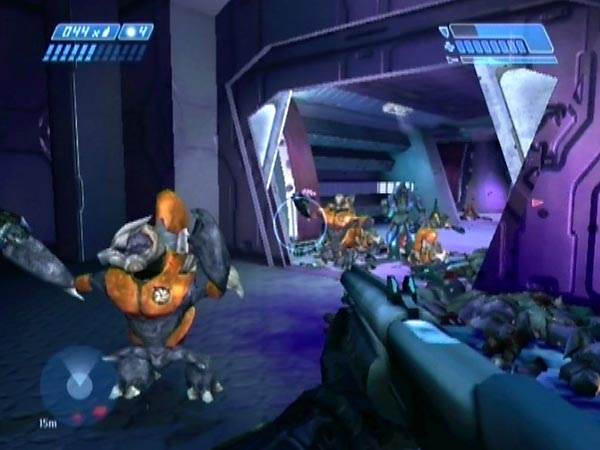
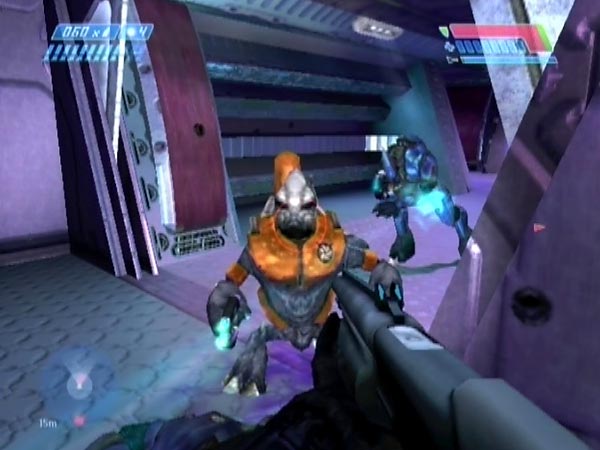
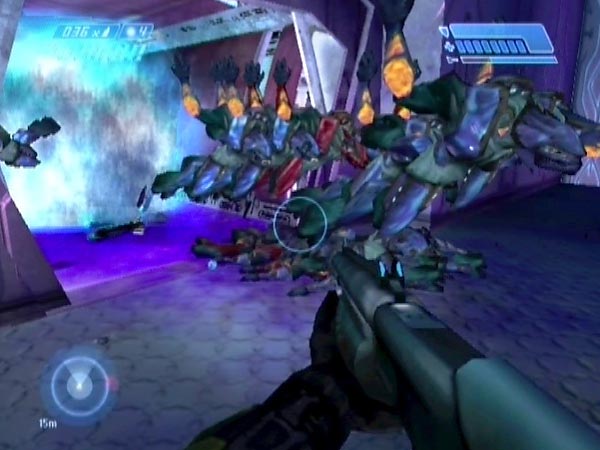
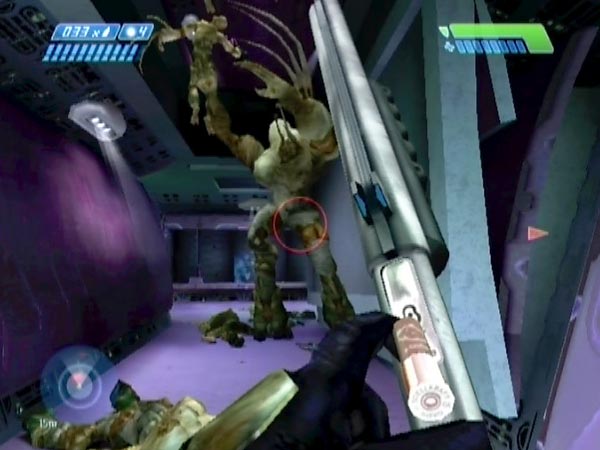
From where you emerge into the hangar's second level, there's a door over on the left; the covie door as I'll call it. When you're anywhere to the right of that door's opening, or even slightly left of that, you're in what I'll call the trigger zone. When you're in that zone, reinforcement Elites and Grunts spawn just around the corner through the covie door. The Elites head for the end of the central platform, whilst the Grunts head to near the start of the platform. Also, Flood spawn on the third level. They run along and jump down to land just in front of the platform pillar at the start of the platform.
Now here's the really good bit. Until spawning ends, the game tries to maintain two reinforcement Elites, two reinforcement Grunts, and three or four Flood (three on Normal and Easy, four on Heroic and Legendary). This means that each time one such enemy is killed, another spawns to take his place (when you're in the trigger zone). Spawning ends once you've had a total spawn count of 32 or so. Expect between 31 and 33.
If you leave the trigger zone, spawning is temporarily suspended. It resumes once you return, as long as you haven't been too far into an exit passage.
The original four Elites, who I'll call the platform Elites, stay on the platform and potentially man the Shade, when threatened. It can take a few moments for an Elite to mount up when the seat is available though. Reinforcement Elites and Grunts can man the Shade too.
Covies that end up down below after diving off or whatever will remain aggressive but aren't inclined to move around, except perhaps to run to man the Shade if it's been blasted down.
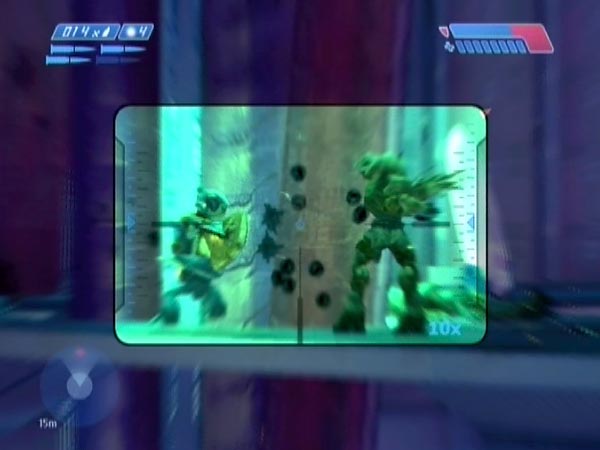
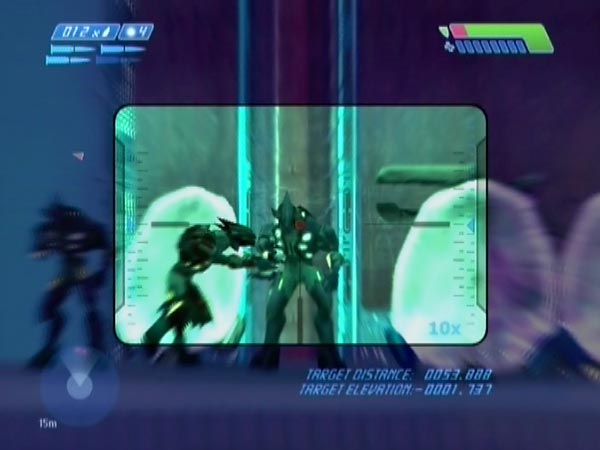
Door ambush
Associated movies
- BCM116 - Normal; Door ambush with shotgun three ways (4:50)
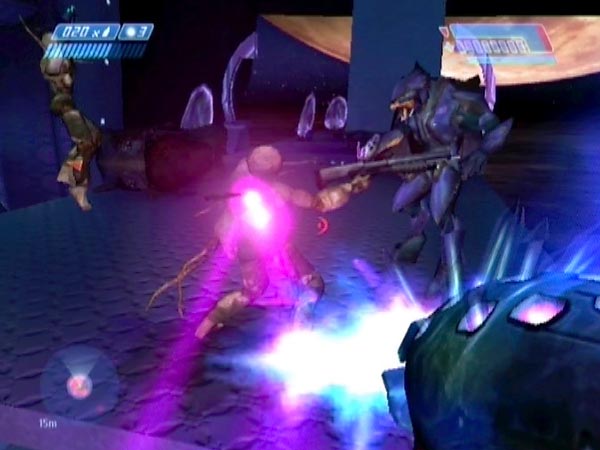
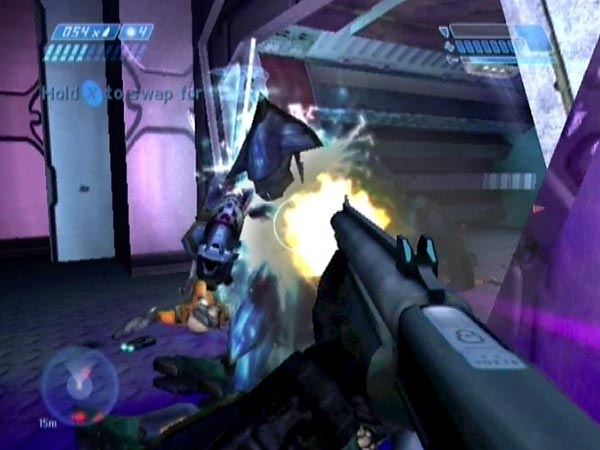
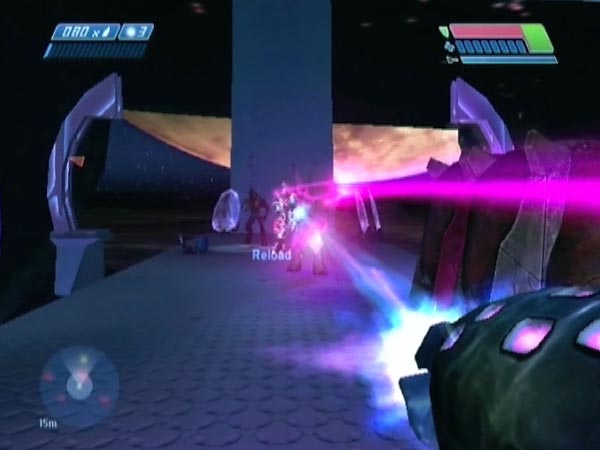
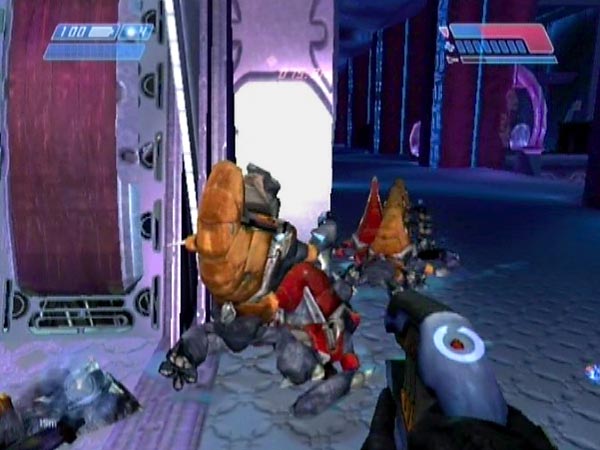
Here's something I guarantee will make an immediate impression on you. Preferably armed with a shotgun, run to the covie door and stand somewhere just to the right where the covies can't see you until they're emerging. One after another, here they come, and they meet up with the business end of your shotty at practically point-blank range. BLAM! Elite down. BLAM! Grunt down. BLAM! Another squid-face bites the dust. And no kidding, they spawn and emerge so fast that you can be scrambling to reload quickly enough!
It can be quite hilarious at first, but don't get too carried away laughing. It can soon get really tough, even on Normal. When two Elites turn up at once and at least one of them is a nasty red, you can start getting forced back, and it can be difficult to recover.
You can try other weapons too of course. The power and efficiency of the plasma pistol makes it a great choice, and let's not overlook the inviting prospect of drilling covies close up with an AR - though I have to say that even on Normal it's hard to reload fast enough, so you'd probably need to combine it with another weapon. Also try the needler. That's difficult to manage but it can be plenty of fun trying.
I suggest you leave the platform Elites alive so they'll keep the Flood occupied. It might be worth blasting the Shade off the platform though, so you won't take any Shade fire in the back.
Selective killing
If you want to just focus on Elites, let the first few Grunts pass, so you'll now get a flow of mostly Elites, with just the occasional Grunt when the Flood manage to kill one. Alternatively you could let Elites pass, to get a flow of mostly Grunts (although they're sometimes slow to emerge).
Stepping in
If you watch your motion tracker, you can anticipate when an enemy is nearing the exit; and from the speed you can even tell when it's an Elite. At that point, it's fun to briefly take a step in and let 'em have it. Feels good, and boy do they get a shock.
Grenade go boom
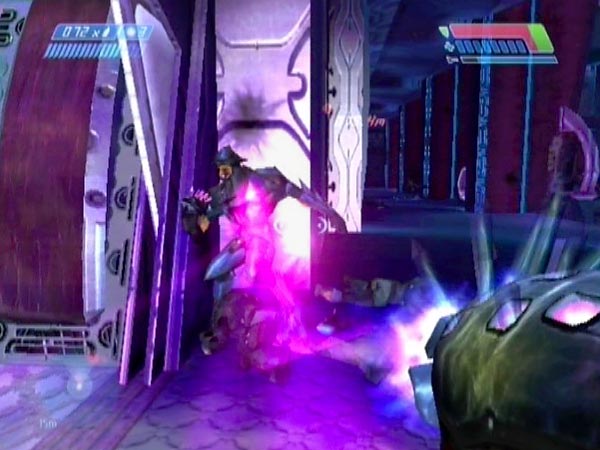
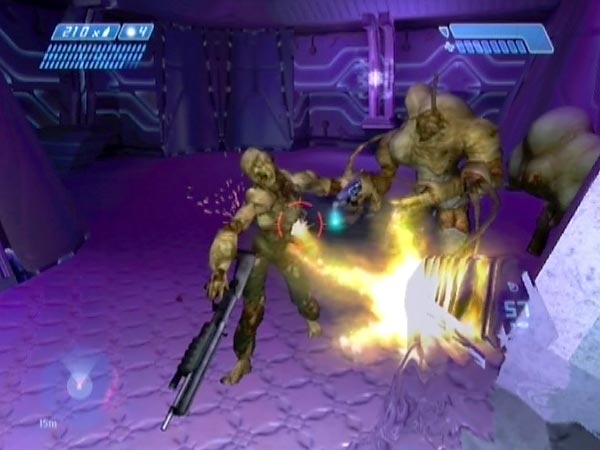
With all the covies you're dropping near the door (or possibly just inside it, if you've been 'stepping in'), you can build up a huge collection of bodies and loose grenades. You know what's coming next, right? Pick your moment to take out some newcomers in a massive chain reaction that sends bodies flying out into the hangar. Nice.
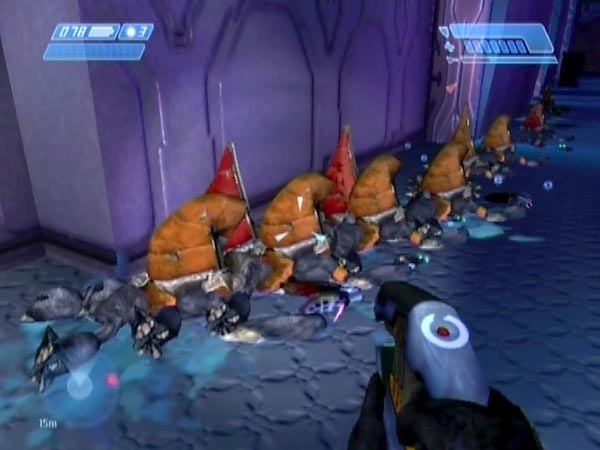
Body pile fun
Even the body piles themselves can look jolly impressive. Have you ever seen 20+ Elites all lying in the same death pose, close together? You soon will. And when you grenade the pile at one end, you can make them all get blasted along a little, in synchronized fashion. Have a play with them. Something else you can do with a big pile of bodies is to drop a weapon onto it and watch it bobbling around, trying to find a place to settle. It's alive!
Standing in view
As a variation on positioning, you could stand well back from the wall so you can see fully into the passage while still being in the trigger zone to get your flow of covies. They'll be able to see you as soon as they come around the inner corner, and you can try to kill them before they get far. It's not a point-blank ambush any more, but they're still going to get a nasty shock. You'll probably have to dodge around a bit though. In particular, watch out for all the needles heading your way!
With a sniper rifle you can drop enemies as soon as they appear. Pretty good fun while your ammo lasts, but the rifle is slow to reload so you'll have trouble keeping it up for long. With grenades you can sometimes take out enemies even before they've come into sight around that inner corner! You'll just hear the screams.
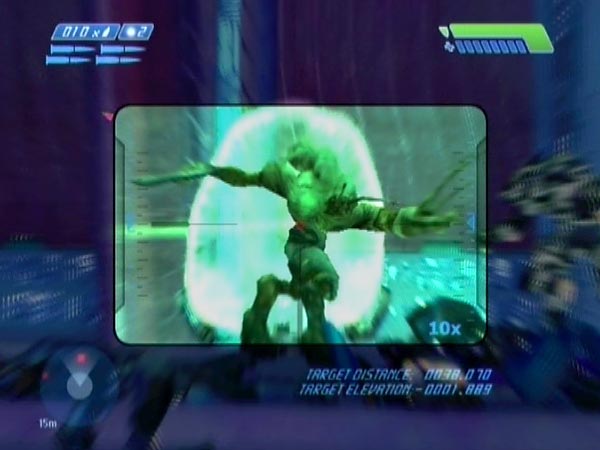
Platform survival
Associated movies
- BCM117 - Normal; Platform survival x3 (5:57)
Here's a fairly obvious thing to do. Run to the central platform and see if you can survive there against the covies and Flood. Actually they'll fight among themselves quite a bit of the time, but you can vary the difficulty for yourself by imposing weapon limitations (e.g. can you survive with just a plasma pistol and grenades?) or by obliging yourself to stand within a certain area (e.g. ahead of the control panel on the platform, so you're near the thick of the action). Lots of possibilities here.
If you want to start off with a nice clear area, eliminate the platform Elites before you go in. If you want things tougher though, only allow yourself to deal with them once you're on the platform itself. You better kill them quick, with those extra covies and Flood on the way!
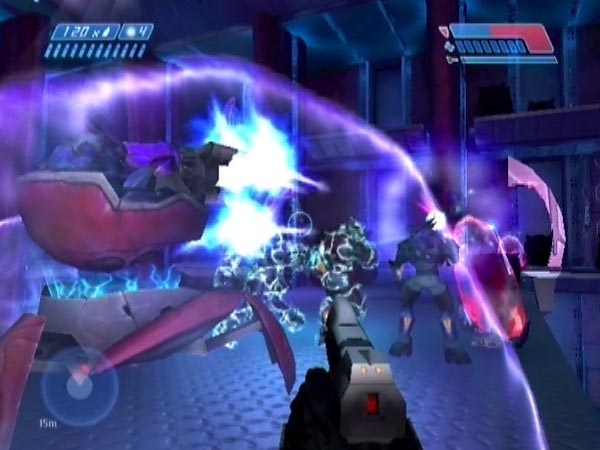
Chain reaction mischief
One thing I like to do is keep killing the arriving Elites in the same area, to build up a mass of loose grenades. Even Flood can contribute, for that matter. When things are looking agreeably catastrophic, take out an arriving newcomer or two in a colossal chain reaction. Hilarious, as long as you stand well clear. You'll have a lot of fun with this; it's practically an art form. I quite like bringing an Elite to his knees beforehand, timing things so he's just starting to growl at me when the reaction goes off. BOOM! Boy does he look foolish.
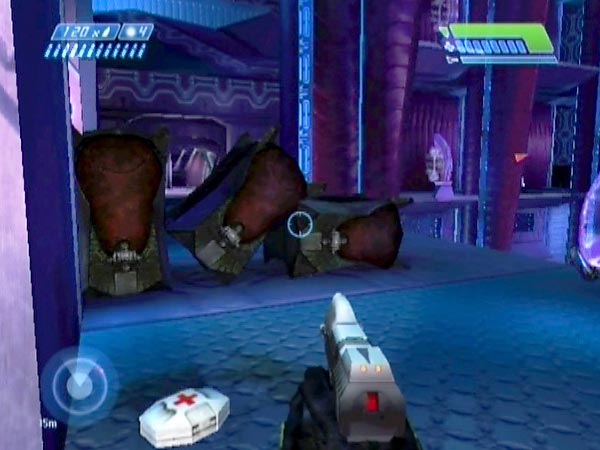
Shotgun ambush
On the left of the platform as you face your attackers, there's a pair of purple boxes, ideal for hiding behind with a shotgun. Just as an Elite is coming along, let him have it point-blank. BLAM! It's also a good position from which to blast Flood as they jump down. On Heroic (or Legendary if you're fool enough), it's hard to survive without using cover, so these boxes come in mighty useful!
Talking of purple boxes, there are quite a few of them around the action area. Instead of using them for cover, try jumping up on top to see if you can survive from there. Not a great idea on Heroic, but it can be fun on Normal or Easy.
Needle delight
The needler can be a lot of fun on the platform, due to the fact that Elites are approaching you without much room to dodge; plus they're often distracted by the Flood. See how many you can take out with pink chain reactions. Plenty of Elites and Flood will drop needlers on the platform, so you should be able to keep your needle supply up. Oh, and don't forget to needle those grunty fools at the back too, once in a while.
The needler is also good fun on covies that end up on ground level, firing up at you. They're nice stationary targets and the needles will pile in a treat.
No Shade please
It's probably a good idea to blast the Shade off the platform sometime before the fighting is in full swing, so you don't end up accidentally yanked into it when trying to reload. I hate that. On the other hand, I suppose you might like to hop aboard and plaster everything with pink plasma. Personally I don't enjoy using Shades much though, as they're so wildly imprecise and you can barely see your targets once you start firing.
Behind the line
For extra challenge, decide on a line past which no Elite reinforcements are allowed to come, and see if you can keep them from crossing it. For example stop them reaching as far as the control panel.
Sandwich challenge
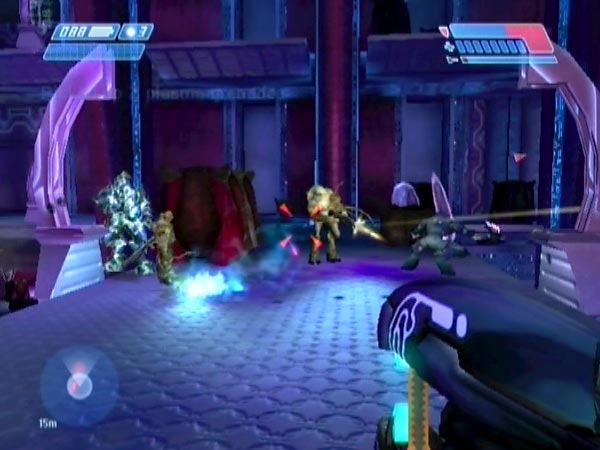
If you really want a workout, try this. Eliminate the platform Elites so they won't stem the flow of Flood, then head in and stand between the covie door and the platform. You're now in the middle of a nasty covie-Flood sandwich! Covies approaching from one side, Flood from the other. See if you can keep both factions back and hold your ground.
There's good scope here for using intelligent tactics in how you split your attention between the two sides. Make full use of your motion tracker to anticipate what's coming up.
You can vary the challenge by imposing weapon limitations on yourself (e.g. see if you can manage with only plasma weapons and grenades), or by obliging yourself to stay within a particular section of the catwalk, rather than allowing yourself to make use of the whole stretch (e.g. oblige yourself to stay about midway between the door and platform).
Stop the covies
Here's a general challenge with lots of variation. Station yourself somewhere in the trigger zone and see if you can stop the covies reaching the platform area. Or as an alternative, leave the Grunts and just try to stop the Elites - or vice versa. No cheating: you have to stay in the trigger zone so enemies keep spawning.
Varying the challenge
You can vary the difficulty according to where you stand and what weaponry limitations you impose on yourself. You could be somewhere between the covie door and the platform like in the sandwich challenge, and even be right by the door itself, taking a door ambush approach. Equally however, you could station yourself on the platform itself or somewhere beyond, if you think you can manage. For example, go well past the platform and use a sniper rifle and pistol to take down the covies from distance as they head along. You could also position yourself on the edge of the entry catwalk (you can just be inside the trigger zone there).
You can also choose whether to eliminate the platform Elites or not. If you leave them alive they'll potentially keep the Flood occupied, which (depending on your location) could be one less thing for you to worry about, though you might take occasionally fire from the Elites. But if you eliminate them beforehand, the Flood may be coming your way soon!
Back attack
Feeling a bit mischievous? Run to the covie door. Briefly move far enough right to trigger some covies, then move left out of sight. As covies emerge, they'll usually have their backs to you (unless you were slow to hide and they spotted you). Kill them with your method of choice. Step forward to trigger one or two more, back off again to be behind them, and kill them. Repeat until light-headed with cyborg glee.
If you like, just focus on the Elites, and let the Grunts run clear. That'll cut down the flow of covies (you'll just get the occasional Grunt when the Flood kill one), making it easier for you to control things and stay undetected. Another suggestion: leave the platform Elites alive to keep the Flood occupied.
Spawning detail
Here's a pertinent detail about the spawning. When you step into the trigger zone to get more covies, it seems that they only spawn at a certain rate (same with the Flood). If you don't stay in the trigger zone long enough, the game may not have time to restore the reinforcement count to 2 Elites and 2 Grunts. You can use this fact to deliberately just get one or two reinforcements each time, namely by stepping into the trigger zone only very briefly.
Needle surprise
One great way of taking out your victims is with explosive streams of needles. You'll have to get more needles occasionally of course, but that shouldn't be too hard with all the needlers getting dropped. You're liable to run into a few covies face to face while doing this, so things might get messy for a bit (a shotgun would be handy), but it shouldn't take long to get back into the rhythm.
If you want to go to town with this, you could actually set up a specialized save in which you've already got a pile of needlers with you on the left of the door, ready for use before any spawning has started. You could do it by delaying the starting checkpoint until you've moved needlers into position. The checkpoint will remain delayed while you keep jumping or while the game considers you under threat (from the platform Elites, in this case), as mentioned near the end of the section on creating a good save.
Mr Shotty gets busy
Cutting them down with plasma is good too. Or if you fancy bringing out Mr Shotty, that should work a treat. I suggest you watch your motion tracker to anticipate arrivals, then briefly step forwards so you can blast them real close.
Whacking and tagging
For more challenge, see how many you can take out with melee attacks to the back of the skull. Another challenge: see how many you can tag with plasma grenades.
Recess ambush
Eliminate the platform Elites and head in. Just before you reach the platform there's a recess in the wall on the left. Station yourself within, hidden from unsuspecting covie reinforcements. Watch for them on your tracker, and let 'em have it with a shotgun or whatever as they come into view. Actually I quite like letting Elites go past, then sending streams of needles into their backs as they head onto the platform. Of course, you'll also have Flood to deal with.
Platform pillar ambush
Possibly after eliminating the platform Elites, run to the platform pillar and stand on its far side, where you'll be out of sight of the reinforcement covies as they approach. From here you can have a great time blasting the Elites as they go past, and blasting the Flood as they land just ahead of you. Lots of loose grenades will build up amid all that carnage you're wreaking, so be sure to set off some nice chain reactions along the way. Grunts may occasionally start needling you in the back or whatever, but you'll soon fix them eh?
Corner shield fun
Run to the central platform and hide behind the stationary shield at the back left corner; there's just enough room to squeeze around behind it. From there you can enjoy watching the covies take on the Flood, and listening to the Grunts' amusing cries as they stick it to the gurgling freaks. Those Grunts sound like they're really enjoying themselves! You can also sneak a few shots out past the shield if you like. You don't have much room but it's just possible.
You can potentially leave some or all of the platform Elites alive, so the Flood really get massacred to begin with. On Heroic you'd want an overshield if you want to get past all four. Once behind the shield, the Elites tend to lose awareness of you. They're real bright like that.
Grenade mischief
You can also have a bit of grenade fun from behind the shield. For one thing, you can lob a plasma grenade so it hits the platform pillar and drops down to where the Flood land, to blast them. Another idea: bounce a grenade off the ceiling so it comes down among the Elites.
Entry catwalk fun
Maybe after eliminating the platform Elites, go to the very edge of the catwalk somewhere near your entry point (staying well away from the covie door). You're actually now just far enough forward that you're in the trigger zone. From here you can enjoy watching the proceedings, and attacking covies and Flood as they fight among themselves. All weapons have enough range, including the needler, but the most obvious choices would be the pistol and sniper rifle. The high shot speed of the plasma rifle makes it another good choice.
You might come under fire from Elites on the platform, and on Heroic that's nasty; but you can always take cover for a moment until they're occupied with Flood again.
Grenade mischief
You can have fun throwing grenades too, maybe setting off chain reactions. Plenty of loose grenades tend to build up near the platform pillar where the Flood land. One thing I enjoy doing is bouncing a frag grenade off the back wall of the hangar, to then land among covies and Flood fighting near the pillar.
Flood shoot
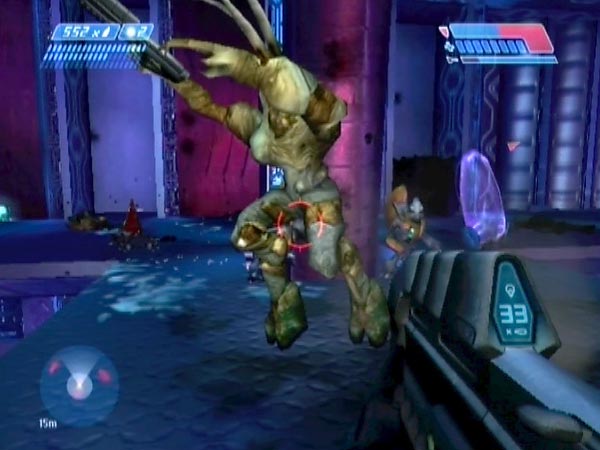
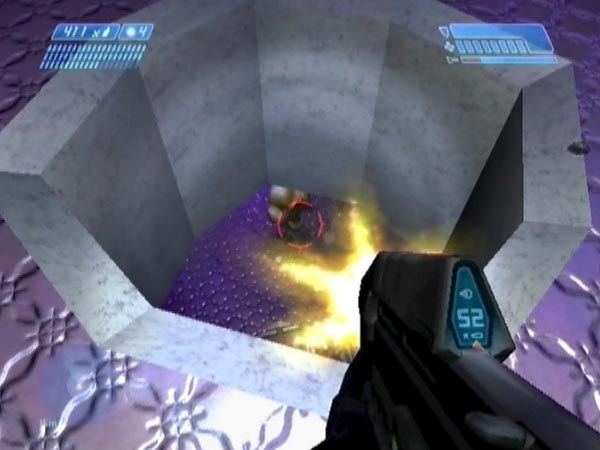
One little challenge you might like to try. Armed with a pistol, see if you can kill or at least disarm Flood, before they land on the platform.
Nibbled covies down below
If a covie (probably an Elite) ends up down on the ground below, he'll potentially get attacked by the spores that were originally trying to get at the platform Elites. It's fun to watch the swarm close in and start nibbling.
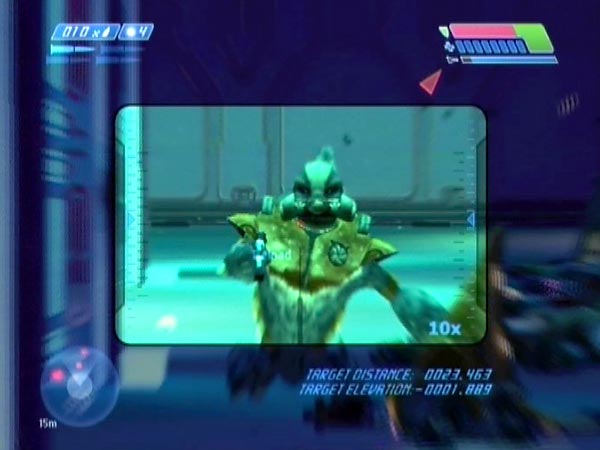
Sniping from the far end
Armed with a sniper rifle and pistol, run past the platform, right up to the far end of the area, and enjoy some sniping. The pistol has enough range for enemies on the platform, and is also handy for stopping any Flood heading your way. Most of the time you'll be unaccosted though. If you move to the edge of the catwalk, you can just see where the Flood land.
Creating a good save
Ok, here's where you invest a little of your valuable cyborg time to create a deluxe save in which you'll start off with a handy weapons stash so you can vary your combo each time you head into battle. You'll also have a healthy overshield if you want one. The battle can be rather tough on Heroic (depending on how you play it), so I recommend using Normal to begin with, or even Easy. You can see the work demonstrated in BCM118.
Acquire shotty and sniper rifle, and reboard the ship
Get a shotgun early and build up its ammo as you go, so it's well stocked by the time you reboard the ship. You can get one before you jump off the ship, and if you got the active camouflage you can run straight through the early areas to save a bit of time.
Also get the sniper rifle along the way. With the camo it's possible to reach almost all the way to it without being held up, if you want to. There's no extra ammo for it (as far as I know), so save its 18 rounds for the hangar battle. Preferably also save your frag grenades, in case later Flood don't drop enough to allow you to stock up fully for the battle. Continue on and reboard the ship.
Get more weapons before the hole
Shortly after boarding, you're looking down on a room with a Wraith in it, and there's an exit passage leading to a hole you'll later drop through. Before the hole, get another shotgun so you end up with a full one for the hangar battle plus a well stocked one (ideally 30+ shells) for the remaining set-up work. Also try to get a full pistol and a full plasma pistol as you may not have opportunity later.
The specific strategy I recommend is to first go to the end of the high walkway where there's often one or two shotty-wielding Flood, then drop down into the Wraith room and make it safe, then tackle Flood down the exit passage. If you're still short of shells or pistol ammo after all this, backtrack up the passage you skipped, to a place where Flood drop from the ceiling. You can get ammo there and leave when you have enough. And by the way, there were some full plasma pistols by the two carriers just after you boarded the ship. You can always go back and get one.
Note: You don't really need to bother getting a full plasma rifle, needler and AR yet, as you'll almost certainly be able to get those later on (whereas shotguns and pistols can be patchy).
Clear the way, get the overshield and get down
Looking down through the hole, try to pop the carriers and spores to make it safe, then drop your extra weapons down (you might also like to have a spare plasma weapon for taking care of any carriers or spores). Go back and apply the overshield if you want it, then drop through the hole. From here on, try to preserve your overshield for battle. With careful play you can keep it fully intact, even on Legendary. It's worth saving a checkpoint hereabouts, to consolidate in case anything turns out bad.
Move on
Around the corner there are some Flood who'll fight with nearby covies. Finish off the survivors and scavenge for additions to your weapons stash. You can probably get a full needler here for starters, though you can also probably get one from the ceiling attack later.
Then around the next corner just after a handy checkpoint, there's a second group of covies. They're not very alert, and a couple of plasma grenades will often wipe them out. I normally try to tag an Elite.
Deal with the final Flood
At the bottom of the passage down to those Elites, you'll trigger some Flood. Some spawn behind you around a corner, but the bigger threat is the mass that will drop through the ceiling just ahead. Here are two methods of tackling things, but I recommend the first.
Method 1: Hectic blasting (probably your best bet for keeping your overshield undamaged). Preferably armed with a well stocked shotgun as primary, and plasma weapon as backup, run past the ceiling opening and turn around. Blast the Flood as they come down or while they're recovering from the drop. You can use the corner for cover if needed, but don't allow yourself to get forced back far through the door else you might trigger the hangar checkpoint prematurely. Watch out for spores which spawned further back but which may get attracted by the ruckus. Afterwards, check for any weaponry you want for the battle, before the game makes it vanish - which can happen as soon as your back is turned. These guys drop lots of needlers and full plasma rifles plus a few ARs, so it's a good bet for getting those three weapons. Then go back the way you came, to deal with another group of Flood. There's just a handful, except for a possible mass of spores. The safest way is to surprise them with a sneaky grenade, as long as you can replace it afterwards. They'll never even see you. Otherwise, try to instantly pop a carrier if one is present.
Method 2: Bait and retreat (slow but enjoyably clinical). This method is especially useful if you haven't got a well stocked spare shotgun. Advance until you hear Flood starting to spawn (there'll be some ahead and some behind), then retreat back around two or three corners to safety. When Flood come your way (you may need to fire a shot to get their attention), pick them off as they round a corner, so they don't even get chance to shoot. Plasma weapons and the pistol are ideal for this. You should be standing at the next corner back, for cover. When it's clear, advance to trigger the next batch. Repeat until spawning stops.
Advance your weapons and delay a checkpoint
Finish collecting for your weapons stash, and move the weapons forward. Try to avoid bodies as you do this, because weapons have an infuriating habit of bouncing off them and disappearing through the floor. If there are a lot of bodies it can be worth grenading them clear.
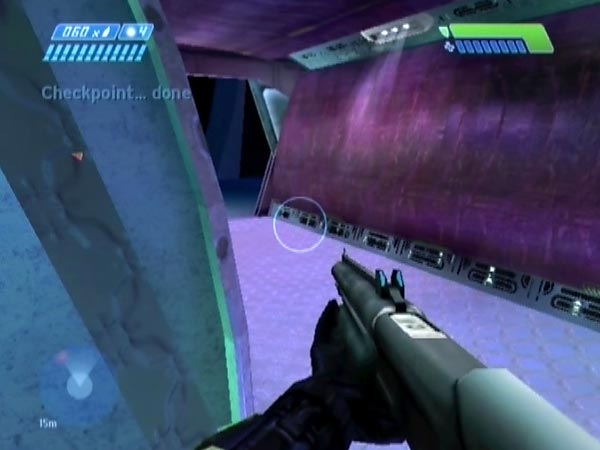
Through the door past the ceiling attack, there's a loading point about a third of the way along the final purple panel, and you'll trigger the 'hangar checkpoint' a step or so beyond that - just past halfway along the panel. Throw your weapons across the checkpoint line so they're near the corner, then cross the line yourself but delay the checkpoint with jumping (though it can also get delayed by the game considering you under threat from the Elites, who'll probably spot you shortly).
If you'd like to advance the weapons further, do so. It's a bit fiddly when you're having to keep jumping, but there's no rush. I like to have them near the end of the recess in the left of the final bit of passage. The recess is handy as cover from the Shade, and I like to be there as my save begins. Whether you advance your weapons or not, end up carrying your desired starting combo.
Finish off
Just past the end of the recess in the final bit of passage, you'll trigger a few lines from Cortana and Keyes followed by about four minutes of music. The speech would get repetitive, so eliminate it by continuing your checkpoint delaying until it's over. If you also wish to eliminate the music from your save, continue delaying until that's over too.
When you've done all the delaying required, get the checkpoint and save. But by the way, it's good to have your flashlight fully charged in case you want to use it. It's pretty dark in that hangar! If you expect to be using it routinely you may like to switch it on in advance, just before getting your checkpoint.
Eliminating platform Elites
If you want to eliminate the platform Elites before you start triggering newcomers, it can be quickly done with a sniper rifle of course. But if you don't have one or you want to save your rounds, it's also easy with a plasma pistol. Wait for an Elite to man the Shade, then take him down with a few bursts of fire. Repeat until they're all dead. I like to have an extra plasma pistol in my weapons stash for doing this, so I can retain a full plasma pistol for the main battling. You can do it from the entrance passage before entering the hangar, and there's a recess you can duck into when Shade fire comes your way. You could use a similar tactic with a pistol, or even a plasma rifle.
You could also use grenades. On Normal, two plasmas can quite easily do the job, though you might need to revert for a few attempts before managing it. A shortcoming of using grenades however, is that an Elite may dive off the platform or get blown off alive, and remain able to attack you later.
Getting rid of the Shade
If you want to get rid of the Shade, do it by landing a grenade nearby. Aimed carefully, a grenade can even blast the Shade off without killing any of the standing Elites, if that's all you want.
Comment on the design
This hangar situation seems oddly designed, as it's so easy to just run past the platform and onwards to safety. After all, there's no mission reason to hang around; you don't have to go onto the platform or anything.
Box diversion
However, one thing I notice is that as soon as you enter the hangar, there's a line of purple boxes blocking most of the catwalk. It's easy to jump over, but many players are likely to go around. In doing so, you'll be forced close to the catwalk's edge and you may well enter the trigger zone briefly. That triggers some covies and Flood, and you've now got more of a fight ahead of you if you keep advancing. So maybe the boxes were put there deliberately, to encourage such early spawning.
Missing Marines?
Here's another idea. Perhaps at an earlier stage of design, you were going to be able to bring in some Marines by operating a control panel on the platform, like you do in level 3. That would give you reason to hang around, and you'd then find yourself in a big fight. Perhaps Bungie then decided against the idea of having Marines, but didn't bother altering the spawning dynamic. As such, we ended up with the current odd situation, where the spawning is not necessarily going to pose any threat.