Grunts versus Flood
Posted January 7th 2007, expanded November 29th 2013
Associated movies
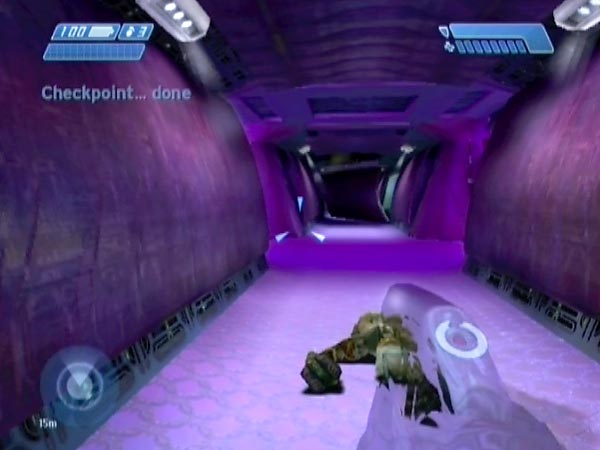
Here's some innocent fun for Grunt fans. To set things up, start the level and run straight ahead. When you go through the door, a checkpoint is triggered but is initially delayed by the proximity of a Grunt being chased by an armless Flood. Kill the pursuer, letting the Grunt continue. A well-timed frag can take care of this efficiently (throw it just after you see the Grunt), ensuring that the Flood won't get up again.
Turn left, get cloaked, then advance and get the checkpoint. If you didn't dawdle, you'll typically get it a few seconds after getting cloaked, which is fine, but I'd suggest delaying it a little longer with a jump or two so you get it closer to the corner, e.g. just past the start of the final purple side-panel. That way, each time you revert later for another fight, you'll have a bit less running to do to reach the scene. Don't expect to get it really close to the corner though, as enemy proximity would tend to keep the checkpoint delay going.
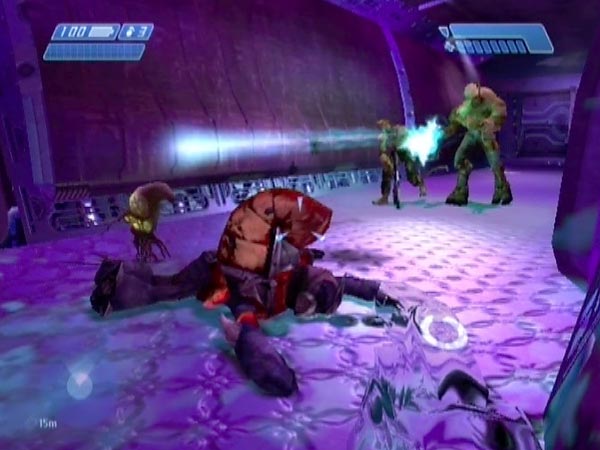
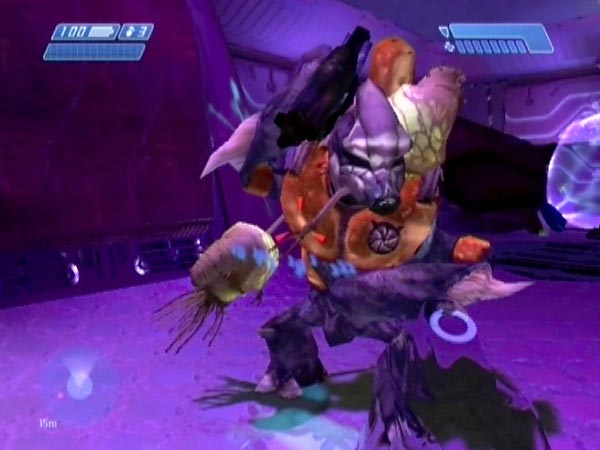
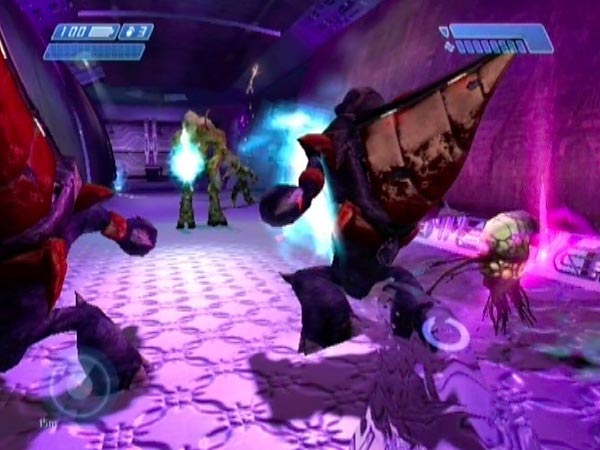
Around the corner you'll find four Grunts near a stationary shield and overturned purple case. Their Elite leader has been killed. Also lurking somewhere are two combat Flood armed with a shotgun and plasma rifle, plus a carrier form and a few loose spores. The fun is simply to watch the resulting fight while safely cloaked, though you'll obviously want to avoid brushing up against anyone or standing in a line of fire else you might get rumbled. When it's over, you can revert to your handy checkpoint for another round.
However, bear in mind that the initial Flood layout varies considerably from set-up to set-up. Sometimes the main Flood may spawn very close to the Grunts (even in their midst), which isn't ideal because the fight could be under way before you're close, and also the Grunts are likely to get taken by surprise and quickly overwhelmed. It's better if the combat Flood and carrier are intially down the corridor. Usually they're hidden around the corner, with just a few spores in sight. If you don't get that sort of arrangement, you can just try setting things up again; it doesn't take long.
UPDATE: My description is based on PAL Xbox Halo, but Captain Spark reports that in the PC version you don't always get all the Flood and Grunts. I can only suggest that you keep setting things up until you do.
Fight initiation
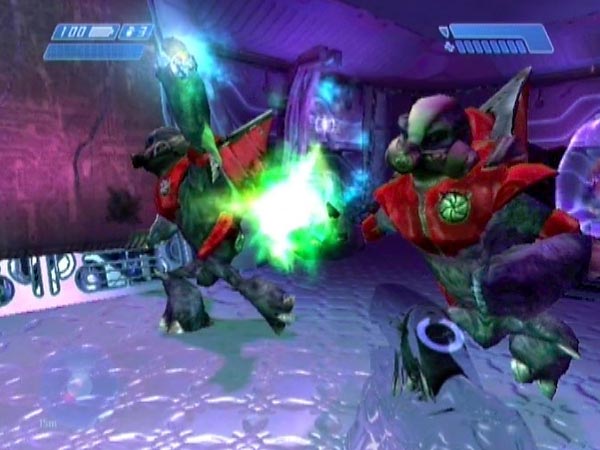
Usually the Grunts will start attacking the spores, which then attracts the combat Flood; but if things are taking too long to start (the Grunts aren't very observant, and the Flood are no better), you could try getting things going by lobbing a grenade down the corridor. You might even want to help the Grunts out a little, to raise their chance of victory. Unaided, the Grunts are likely to lose, except on Legendary where their aggressiveness gives them the edge (as long as the Flood haven't spawned close by). They're especially vulnerable to spores.
Warning: A few metres along the corridor past the Grunts, you'd trigger a skirmish between some other covies and Flood beyond the next door, across the gaping hole. That would tend to distract the participants of the current fight, so it's best not to cross the trigger line. You can easily determine where that line is. Your tracker will show some fresh red dots when you reach it.
High comedy
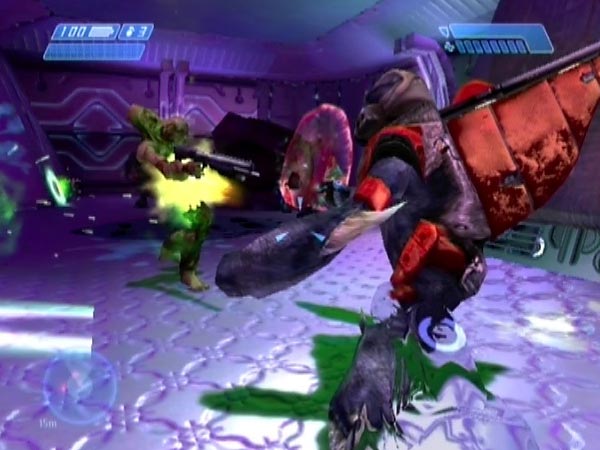
I've had a whole lot of fun watching this foursome in action, and I urge all gruntaholics to give them a visit. The fighting can be quite hilarious. One of the funniest things is seeing Grunts get blasted by a shotgun at close range. BLAM!
They also get nibbled a lot by spores, which are a major threat. Actually, sometimes when a Grunt is being nibbled, he can end up being killed by friendly fire when other Grunts target the spore - which they'll do without hesitation. But from what I've seen, I don't think their fire can kill an attached spore. Loose spores aren't just a threat because of their nibbling though. They very often distract Grunts from paying proper attention to the advancing combat Flood, with potentially fatal consequences.
Grunty grenade work is a great source of comedy, except on Easy where I'm not sure they throw at all. The Grunts do a lot of diving about to avoid their own grenades, and they'll even target spores. Sometimes a combat Flood will get tagged and run at the Grunts - and you can imagine what happens next! I've also seen spores tagged as they're closing in or leaping; and again the result is highly amusing. In one freaky incident, a Grunt threw a grenade which tagged an incoming spore and exploded beneath the thrower a few moments later, blowing him up through the hole in the ceiling never to be seen again. Neat trick!
Sometimes a grenade gets thrown against the side of the corridor and explodes early, maybe killing the thrower. I've often seen Grunts throw at no discernable target like that at the start; it's mysterious. In some cases I think they may be targeting Flood seen 'through' the walls, but in other cases I wonder if the thrower has simply failed to rotate to face what he's targeting (often a spore, early on).
Victory lines and more
A lot of the appeal and comedy lies in what the Grunts say. When they come out on top you may hear an amusing victory line, some of which you may not have heard before as they're pretty rare in standard play. One example is "We'll all get medals for this!" and another is "Yeah, nice job guys, cold fusion on me!", both of which feature in BCM87. Actually, such a line doesn't necessarily mean that all the Flood are wiped out; it seems to just signify some sort of local victory. There could still be some Flood not spotted for example. In particular, the carrier form is often around the corner at the far end, though it may waddle into view after a while.
Difficulty levels
The fight varies considerably on the various difficulty levels. Here's my rough analysis for the typical situation in which the combat Flood are initially at the far end of the corridor (usually hidden around the corner), which gives the Grunts a decent chance of striking first.
On Easy you can expect the Grunts to lose almost every time, and I'm not sure they use grenades at all (I never saw it). On Normal however, they readily throw grenades, greatly raising their chance of victory, though I think the Flood are still firm favourites. The Grunts aren't very effective with shooting once the enemy gets close, so their main chance of victory rests on early grenade work. Quite often a Grunt will lob an early grenade at a spore, and the combat Flood will get caught in the blast, having been attracted from around the corner by gunfire.
On Heroic the Grunts are more aggressive still, but I think the Flood still have the edge. On Legendary however, the Grunts are at their most aggressive and accurate, which helps them tackle spores in particular - a major threat. They throw a lot of grenades, which often helps them wipe out the combat Flood. Fights are usually short and the Grunts are favourites to win. You mostly get red Grunts (it's randomized to some extent), whereas on lower difficulties you get progressively fewer reds on average. The split between red and orange seems to be pretty much even on Heroic.
Conclusion: For the best experience use Normal or higher; and if you want lots of grenade throwing and unaided grunty victorys, use Legendary.