Two door battle
Posted June 15th 2010, expanded March 14th 2013
Associated movies
- Introduction
- Hiding defence
- Recess defence
- Central defence
- Wipeout challenge
- Pillar defence
- Disarming defence
- Up in an outlet
Introduction
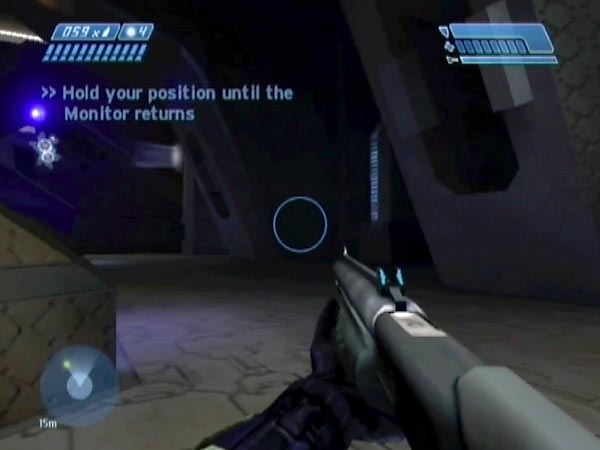
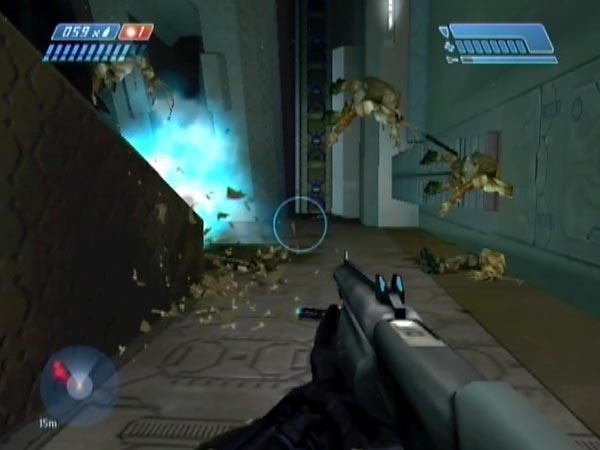
Near the end of the third floor you get trapped between two doors - no thanks to the Monitor - and have to contend with a mass of Flood spawning from two outlets. It's a nasty situation and seems designed to be the toughest challenge in the whole level. On this page I'll give some ideas for tackling it, including my wipeout challenge.
Attack analysis
First, a few words on how the attack works. After getting a checkpoint near the second door a message on the screen says "Hold your position until the Monitor returns", and pretty soon spores and combat Flood start spawning from two outlets. For each difficulty level there seems to be a fixed delay before the door opens. Measured from when combat Flood first land in the outlets, which occurs about 15 seconds after the message, the delay on PAL Xbox is about 52 seconds on Easy, 70 on Normal, 77 on Heroic and 88 on Legendary, but for NTSC/PC I think it's about 43, 58, 64 and 73. You could think of that time as your main 'hold out' period - after which the pressure would soon alleviate.
In regard to the combat Flood, the spawning seems to have a replacement dynamic in which the game tries to maintain a certain number; 4 on Easy or Normal, 6 otherwise. So each time one dies - and I mean properly dead with no reanimation pending - another will spawn (randomly in either outlet I think). Except, the supply is limited, which means that if you kill them fast enough, your allotment could actually run out before the door opens (something you may not have realized before, as you have to kill them very fast). The allotments look like being as many as 30 combat Flood on Easy, 40 on Normal, 44 on Heroic, and 51 on Legendary. If you don't get through the allotment early, spawning will stop when the door opens - which namely occurs with the message "Follow the Monitor to the Index".
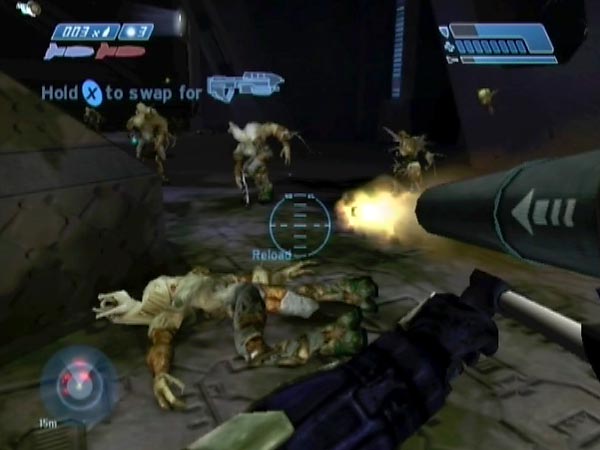
Combat Flood appearing from the left outlet have plasma rifles and pistols, while those on the right have shotguns and ARs, making them considerably more dangerous. However, sometimes a Flood has trouble leaving his outlet, which can raise his threat value (especially if he has a pistol) because he'll fire rather than inefficiently run about.
If Legendary is anything to go by, the spawning doesn't favour any particular type of Flood. In fact, from what I've observed, each of the four types is likely to make up approximately a quarter of the total (give or take a few), so I have the impression that the game actually makes an effort to keep things fairly balanced.
Separately there's some sort of replacement dynamic going on with spores too, except I think they spawn in groups rather than individuals (it's hard to identify the situation more closely than that). They stop spawning when you get through your allotment of combat Flood or the door opens, whichever comes first. Spores are especially numerous on Legendary.
More about allotments
For a given difficulty level, there may actually be some minor variation in the allotment of combat Flood. On Heroic I suspect you either get 44 or 43, based on my close inspection of recorded plays in which I count the number of times a Flood is seen losing his weapon - which is how best to try and count Flood here. Sometimes when counting 43, it could be that the allocation was actually 44 and one of the Flood lost his weapon due to friendly fire out of my view, but I don't think that's always the case. I think there's genuinely some variability because I tested things on Easy where it was easy to be sure there was no friendly fire going on, and I sometimes got an allotment of only 29 instead of 30.
As for Legendary, I suspect you either get 51 or 50. On Normal however, I've yet to see any suggestion of variability. Over the course of several battles I kept counting 40 weapon losses.
Spare weapons for a flexible save
It's possible to move some spare weapons into the battle area before triggering the checkpoint near the second door. This way you can form a nice flexible save in which you'll be able to tackle things with various weapon combos. Each time you revert, you'll have time to switch weapons if desired. For that matter, you'd even be able to switch part way through the battle.
Hiding defence
If it's stealth you're after, you can actually just hide and wait until the second door opens, at which point the few Flood that have spawned will run off to attack the waiting Sentinels. You can hide in the long recess or short recess at either of the doors, or stand behind the pillars between the outlets. If any spores turn up for a nibble, don't fire at them or you'll attract combat Flood. Just use melee.
This hiding tactic makes things very easy, but also very dull of course. So dull that I wonder whether Bungie knew about these hiding options. I suspect they intended the Flood to spot you, so you're obliged to fight for your life. As such, I tend to think of the hiding tactic as a bit of a cheat, like taking advantage of a glitch in the design.
On the other hand maybe they did know you could simply hide, but decided to leave things like they are anyway. Short of altering the layout to eliminate hiding places, they would've had to make combat Flood able to home in on you without having been alerted, and maybe that was undesirable as it's not normal Flood behaviour.
So, a boring and totally unchallenging tactic, but it's there if you want it. Having got this out of the way, let's move on to something more engaging. I want action!
Recess defence
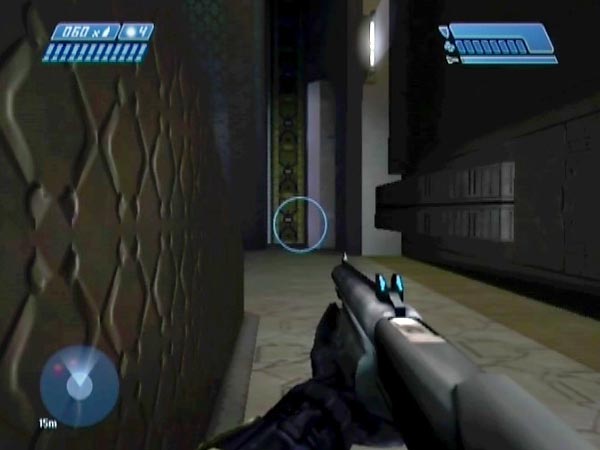
Here's what I find the best defence if you're not interested in hiding. Go to one of the doors - preferably the second one - and defend from within the long recess. You've got a great defensive position, with enough leeway for falling well back when necessary.
Shotgun and plasma pistol
On Legendary I favour a shotgun, with either a plasma pistol or pistol as backup - though it's quite possible to survive without ever using a backup. I prefer a plasma pistol as you don't need to reload it and it's better for popping spores. Staying close to the wall for cover, you can use the shotgun to blast enemies as they near the corner or come around it. Try to get them before they fire a shot. If you're at the second door they have to come around a bit further because they have their weapons in their right hands; plus you're right-handed yourself so your gun gets a sight of enemies sooner. Those two advantages are why I recommend defending from the second door rather than the first.
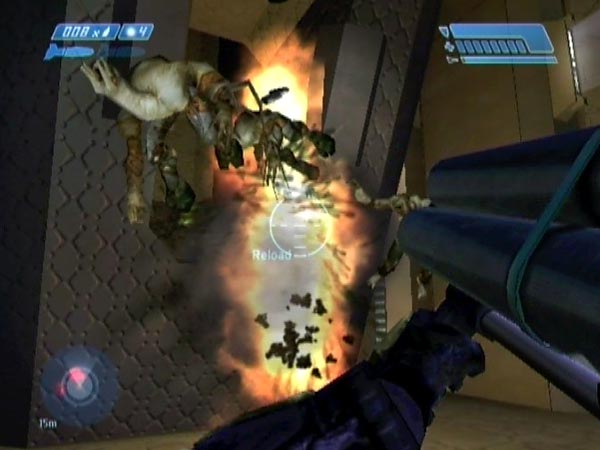
You can also blast Flood as they jump down from the nearest outlet, or even while they're still in the outlet itself; and grenading them at those locations is another option of course. Every now and then, use a grenade to try to take out lots of Flood as they're near the corner, and potentially to buy yourself a bit of recharging or reloading time. Take every spare moment to keep your shotgun reloaded, ready for the times when things get really hectic.
At times you may get forced back deep into the recess by the pressure, and in this case it's good if you've got a frag grenade handy. Try to keep a few in reserve for this. When you use a grenade be very careful to stay well back. There are often loose grenades around and you could get caught up in a chain reaction you started yourself - and then you'll feel a right fool. In fact, preferably keep an eye out for such grenades and hoover them up as soon as you can to keep things safe. Also try to avoid accidentally tagging a combat Flood or spore, or you can end up with a fizzing grenade heading your way!
Rocket launcher
Rather than having a plasma pistol or pistol as backup, you might be interested in a rocket launcher. It's possible to have a full one if you want. It can provide quick relief in sticky situations, like when you really need to get your shield recharged. But it's dangerous. You'll need to be very careful not to fire it when spores are hopping around in front of you or when combat Flood are getting too close. It's also very slow to reload of course; so if you want to use more than two rockets you'll need to pick your reloading time well. It could be a good idea to throw a grenade just before you reload, to try and make sure you won't be coming under fire before you're ready again.
In the past I think I usually took a rocket launcher into this encounter, but eventually I realized I could do better with shotgun and plasma pistol - which also freed me from the concern about blowing myself up! However, the launcher is plenty of fun of course.
Spore trouble
Crucially, don't ignore spores or it could be the death of you. It's important to keep your shield as healthy as possible. Any time you've got a moment's relief from combat Flood, shoot or whack spores to try to keep your area clear. I'd normally be using a plasma pistol for that, but there's usually no shortage of shotgun ammo so don't feel bad about using up shells just to eliminate a few spores. Keep moving around so they find it harder to get you. The most annoying thing about these little nibblers is that they can come up over the buttress you're sheltering alongside, so you can find yourself suddenly getting hurt from the side or rear, and it's easy not to notice that for a while when you're busy fending off combat Flood.
Central defence
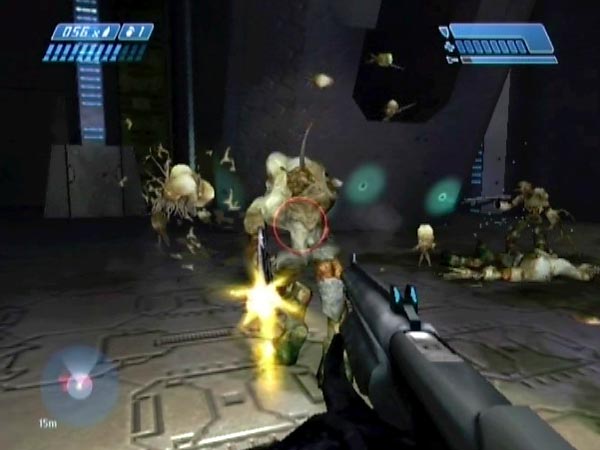
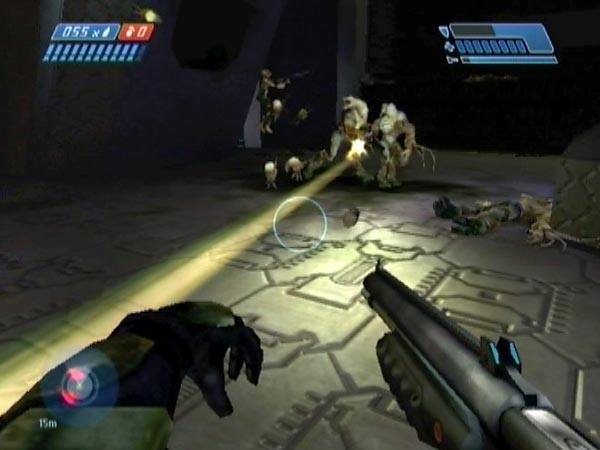
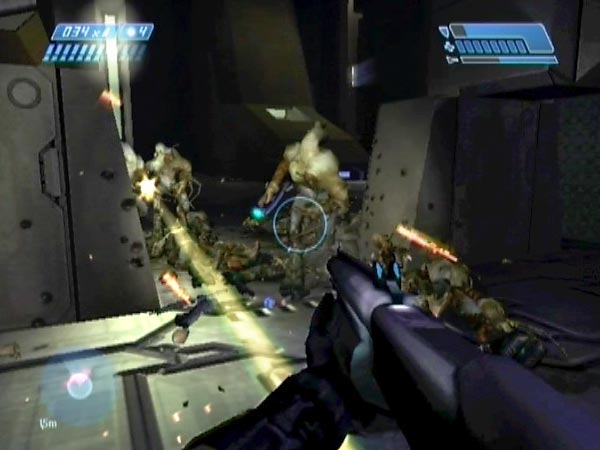
For considerably greater challenge than the recess defence, try defending out in the open, predominantly in the central area between the outlets, forbidding yourself from sheltering in a recess or behind the pillars. In particular you can run back and forth trying to blast Flood with a shotgun before they've had much chance to fire. You can use grenades too (throw, then switch your attention to the other side), and rockets if you've got a launcher, though the slow reload time can make using the launcher quite tricky.
On Heroic or Legendary you have to work like crazy to stay alive with this defence, but it can be a heck of a lot of fun if you find it manageable. Check out BCM71 for some example action.
For added challenge you could forbid yourself grenades and just use a shotgun. Survival without grenades is possible even on Legendary, though you'd have an extremely tough time of things; not much fun perhaps, if you keep getting slaughtered. Indeed, Legendary can be aggravatingly hard even with grenades, so you might be best off using Heroic - at least to begin with.
Another way to raise the challenge is to use up the medkit beforehand so you won't be able to restore lost health bars in battle (or just make a point of avoiding the medkit). Also you could eliminate the two frags nearby.
Shot-blocking spores
With this defence you may not need to bother much with spores because for one thing you're potentially moving around so much that they can't easily get a nibble unless you run straight into them, and for another, enemy fire is likely to pop quite a few. On Heroic or Legendary you'd be hard pressed to find any time to spend on spores anyway!
That said, pop them if you can. Health preservation aside, spores can block your shots, so that's another reason to try and get rid of them. Especially on Legendary, where they're significantly more numerous and troublesome than on Heroic. If your shot is likely to be blocked however, you could try jumping to get a clearer view of your target.
Wipeout challenge
As mentioned in the introduction, there's actually only a limited supply of combat Flood here. The 'wipeout challenge' is to kill your entire allotment before the door opens - i.e. before you get the message "Follow the Monitor to the Index" - though you also mustn't get killed by spores in the closing moments. You officially achieve 'wipeout' when you see the final combat Flood starting to go down. You can moreover try to see how fast you can achieve wipeout, namely checking how much time you still had left. On PAL Heroic I've done it about 25 seconds left, while on Legendary I've done it with about 17 seconds left.
See if you can manage the challenge on your chosen difficulty level. It's possible even on Legendary, but that's pretty severe and perhaps the sweet spot is Heroic.
You can award yourself bonus points if you also manage to finish off the spores before the door opens, but I chose not to make spore mopping-up part of the basic challenge as that's a relatively minor thing. It's more satisfying to be focused on the combat Flood.
The higher the difficulty level you use, the more combat Flood you have to kill, but you also have more time. Interestingly, things balance out pretty closely so that in each case on PAL, you've got about 1.75 seconds per kill to achieve wipeout (calculated as p/A where p is the period from when they land in the outlets to when the door opens, and A is the maximum allocation). On NTSC/PC I believe it would be just under 1.5 seconds per kill, assuming you get the same allocations as for PAL (which I expect is the case). So even on the lower difficulties, you still need to kill fast.
Restrictions for varying the challenge
You can make things tougher by imposing restrictions. In particular you could limit grenade use in some way, such as using frags only, or 4 grenade throws only (something which will really make you pick your targets well), or starting with no available grenades (i.e. using dropped grenades only), or using no grenades at all. Another restriction you could adopt is to forbid the use of medkits.
'Shotgun only' can be a lot of fun, and it's viable even on Legendary, on PAL at least; see BCM73. I've done it with 8 seconds to spare, though it took hours of practice and tactical honing before I succeeded at all. I'm not sure whether it's viable on NTSC/PC, because as well as having less time, Flood move quicker, making them harder to cope with.
Tactics
In order to kill combat Flood fast enough, you'll probably want to be around the central area quite a lot to try and maximize the rate at which you can acquire targets, especially if using a shotgun only. As such, you'll probably be doing something akin to a central defence, except that there's no rule against taking cover in a recess or behind a pillar. That said, you won't have a lot of time for taking cover (not complete cover anyway), because any time you're not busy killing combat Flood you'll be losing precious seconds.
Most of your work is probably going to be done with a shotgun, and you should try to make each shot count. A key skill you'll need to hone is that of rapid target acquisition, so you can fire almost non-stop. Try to blast Flood close and be accurate, so as to do the most damage and hopefully kill them outright. If they merely go down to later reanimate, taking a further shot to kill, that would be extra time spent on the same guy, so it's inefficient. For the same reason, it can be worth delaying a shot to allow you to close in for a killing blast, rather than doing lighter damage from further away. That said, a distant blast can sometimes be worthwhile for disarming or stunning a severely threatening enemy.
As much as possible, try and kill Flood before they get much chance to fire. Watch for the opportunity of blasting one as he's coming down, or just after he's landed. If you're not ready to fire your next shot as he's landing, consider moving around behind so he'd have to turn before he can open fire.
You don't have to wait for Flood to reach the ground of course; you can attack them while they're still in an outlet. However, try to make it decisive if you do. If a Flood reanimates in his outlet, he'll probably just stand around there and may well cause a blockage. Blockages may be good for your health, but in the wipeout challenge you really don't want them. You want enemies to keep flowing into your gun sight. Even a healthy Flood can have a problem leaving his outlet if he's on one of the side-slopes, and in that case you should try and deal with him quick. Not just because he might cause a blockage but also because from up there he'll concentrate on firing, which can make him much more of a danger than if he were down on the ground running about.
On Legendary, spores are a serious problem, both as a health issue and in the way they can block your shots. It can be worth delaying a shotgun blast to try and get a clearer shot at your target. You could also try jumping, to briefly get above them. In general, don't spend time blasting spores, as that's using up valuable time. Do your best to work around them, staying focused on attacking combat Flood. That said, you could occasionally blast them when you can't see a better target.
Pillar defence
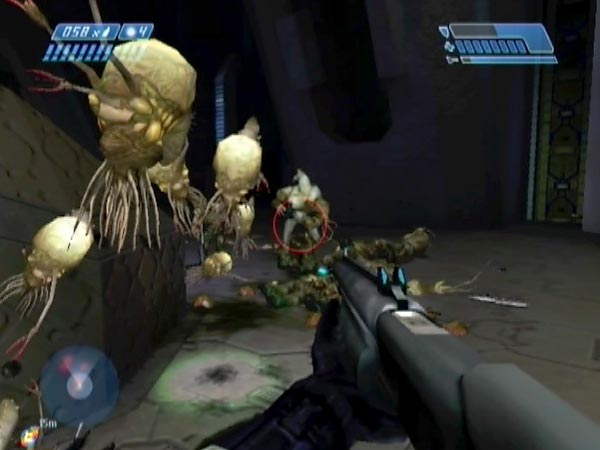
Between the two outlets is a shallow recessed area with two pillars. Try defending from back there.
The pillars can make for pretty good cover as you vary your attention between the Flood dropping down to your left and right. If you keep moving around, you can make it hard for them to get a good shot at you. But on the minus side you've got enemies coming from two directions, and nowhere to retreat to. That can make it very hard to recover if things start going bad. There are two medkits on hand if you want them, but personally I prefer to eliminate them beforehand (when setting up) for added challenge, and also because I don't really want my view going white in the middle of a close-quarters brawl.
It's possible to do some medium-range work while Flood are still distant, for example with a pistol or grenades, but you may prefer to instead focus on repelling them at close quarters with a shotgun. If you do that you can end up with a mass of bodies on the ground just in front of the pillars, and afterwards you might like to set off a blast there to cause a spectacular chain reaction among the many loose grenades.
Enemy control
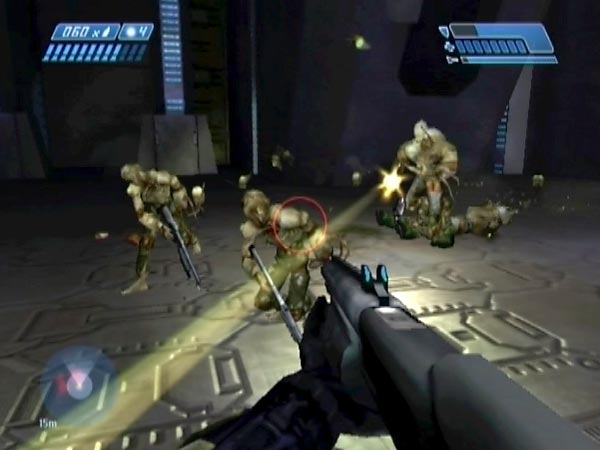
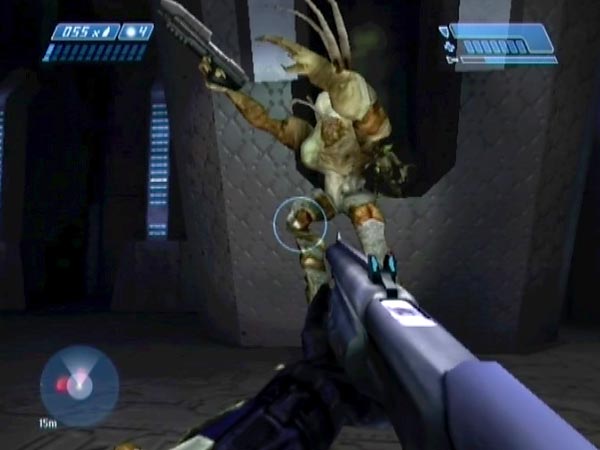
Actually the enemy attack can be controlled to some extent, as I eventually realized. If you stand near the middle or at either end of the recess, the Flood will try to approach you via the opening ahead of you. They don't have the sense to approach via either of the other two (though they may still shoot through one of those gaps if they get a line of sight while advancing).
That creates a useful bottleneck dynamic for you to exploit if you wish. Instead of moving around a lot within the recess, something which leaves you open to Flood entering via any of the three openings, potentially leading to trouble and chaos, you could try to fend them off via just one of the openings. In the second picture here, you can see me using the opening on the right.
Disarming defence
In the introduction I described the battle's replacement dynamic, in which the game tries to maintain a certain number of combat Flood. A disarmed enemy still counts as one of the number, and is obviously less of a threat than normal; so if you ever see one of those, you might like to leave him alone for at least a while, to focus on the guys with guns instead. If he lacks a melee arm he'll be no threat at all of course, except in the minor regard of possibly hindering your movement; so you could make a point of leaving him alone permanently, reducing the number of threatening combat Flood by one and easing the pressure a bit. These general considerations lead to the following idea.
The 'disarming defence' is to achieve a situation where you've only got disarmed combat Flood around, and then to simply run around evading them. This can also be treated as a challenge, though I think you'd need Normal or Easy to have a decent chance, because when I tried things on Heroic it was a real job to achieve the disarmed state and it was also tough evading swipes. As a second challenge, you could moreover try to get everyone minus their melee arm, so you won't even have to worry about getting whacked. Experiment with the best ways of getting Flood armless. All this is frankly more trouble than it's worth, if my experience is anything to go by, but you might have a bit of fun with it.
Up in an outlet
Here's a novel tactic that I consider more a bit of fun than a serious defence. Grenade jump up into one of the outlets. Flood materialize above you and land in front. They'll leap out, not seeing you until they're down on the ground, where you can blast them with a rocket launcher or shotgun or whatever. Of course, you'll also have Flood from the other outlet to deal with, and they'll take a pretty dim view of the proceedings.