More set-up tips
- Early rearranging
- Spare weapons
- Having the Wraith
- Having enemy Ghosts
- Having an enemy Banshee
- Adding a Warthog or two
- Checkpointing with the drop method
- Getting good rock geometry
- Modifying a save
- Skipping earlier stuff
Early rearranging
There are various useful things you can do via early rearranging, after skipping at the level's first bridge (having either grabbed a Banshee or done a descent trick). I'll list the main options here, and for some you can find elaboration in subsequent dedicated sections.
Advance local changes
The main routine mentioned various optional actions, but you could so some of those things in advance to ease the later work, and there are further easy options too, thanks to having no time constraint or enemy pressure, nor any need to avoid certain later trigger zones (the triggers don't operate yet).
The tunnel Ghost can be flipped, and likewise the two enemy designated tower Ghosts. They could also be moved. See more talk about Ghosts below.
The front Shade can be flipped, or moved to a novel spot. The gunner who later spawns on the slope will run to it and board.
The rear Shade can be flipped, or moved on its plateau for a slightly different position. If you're careful you can get it a steep angle over the edge, yet still boardable (you might want to get a checkpoint just beforehand, as it's a touchy operation). That'll make for a novel sight once the Grunt is aboard!
The Wraith can be flipped or destroyed. If you destroy it, the wreckage may well have been removed by the game by the time you return to the area later.
Adding weapons
Very usefully, you can add spare weapons to the battlefield, to boost your defence options at various spots or whatever. This can make your set-up considerably more flexible. See my separate section Spare weapons for details.
Adding the Scorpion
You can move the Scorpion to the battlefield. A nice toy to use when desired!
Adding a Banshee
You can position a spare Banshee where you like, or even two. There's initially a Banshee on top of the tower of course, but you can shunt it down to the ground. That would also make it more easily accessible for switching to before completing a set-up (easier than having to fly to the tower roof to make the switch). But of course, any Banshee can serve this purpose.
Adding or rearranging Ghosts
You can set up Ghosts for potential personal use, in places you want them. They could be ones already in the tower zone (except, not the ones at the tunnel exit, as the game will make those part of the dropship arrival later) or ones brought in from elsewhere. You can also make provision for enemy-manned Ghosts, though you might like to have them overturned, so that in the battle you can control whether or not they're available to the enemy. See Having enemy Ghosts for details.
Forming a blockade
You can form a blockade somewhere, as part of engineering a special scenario. Ghosts make handy blockade material, but there are some considerations to keep in mind when it comes to which Ghosts to use. In particular, you wouldn't want an Elite boarding one of the Ghosts and driving it off! I may add some advice on this later.
Setting up rocket targets
You can place Ghosts or Shades (possibly overturned) in positions where the enemy may later be, so you can have the fun of rocketing the object to hurt nearby covies and send the object flying.
Spare weapons
There are already some spare weapons in the tower zone, near the slope outside the front door. As well as a pistol and AR, there's a full rocket launcher with two spare rocket cases. Also two packs of sniper ammo and lots of frags. But what if you want further weapons?
Early rearranging
You can engineer that by doing some early rearranging. After making the first bridge safe, throw covie weapons down to the snow. These can be any dropped by bridge troops or earlier troops. Plasma pistols on 100% charge can be obtained from Grunts on Shades, so it's worth letting plasma pistol Grunts man Shades before killing them. On Heroic or Legendary you can also get a plasma rifle on 100% from the Banshee pilot (sadly there's no Banshee on Normal or Easy). Once the weapons are down, move them to wherever you want in the tower zone.
You could also get extra assault rifles from the three Marines initially below the bridge, by killing them. Although, it won't make you very popular!
Later methods
Aside from this early rearranging, there are some later possibilities for weapon provision, even despite the presence of covies in the battlefield. One simple thing is to kill the tower Banshee pilot while he's standing around on top, and drop his weapon over the edge (I don't advise blasting it off, as it seems to me that the weapon can very easily go through a cliff wall and be lost). You can subsequently fine-tune its position. You can likewise reposition the dropped weapons of any covies you eliminated in the battlefield.
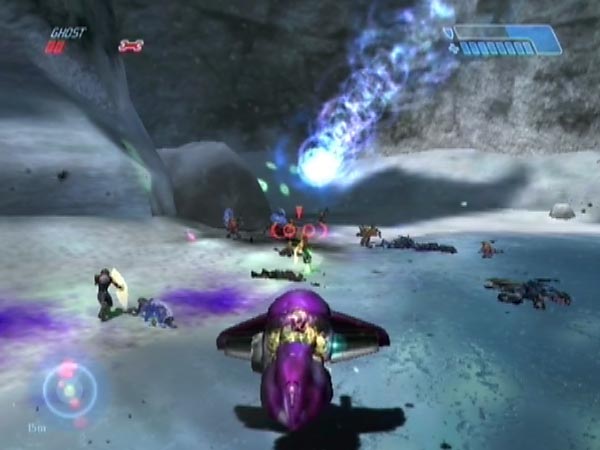
Having the Wraith
You have the option of letting the Wraith get manned, and certainly, having a Wraith in the battle can be good fun. It adds noise and atmosphere, plus an element of danger of course, and you can potentially enjoy destroying it, whether in a vehicle or on foot. But there's one more thing it's good for: hilarious friendly fire on the covie mob! You can see plenty of that in BCM464 and subsequent movies.
Splattering hazard
Setting up with a Wraith is a bit more tricky than without, however. For one thing, obviously you need to be wary of Wraith fire during the work. But another aspect is, you should try to keep free-roaming covies away from the Wraith, to avoid any of them getting splattered as it moves around. Your Banshee hovering gives you significant control over the their location though, so this isn't much trouble. Hunters are a different matter. If you're getting Hunters into rage mode, they'll be in the vicinity of the Wraith while you work. One of them will head over to the two trees behind the ice patch, and he's the one who's more at risk. Might be a good idea to get to work promptly.
Checkpointing
There's also the issue of getting your delayed checkpoint to complete the set-up. Initially at least, the Wraith is likely to be firing shot after shot, and the trouble with that is, a constant presence of plasma in the air will prevent you being able to get the checkpoint (active ordnance causes checkpoint delay). What to do then?
One option is to fly around the corner into the spiral path area, suitably high up to avoid triggering any covies there (around ledge height will do). Hopefully you'll get the checkpoint after just a few seconds. You can see that method used in BCM464. However, my experience has been that when you return, Hunters that were previously weakened into rage mode will have lost that state. As such, they need zapping if you want to restore the state. Even if you don't bother though, they can still manage to reach the scene of battle in many cases. But they'll shuffle along to get there, rather than charging.
Another option is to ascend high enough that the Wraith loses sight of you (tower height would be more than enough) and eventually stops firing, or at least pauses. Then you could either get the checkpoint as you are, or better, you could initially do a bit of Banshee firing to keep the delay going while you drop, and then get the checkpoint - such as seen in BCM466. With the drop method it's possible to get the checkpoint quite close to the height of the lower ledge, but it might be easier and more reliable to settle for getting it somewhat higher.
This second checkpointing option can be frustrating however, because the Wraith may fire for a long time (it seems rather random), so you may need some patience. Also it can be tricky to control the mob when you're high up; so the mob may end up being somewhat dispersed, although that's not necessarily bad and you might not mind.
Having enemy Ghosts
In the set-up work there were five Ghosts you could allow to be manned: the enemy designated tunnel Ghost, the two dropship Ghosts, and the two enemy designated tower Ghosts. Thus, you could have as many as five enemy Ghosts hovering around in battle. However, there are a few things to consider.
Ghost pilots are clumsy and can easily get themselves ejected. So by the time you're ready to complete your set-up with a checkpoint, some or all of the pilots may've lost their rides. They might also have splattered some friendlies. In view of these troubles, you might have to repeat the set-up work (from a suitable starting point) until things turn out acceptably well.
However, you could potentially only let Elites board Ghosts late, shortly before getting your final checkpoint. That way they'll have less time to bumble around. To arrange late boarding you'd have the relevant Ghosts initially overturned, then when you're soon to get your checkpoint, you'd blast them upright to let them be manned. The Ghosts would need to be 'multi-chance' ones though; see below.
Another thing you could do to help would be to eliminate the collision threat posed by the Wraith, bearing in mind that a Ghost which drives into the Wraith can easily flip. This would best be done during a phase of early rearranging. You could shift the Wraith so it's out of the way (e.g. against the nearby cliff) and then destroy it. Actually the wreckage may even get removed by the game at some later point before you complete your set-up.
One-chance Ghosts and multi-chance Ghosts
Let me also mention that the two enemy designated tower Ghosts are different to the tunnel Ghost and the two dropship Ghosts. If they're not manned at the usual time (because of being overturned), they won't get used at all, even if subsequently righted. In other words they're "one chance" Ghosts; there's only one chance for them to be manned by the enemy. In contrast the other three are "multi-chance"; they can be manned by an Elite at any time when upright. Also, it looks to me like any Elite can pilot them. This makes them a lot more useful for battle engineering, as I'll now describe.
Flipped multi-chance Ghosts for flexibility
Any multi-chance Ghost can potentially be used in the following way. In the set-up work you can get it positioned where you like, and overturned. In battle you'll then have the option of righting it (e.g. with a Banshee blast) so an Elite can run to man it. This will give extra flexibility to your set-up; the option of whether to grant the Ghost to the enemy or not.
How to arrange it? If doing early rearranging you can simply drive the Ghost into position, before overturning it with a blast. But what about later when covies are around? Simple Banshee blasting is one way, but another is to initially let it get manned, then draw the Ghost over to the area you want it, and eject the pilot with a Banshee blast landed near a wing tip (far enough away that he doesn't take health damage). This latter method is rather quick and easy, and can be seen in BCM466 with the dropship Ghosts.
In regard to the early rearranging option, it's not just the tunnel Ghost you can use. The two 'Pelican attack Ghosts' just past the crashed Pelican area, which would normally attack you there, can likewise be used. However, when playing through the level after moving the Ghosts, you'll want to make sure to either kill their pilots before they teleport to the Ghosts, or prevent the pilots spawning at all. For specific advice see here on my spiral path megabattle page giving blockade tips.
Having an enemy Banshee
Near the end of my refined routine, I said you might like to switch to the fresh Banshee on top of the tower and kill the nearby pilot. But can you instead have a set-up in which the pilot has boarded, thus giving you an aerial threat to cope with in battle? Yes! To begin with I thought it wasn't possible. It seemed like the pilot never boarded, which I suspected was due to the weight of enemy numbers. But when investigating later (on Heroic), I started getting a better picture of the workings.
Pilot behaviour, and prompting him to board
After triggering the pass guards, it looks like there's a window of around 48 seconds in which the pilot has the ability to board. If you fly up there, you'll probably see him running back and forth as if agitated. Your presence may make him snap out of this and board, but if not, just fly at him to make him dive, and that usually does the trick (try again if not). Sometimes the dive even takes him aboard! You need to get the job done before the time window closes though. At that point he alters state, becoming stationary and aggressive, and will seemingly never board.
Using the boarding prompt method
With this method then, you can potentially get the Banshee manned. But what about getting a checkpoint to finish off your set-up? If you've been delaying the pass approach checkpoint as usual, you just need to get clear enough of enemy threat. That's quite easily done by quickly getting clear of the Banshee. But the drawback is that you haven't had much time to do any final mob herding yet, nor other tasks such as perhaps killing the Elite pass guards and weakening the Hunters so they'll chase you. There were only scant seconds available after triggering the guards, before you had to fly up the tower.
Here's an alternative then. Instead of getting the checkpoint quickly, keep it delayed. You can potentially do your herding and whatnot, as long as the Banshee stays out of your hair. Ideally you'd like it to be flying around on the other side of the tower, not spotting you. You can help lead it to that side by the way you depart from it; e.g. spiralling closely down the outside of the tower to give the pilot the slip, if he's chasing. There are a few other tactics you might use to avoid being spotted you while you work. You could be hidden around a corner, or up rather high. When you're done, then get the checkpoint.
An easier way: Banshee repositioning!
After yet more investigating, I realised something else. If you suitably reposition his Banshee beforehand (any time before he spawns), he'll very likely board it without prompting, so you won't have to fly up there after triggering the pass guards. For example just fly it forwards several metres. In view of this finding, I conjecture that the aforementioned back and forth running was related to some navigational difficulty he had. An adjusted position can somehow help him navigate into his machine. In regard to the specific repositioning, keep to the platform. Don't put it on the snow as he can't navigate there.
Using this method seems much preferable to the boarding prompt method; and bear in mind that you can potentially do the Banshee repositioning as part of some early rearranging.
Adding a Warthog or two
Adding a Warthog to the battlefield can't be done by simply driving the initial hog there as part of some early rearranging, because the game would later move it back into the first snowfield where it was scripted to be when you trigger the battle there. So what do you do?
One way is as follows. In advance (as part of some early rearranging), leave a Banshee near the exit of the rising tunnel - just out of the shadow or thereabouts. When you play through later, have the hog with you. Whizz up the tunnel in it (bypassing the covies), quickly transfer to the Banshee, and flip the dropship Ghosts as usual. Now get the hog to where you want it by blasting it along while remaining out of covie range. You might want to also stay high enough to avoid triggering tower troops. The fewer covies there are around, the better. A side benefit of this method is that it saves you incurring Banshee damage from flying up a covie infested tunnel.
If you want to avoid any early arranging however, here's a way. After clearing the underground bridge, bring the hog and a Banshee to the tunnel corner just before the Elites and Grunts. In the hog, whizz up the tunnel to where the far end of the incoming dropship is going to be. Board one of the Ghosts it drops, whizz back to the Banshee, then fly up the tunnel. Flip the remaining dropship Ghost, then do hog blasting as before.
Two hogs
If you want to add a second hog (there are potentially two available), you could whizz down the tunnel in a Ghost, transfer to the waiting hog, then drive up and do some more hog blasting.
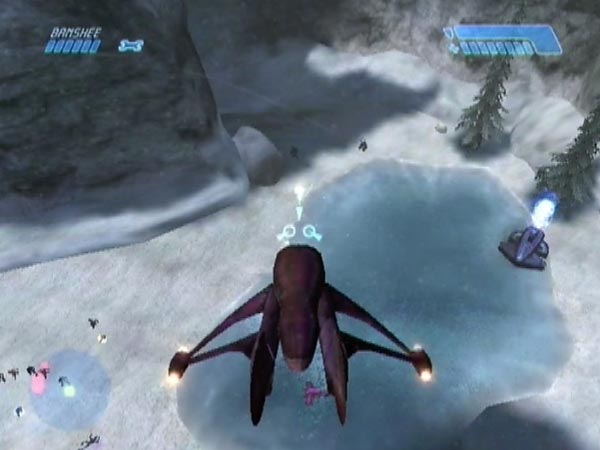
Checkpointing with the drop method
In my set-up advice I mentioned climbing to get your final delayed checkpoint - your starting point for the battle. However, it only comes when you're rather high up, which isn't all that convenient. A superior way is to use the 'drop method' which I developed in connection with completing a mob battle set-up in the first snowfield. I showed it in BCM361 for the mob battle, but here's what to do.
Climb to about halfway between the two ledge heights, firing to maintain the checkpoint delay, then get angled down, drop (freefall) and stop firing. This can give you the checkpoint at around the height of the lower ledge, which lets you get into action faster. It also helps that you've got downwards speed - although you could instead cut your speed just before getting the expected checkpoint. If you don't get the checkpoint, just try again.
Getting good rock geometry
When you last came through a loading point - which would've been the one before the rising tunnel - the game randomized the rock geometry . But the geometry can be relevant to your battle tactics at a particular location. It affects how much cover a rock offers, whether it's low enough for you to shoot over or not, and whether you can easily get up on top. If you want one or more rocks to be just right for your purposes, here's my advice.
Quick check method
Start with a save where the loading point is just ahead. There's a checkpoint right after it. After getting it, keep all subsequently triggered checkpoints delayed while you go and inspect the rocks you're interested in (reminder: when on foot you can use jumping and grenades, if you're not sure there's enough enemy threat to do the job). It's okay to kill any covies you want, and to take damage. If the rocks are satisfactory, revert to that early checkpoint (you might even like to now save it), and proceed with the usual set-up routine (and of course, make sure not to come back across the loading point for any reason). If not, eject the disc and reload to try again with fresh randomization.
Modifying an existing save
If you've already created a set-up and saved it, you can modify it as outlined in the next section. In the process, the rocks will get re-randomized. You'll be needing to check the rocks while keeping the tunnel checkpoint delayed, and you may also need to first draw covies far away from the area, to give you enough time for a decent look. If you're satisfied with how the rocks have turned out, finish off. If not, eject the disc and reload to try the procedure again.
Modifying a save
Having created a set-up and saved it, you can use that save to create other set-ups, by modifying things and getting a new battle start checkpoint. One idea for a modification is to have the mob in a different starting place. Another idea - if you were originally airborne - is to be already on the ground, ready to defend. Another idea: getting equipped with a different initial weapon combo. Yet another: eliminating some of the covies, to craft a particular battle experience.
The modification process goes like this. After making any initial desired adjustments (e.g. a weapon change), fly off and bring back a delayed tunnel checkpoint. Then finish off, herding the covies as desired and getting the checkpoint where you want. All this is quite little work, for what can be a considerably different battle experience. You can see an example of modification in BCM475.
Warning: the procedure will also re-randomize the rocks in the tower zone, because you went back across the loading point. So the battlefield will change a bit.
Hunter re-raging
One detail to mention. When you return with the delayed checkpoint, any Hunters that were previously weakened into rage mode will probably have lost that state, due to your having crossed a loading point. In fact I suspect this always happens. But you can restore their raging with a plasma pip apiece (something you can see me doing in BCM475). Do try to only use a pip though, else you might unintentionally kill the target, due to his weak condition.
Skipping earlier stuff
I've already mentioned that prior to performing the refined routine, it's best to've killed all previously spawned enemies, else some of the possible megabattle troops may fail to spawn. I imagine this is due to the game becoming strained in some way. But there's a place where you can save some serious time.
Namely, it seems okay to skip the trigger for the crashed Pelican area, by flying high to avoid the trigger zone (this is assuming you've acquired a Banshee in advance of course). Having done that, no troops will spawn until you reach the cavern. It's a considerable time-saver (fewer covies to kill), and I've never noticed any adverse effect from doing it.
Let me also mention, it may also be okay to leave covies alive in the cavern. At any rate, I've done that sometimes and have never noticed any adverse effect. That said, I'd usually kill everyone there anyway, partly to ensure that my Banshee doesn't take any damage.