Danger! Falling Grunts
Posted October 6th 2004, expanded later
Associated movies
- Introduction
- Falling Grunts
- Grunts going grenade crazy
- Needle carnage and other fun
- Setting up and replaying
Introduction
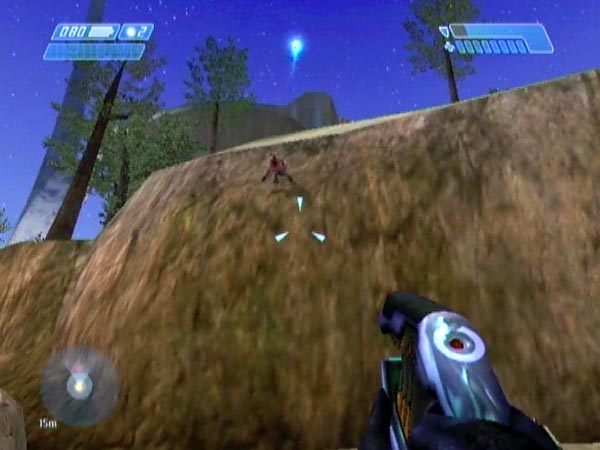
After doing your stuff in the security substation, you emerge to find that things have changed on the beach below. There's a newly crashed Pelican which just sent a mayday, there are Grunts on top of the plateau-like hill (5 on Legendary, 4 on Heroic, 3 otherwise), and there are Jackals at both ends (8 on Legendary, 6 on Heroic, 4 otherwise). You can have a lot of fun with these endearingly clumsy hilltop Grunts, due to their tendency to fall off the hill and also to go into grenade-lobbing overdrive. If you want to get into it right away it's easy to jump down without damage; there are plenty of options there. Alternatively you could go back the way you came and circle around along the beach. Before having your grunty fun though, you'll probably want to kill the Jackals to stop them pestering you with plasma fire (or at least the ones at the sheer end).
Related material
Seems like ace reporter Suzie bumped into this gaggle of Grunts too. Check out her broadcast Danger! Falling Grunts. Also, I later found another bunch of free-fall enthusiasts, this time in level 8. Check out the excellent fun in Danger! More falling Grunts.
Falling Grunts
Go to the sea-facing side of the hill, and over towards the right so you're facing the main stretch. When you fire a shot up to get their attention, the Grunts come rushing over towards the edge to fire at you with their plasma pistols (which are collectively pretty murderous on Legendary) and potentially lob grenades. But the ground is so steep there that they often misjudge things and overshoot, falling down to the beach. They often also fall off when lobbing grenades, and occasionally dive off the edge to get clear of a colleague's grenade - or even their own if you make them fumble it with a shot at just the right moment.
Healthy fallers usually survive, and unless they've just thrown a grenade they usually make an amusing "Ahhhhh" cry or suchlike when they hit the ground. Cute! Actually I think I've only heard two different landing cries, the other one being a weird high-pitched "Aoooommmm" or something like that (not sure I spelt it correctly). You'll also notice an animation of pain as if they've just had a nasty shock to the spine, which I think is actually just the same animation you get when shooting them in the back. It's quite good fun to witness all this up close. And them smack 'em in da face!
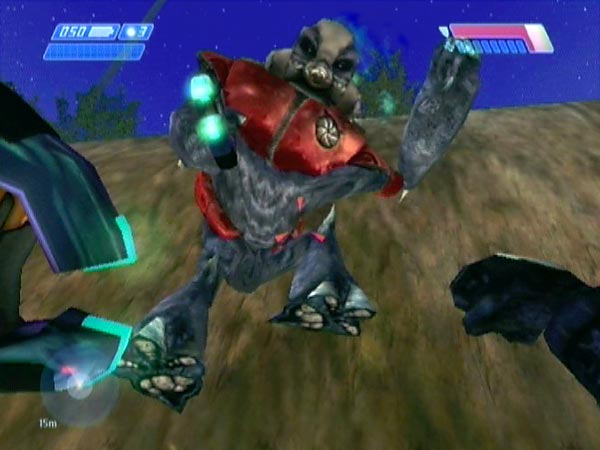
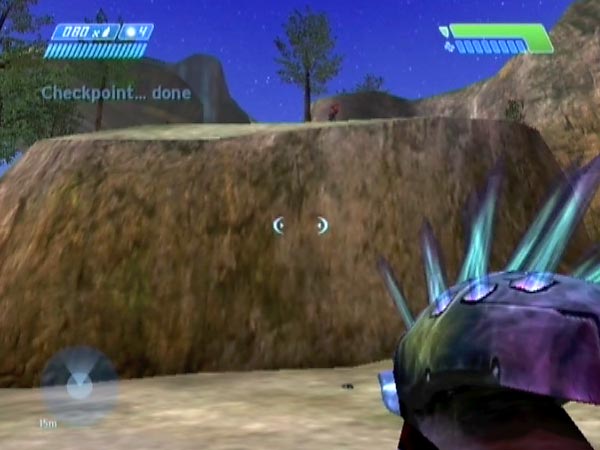
One challenge you can try here is to headshoot a Grunt with a pistol as he's falling. See how many you can get that way. Another idea is to try and rocket them as they fall. Not easy, but it's got to be good practice, right? If you're close enough to the hill you can even smack a faller as he comes down. Good sport! You'd think that would put their lights out for sure, but the little fella in the picture shown here shrugged it off to make it to the sand alive, and then lobbed a plasma at me.
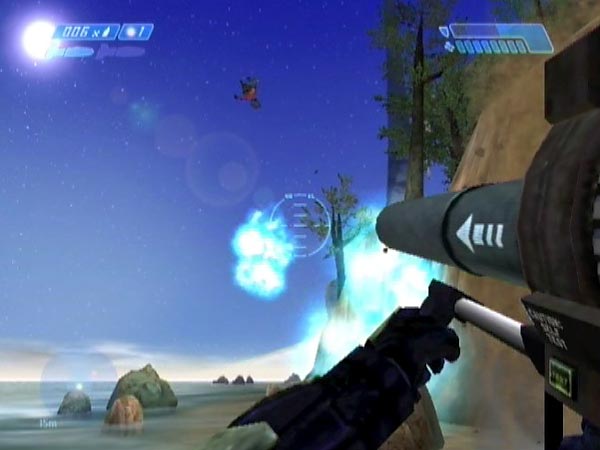
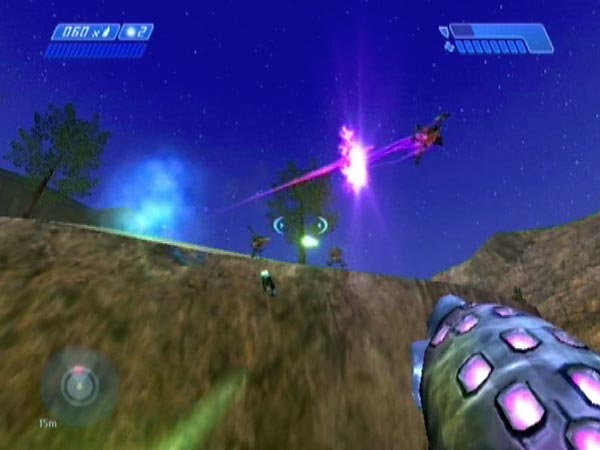
And then there's the whole delightful business of launching of course. If you've got a rocket launcher handy you can tag your faller when he's down, then blast him with the launcher to send him flying. When the plasma goes off, it'll often set off any grenades he's dropped from being killed by the rocket, giving him an extra boost. Sometimes I try to send them high by aiming the rocket near their feet, other times I send them shooting off at a low angle by rocketing the hillside just behind them. Something odd I noticed here for the first time: weapons seem to bounce off the sea! Blast a few out across the waves if you don't believe me.
A faller will initially attack you, but if you back off he'll quickly forget about you and head for the path back up to the top. That briefly gives you a nice opportunity to run up behind for a tag and launch if you want. If you let him continue, he won't go further than halfway up the path where it bends sharply and he's got you in sight (I've never seen one get back to the top). If you rocket the tree behind him you can send him flying out across the sea. If you let multiple fallers toddle off, you tend to get a bit of a grunty traffic jam. Like, one guy halfway up the path, perhaps another further back, then the rest at the bottom. Each time you rocket the tree to clear the most advanced Grunt, another will shift up. So you can rocket one after another.
When you back off from the hill, any Grunts up top will retreat back out of sight and then you can set the whole thing going again, moving in to get them rushing over and maybe falling straight off. It's all such a comical situation; don't miss it if you're a Grunt fan!
Grunts going grenade crazy
Another thing to experience is Grunts going grenade crazy, lobbing them one after another in barrages that would presumably be never ending if it weren't for the fact that they often end up falling off in mid-throw. This is best seen on Legendary due to the much higher rate of throwing, namely around 20 per minute. That's one every 3 seconds! On Heroic the throw delay is more like 5 seconds which just isn't as amusing, while on Normal it's over 6 seconds. On Easy the enemy aggression is dialled down so low that there's no sense of any grenade craziness at all, so that's no good. The delay between throws isn't exact; it'll vary a bit, probably partly depending on how the thrower moves around, and that may take the average rate down slightly (e.g. on Legendary the average throw delay over a long run will be closer to 3.2 seconds).
To get a Grunt throwing at you like this, ideally you want to be at just the right distance quite a way back. It also helps a lot if you fire near him as this seems to provoke him into action. I like to use a plasma pistol for that. Once he's started he'll potentially continue even without your shots, but I think further shots help. It takes a bit of practice to keep things going without getting blown up or killed by plasma fire, especially on Legendary, but it's good fun and you should soon get some sense of control. It tends not to work when there's only one Grunt left on the hilltop though. He tends to be quite timid and backs off a lot, so it's harder to get a barrage. Sometimes things also go that way when you're down to two Grunts up top, but I did once get a 14-grenade barrage when down to two.
So just how many of these darned things does a Grunt have stuffed up his shirt anyhow? Come on grunty, show me what you got! See how long a barrage you can get (and to be more clear, by 'barrage' I mean a sequence of throws at the maximum rate, ignoring minor variation). In BCM14 I got a barrage of 15 before the plasma-happy critter fell off the edge - at which point I gave him one back.
Throw cries lagging behind
Something you might notice from that barrage is that his throw cries get out of sync with the throws. They lag further and further behind, suggesting that something in the game programming prevents a Grunt from being able to make his cries frequently enough when going grenade crazy. On his first throw things are normal and the cry comes before the grenade has left his paw. But by throw 5 the grenade is already close to me before his cry. By the time he's thrown grenade 15 and fallen to the ground, he's only actually made 13 cries.
Needle carnage and other fun
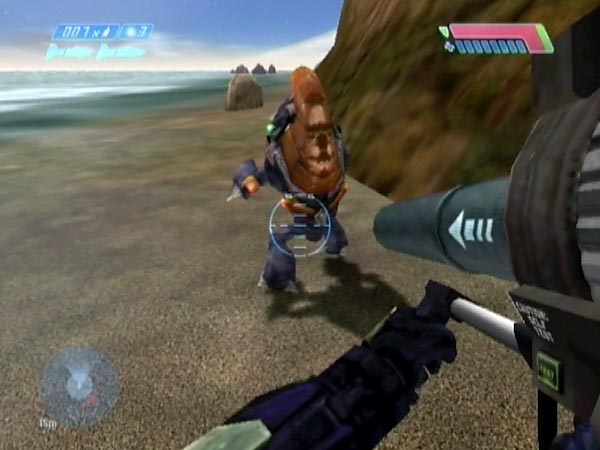
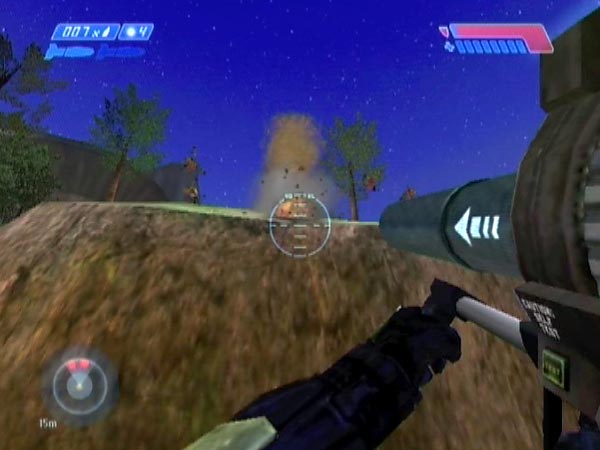
Of course, there's nothing to stop you shooting back a bit, either for their amusing reactions or to reduce their pressure of fire a little, which can be a bit hot on Legendary. But when it comes to serious Grunt slaying, my favourite method here would be to fire streams of needles up from quite close, panning across as I shoot, or starting further back then rushing forward to drive a stream in. Often they're throwing grenades as you fire, making them nice stationary targets. In fact your firing may well prompt him into a throw. You can get a whole clip into a Grunt very easily and the bangs often set off plasma grenades, sending him flying. It's sheer glorious carnage. See if you can manage to take them all out one at a time with explosive needle streams.
To add to the spectacle you may like to try and tag your target with a plasma grenade after firing most or all of a clip. Alternatively you could throw your plasma then send in the needles. Explore and see what you can do. You'd do well to have a spare needler near the base of the hill so you can top up. It's also great fun streaming needles into fallers the moment they're down, hee hee!
Blasting them off the top of the hill with the rocket launcher is also good fun as you'd expect. See how many you can get with one blast. On Legendary you can get all five but you need to pick the right moment for your shot as the Grunts tend to remain fairly spread out. Or if you want to go the other way and make the fun last longer, see if you can blast them off one by one. The launcher can also be used rather nicely in conjunction with a needler. Send in a stream of needles, then a rocket, timed so that the rocket goes off just as the victim has received his full dose of needles, or very shortly thereafter. With any luck he'll get sent flying by the rocket (maybe a few plasma grenades too), and you can get a trail of pink explosions across the sky. Oooh… pretty!
You can also try tagging. I especially enjoy doing that from very close to the hill, throwing up steeply. Grunts peer down at you, making excellent targets. If you want to try to make sure your target stays still, fire close to him and there's a good chance it'll provoke him into a grenade throw. A couple of times, a tagged Grunt has wandered off the the edge while screaming, fallen most or all of the way down to the beach, then the bang sent him back up to the hill. Comical stuff. Or try lobbing grenades up to make them dive clear - possibly off the edge. Another bit of mischief is to lob a grenade way up high so it'll drop down out of the blue several seconds later. It often makes them dive off the edge, and you might even get lucky and tag one on the head, which is always good for a laugh. Try lobbing a whole bunch of grenades if you like; give 'em a taste of their own medicine!
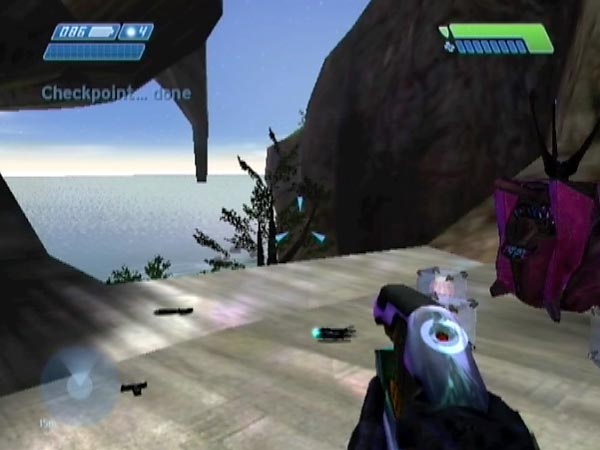
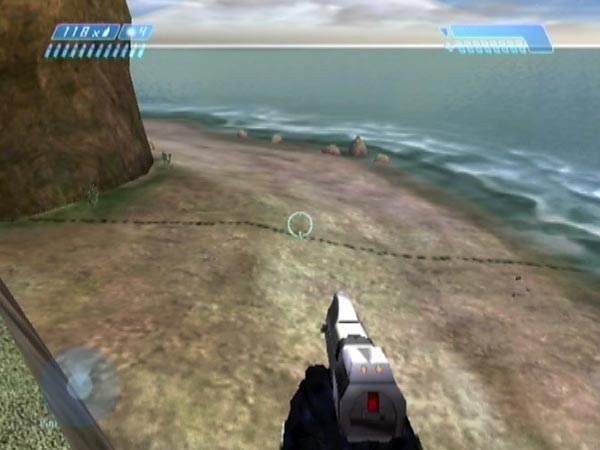
If you lob grenades up to one side of a Grunt (even if they're only sailing past too high), you can get him diving to and fro which can be quite amusing. Maybe finish things off with a rocket or something. No escape for you grunty! But here's another grenade-based recreation. Land a plasma grenade a short way behind a Grunt and off to one side, and you can get him to dive forwards off the edge - usually on a second dive after he's decided his first dive hasn't got him clear enough. When they dive off the edge like that, they look pretty funny. They really shoot off sometimes and can go quite a way. I had one critter who ended up chest-deep in the water and lobbed a plasma at me - see pic! You can see some of these dives being prompted in BCM15, which also shows many of the other recreations mentioned here.
Setting up and replaying
There's nothing special you need to do to set things up; you could just use the checkpoint you get when heading out of the substation. But there's plenty of scope for making things more convenient, depending on what you want to do. I'll talk about that here. But in particular it's possible to get a checkpoint at the hill itself, so you can be straight into the grunty action each time you revert.
Checkpoint outside the substation, Jackals present
In BCM14 I was using a save which is good for playing the situation as a whole, Jackals included. It namely starts from a checkpoint outside the substation - but not the first one you get as you head out. After emerging from the substation having operated the control there, I first went around to make the dropship leave so I wouldn't be hearing it humming all the time. I got an overshield whilst there, then returned for a new checkpoint at the substation (you can keep getting checkpoints there), armed with a plasma pistol and needler because that's my favourite combo for having fun taking out Jackals. Also, I'd made some other preparations even before entering the substation, namely placing spare weapons in various locations to give me more ways of tackling things. That includes a few weapons right in front of me at the entrance, so I can potentially make an immediate swap before jumping down. I even placed a spare hog over to the right, for times when I might feel like driving in to squash the Jackals. Another aspect of this save is that the covies below haven't noticed me yet, so I'll be able to sneak up on the Jackals and give them a nasty surprise. Yay!
Checkpoint at the hill, Jackals eliminated
If you don't want to be bothering with the Jackals each time, it's no trouble to eliminate them beforehand. You could do that from outside the substation with a pistol or plasma pistol, then get a new checkpoint there by going around the corner and returning. However, if it's just grunty action you're after, ideally you want a checkpoint when standing at the hill ready to attack, and without your opening shots giving the Grunts a shock and causing them to run off in panic (which would frustratingly delay the proceedings each time you start). I eventually realized how to do that.
Here's a recipe, starting from outside the substation. Use a pistol or plasma pistol to eliminate the Jackals - even the ones way off to the left - then preferably get and save a new checkpoint outside the substation, just in case anything goes wrong after this. Jump down without damaging your overshield. Get the rocket launcher (you might get spotted by the Grunts here but that's fine), then skirt around the base of the hill anticlockwise, out of sight. Go along the sea-facing side and on to where you can trigger a checkpoint at that end of the beach. You can actually delay that checkpoint for a few seconds by jumping (four jumps will be ok - maybe five). So what you can do is this. Move into the checkpoint trigger area (probably best to do that with a jump), then about-face and start jumping back towards the hill, to the position you want to start at. The edge of the trigger area is pretty close to the hill, so it's possible to get the checkpoint as close as you like, even right at the base of the hill. When you stop jumping, the game should give you the delayed checkpoint as long as you didn't delay it too long and the Grunts still haven't spotted you (they'll probably mostly be on the other side where they last had sight of you).
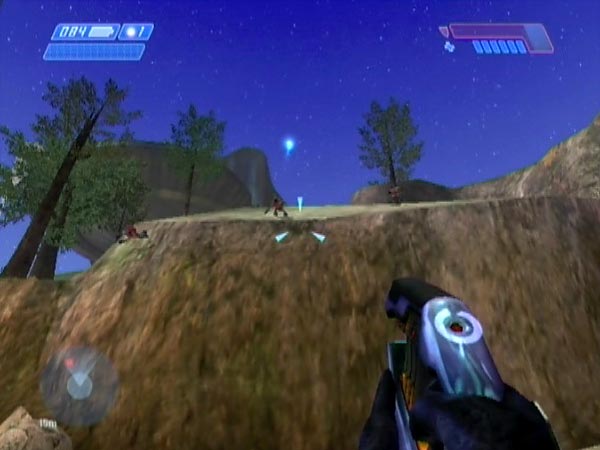
To use this method successfully you'll need to know where the edge of that checkpoint trigger area is. You can do that with a bit of experimentation beforehand (i.e. sometime before entering the substation), and by then leaving a weapon on the ground as a landmark so you'll know where the edge is when you return later. The edge seems to be a straight line, and I've indicated it in the picture here to give you the general idea (I made needle marks on the ground). The weapon you leave could be part of some spares you've arranged. In BCM14 you'll see some spares which are very near the edge. It's about a metre beyond.
When you fire shots, hopefully it won't panic the Grunts and delay their attack. Originally when I was trying to get a convenient checkpoint at the hill, that was my problem. However, at that time I'd been doing things differently, approaching from the landing zone. I have a suspicion that if you leave the hill section of the beach, it returns the Grunts to a state of complete non-alertness, so that when you subsequently get their attention with a shot, it shocks them. With the recipe I gave here however, you never left the hill section, and I suspect that's what's making the difference. I cottoned on to this method shortly after finishing the recording work for BCM15. Pity I didn't find it sooner, as it would've made things rather more convenient for my hours of replaying!
Checkpoint driving around the corner
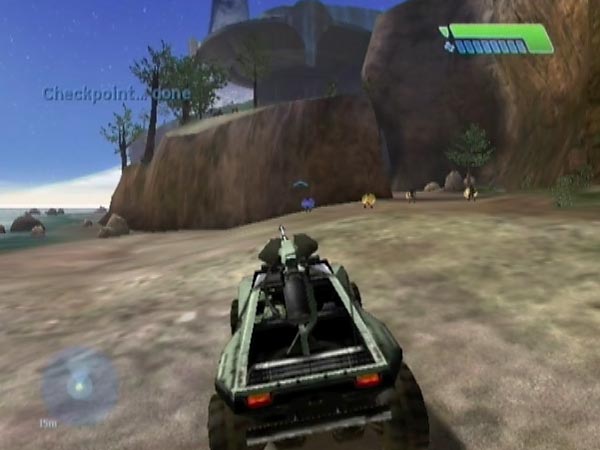
Another way you can set things up is to simply come bombing around one of the two beach corners in a hog; ideally the nearer corner if you want to be at the hill as quickly as possible. You'll trigger a checkpoint at the corner. Maybe you've left the Jackals alive, maybe not. If you've left them alive, this is a nice set-up for having fun driving around the hill squashing them before starting on the Grunts. Sometimes you can get a whole group with one nice tail-slide. However, if you're coming around the nearer corner, you may not want to be going too fast as you round it, else the game might delay the checkpoint due to the perceived Jackal threat. Let the game have time to give you the checkpoint.
If you're coming in from the nearer corner and you've eliminated the Jackals beforehand, you could optionally make the corner checkpoint get delayed a little by dismounting just before you get it, then jumping towards the hill a few times. This way you'll already be on foot as you get the checkpoint - and perhaps be standing at a pile of spare weapons. However, if you get the Grunts' attention by firing, it's likely to startle them and send them into a panic, so you won't have much to attack until they regain their courage and come forth. That's the shortcoming you can expect with this method, though maybe you'll be lucky and get spotted as you approach. Actually you can avoid sending them into a panic by briefly driving the hog near the hill to make them notice you, but that's a bit of a drag.
Spare weapons
I've already mentioned spare weapons a few times. As with any battle situation, it's nice to have spares handy to give you more ways of tackling things, or to provide extra ammo. It's worth doing if you're going to save things for long-term replaying. With this hill situation Grunts often lob grenades down, so it's probably best not to have your spares in the central area below the hill. Or at least, not if you want to be able to switch in mid-battle (it would be ok if you merely want to be able to make a swap before hostilities commence). Put them off to one side perhaps (short of the checkpoint trigger line, obviously), where they're less likely to get sent flying. However, if you're into needling it's a good to have at least one spare needler somewhere very handy, for quickly getting extra needles. I favour having one relatively near the base of the hill, so I can just move forward a bit to stock up. Perhaps slightly over to the right would be a good idea, away from where Grunts usually fall. That way you'd still be able to deal with fallers explosively, without worrying about sending your spare needler flying.
Replaying
To be able to revert to your start checkpoint, make sure not to wander too close to either end of this stretch of the beach while having your fun, else you might trigger another checkpoint there. A little experimentation will soon show how far it's safe to go (and hence how far it's safe to put spare weapons for use). Aside from that there aren't any other checkpoints that could get triggered, so you'll be able to revert ok.