Fun with a snatched Banshee
Posted February 25th 2016, expanding earlier material
Associated movies
- BCM161 - Easy; Rendezvous exploration (5:36)
- BCM162 - Easy; Journey to the hangar (6:33)
- BCM167 - Easy; Freaky Shade Elite (6:16)
- BCM170 - Easy; Rooftop fun with the other Banshee (6:55)
- BCM171 - Easy; Ejecting the other pilot (6:40)
- BCM300 - Easy; More rooftop fun (6:15)
But see also BCM420
- Introduction
- Rendezvous exploration
- To the hangar and beyond
- Freaky Shade Elite
- Fun with the other Banshee
- Ejecting the other pilot
Introduction
When I posted my original Banshee snatch article giving a speed-up of the overloading work, I included a section about the subsequent fun you could have with the Banshee. But that fun largely also applies to a Banshee obtained with my later tag-snatch method; and in fact a lot of the fun is better in that case, because you can rely on being able to fire weaponry and throw grenades, unlike when there's overloading. Since there's also by now so much fun - it ballooned somewhat - I've decided to move my coverage to this separate page, serving both of my snatching articles. So here we go.
Rendezvous exploration
When you snatch a Banshee for the first time, simple exploration is probably number one on your list of things to do, so I'll cover that topic in this present section and the next.
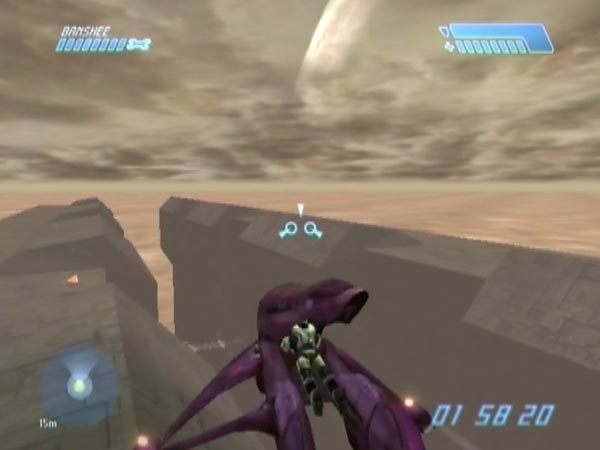
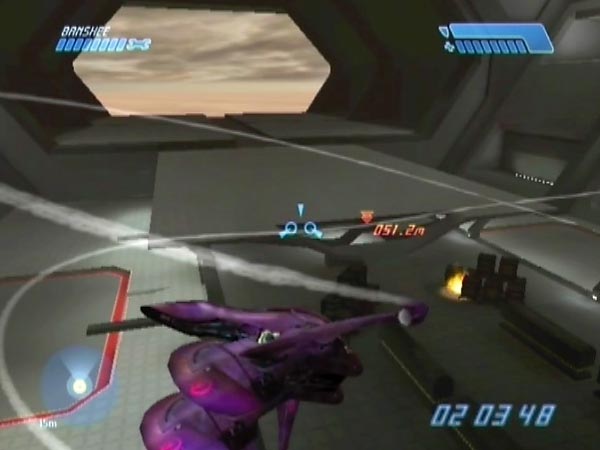
For starters you can fly around the outside to see how things look (during which Cortana will say "Alert. We need to keep moving - get back in the Warthog", every 39 seconds or so). Check out my first exploration movie BCM161 to see how things look. Basically there's just a chunk of the ship there; the rest is missing. You've only got the section which was loaded up for the current loading zone. You can land on the top and bottom of the ship and walk around.
If you experiment with trying to fly out yonder, you'll find that you're basically in a giant box, bordered by invisible surfaces through which projectiles don't pass. You can land on the invisible base and stand on it.
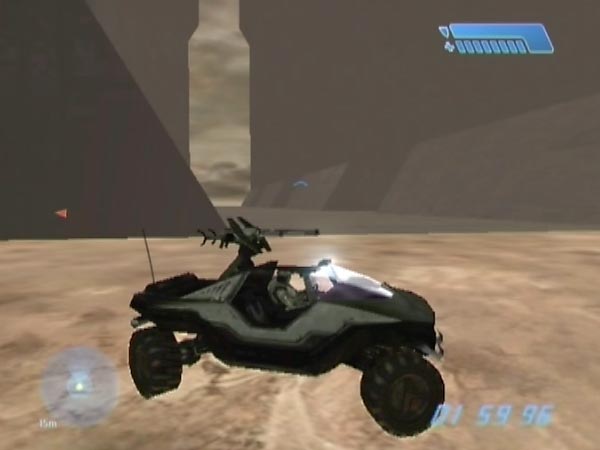
You can also drive on it and on the ship's 'floor', after blasting or pushing a Warthog down. There's a lot of driving room here! The floor makes an extremely long straight, which I used to get an accurate comparison of speeds for PAL Xbox. Verdict: the hog is about 27.5% faster than the Banshee and about 3.1 times faster than MC.
Incidentally, you can't backtrack to earlier parts of the ship. At the place where you made your recent jump in the Warthog, there's now a solid wall! Dagnabbit, I wanted to fly back!
To the hangar and beyond
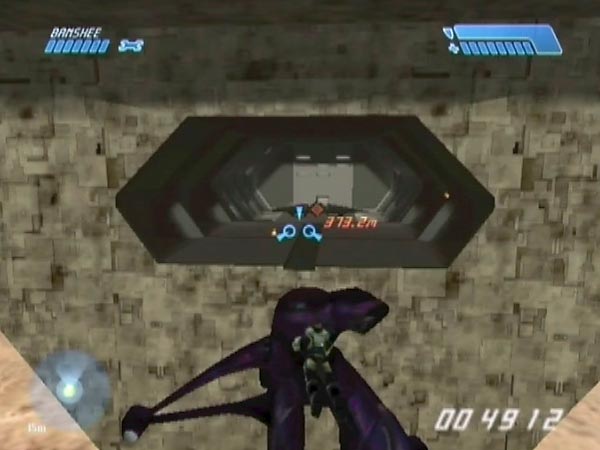
Exploration and fun isn't limited to the outside though. You can fly inside all the way to the hangar, following the usual route. In places things are a bit of a squeeze for the Banshee, but nothing very troubling. With good flying you can avoid getting stalled by too much contact, and be there in about 80 seconds. And here's a useful tip. By starting the journey sufficiently soon after the snatch, it seems that you can prevent Cortana from nagging you about getting back into the hog. I think you need to be through the opening within something like 20 seconds.
Running covies and more
There are various activities you can enjoy along the way or after reaching the hangar, such as demonstrated in BCM162. Early on, there are some running special ops covies you could have some mischief with (though you could also use a hog for that). By interfering with them, e.g. blocking them for a while or shooting them a bit, they quite easily end up running into a wall. Update: I've now elaborated on that, plus other activities with the same guys, in a separate article: Special ops wall glitch and more. So see that for more detail, including my new hobby of covie stacking!
If the game is overloaded, any of these guys can be weaponless - which in the case of a Grunt means a fuel rod joker. But even if armed, they won't attack during their running phase.
Also early on, you might care to visit the location of the hidden thirsty Grunt. If he turns out to be absent due to overloading, you'll find that his voice nevertheless gets triggered!
The jump room
A major place of recreation is the 'jump room' as I call it - the place where you're normally obliged to do a massive scary hog jump. It's good fun for flying around in, partly because there are lots of girders crossing the room, which you can enjoy weaving around.
There are also lots of places you can land, including the tenuous looking beams with triangular cross-section. Having landed, you might then enjoy seeing where you can reach on foot, for the challenge. Needless to say, things can be rather precarious, so I hope you've got a head for heights!
Also, don't forget to visit the bottom of the room sometime. Ok there's not a lot to see down there, but you definitely need to tick it off your tourist's list.
The hangar
Soon after the jump room there's the hangar, where you can still have over two minutes left on the clock. If the game is overloaded, the Longsword may or may not be present (it's fickle).
If it's there, you'll find that it's not solid. You can fly though it. This allows you to get a close look at the interior of the ship, especially the cockpit where there are lots of screens, some including readable text (e.g. "ENGINES OPERATIONAL"). There's also a bank of screens lower down in the ship, if you care to find it. The easiest way to get your views is to be aboard the Banshee, but it's also possible to get nice views by standing on top of the Banshee, if you parked it in a suitably good place.
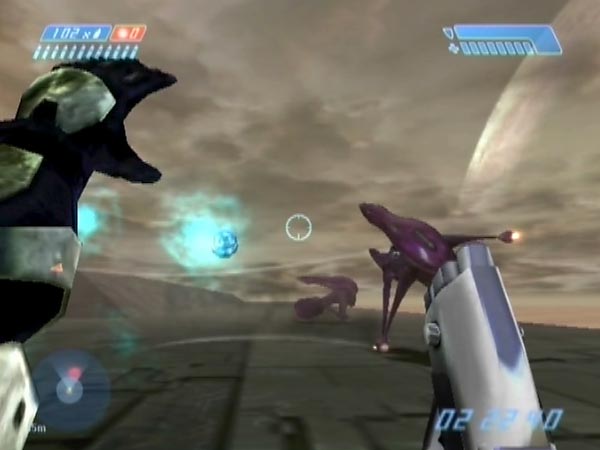
In the case of overloading, quite often there won't be any personnel in the hangar, and you may be lacking patches of fire too. I've rarely had even a single Flood, but I've had as many as three Elites, including one manning the high Shade. You can enjoy blasting them of course. Or with that Shade guy, how about pushing him off the edge? Actually there's some amusing stuff you can do with that guy, which I plan to cover in a later movie. If there's an Elite on the ground, he'll potentially lob grenades at you. You could have a bit of fun inviting throws and avoiding them.
Beyond the hangar
Beyond the hangar, you can fly out for a new exterior view - which is quite a weird one. As you'd expect, there are invisible walls bordering the place. Oddly, the invisible floor isn't level. It slopes down quite steeply from the base of the ship. Steep enough that a Banshee can slowly slide down, if given some initial impetus.
Escape cutscene
The escape cutscene can be triggered while aboard the Banshee. You merely have to enter the relevant trigger zone. You can see an example at the end of BCM162. The game removes the Banshee and you'll briefly be in mid-air, then the cutscene starts. If my own experience is anything to go by, the cutscene will include the Longsword even if it was absent beforehand. If it was present, it actually vanishes as the cutscene is triggered. Presumably the game then creates it afresh for the cutscene - along with the pursuing Flood. You can easily see the removal if you're pointing the right way. I assume it occurs in normal gameplay too; but you wouldn't see it, because your view would be blocked by the platform.
If you let the timer run to zero so the explosion cutscene plays, it may be lacking any visible explosion if the game is sufficiently overloaded. Bit of an anti-climax! But you still hear a bang at least.
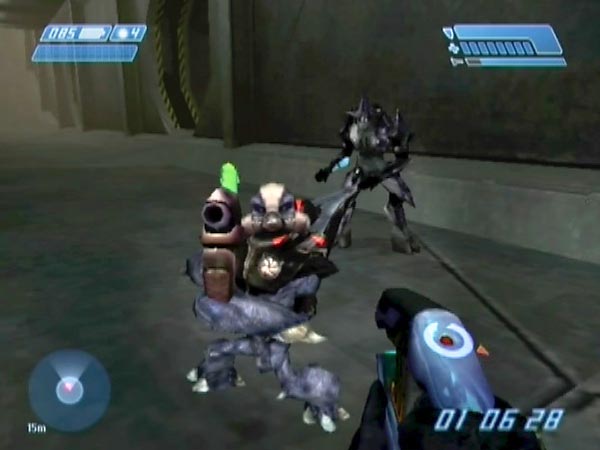
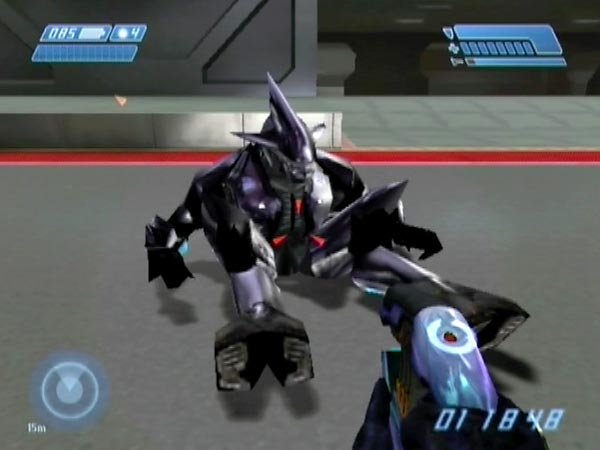
Freaky Shade Elite
If the game is overloaded, one thing you might get in the hangar is a freaky Shade Elite, as seen in BCM167. In my case it was the guy manning the Shade on the left, but perhaps it's also possible to get a similarly odd guy manning the other Shade. Due to the overloading the Elite may be weaponless, and in that case he acts quite strangely when ejected.
If you get him down to the ground (shunting the Shade off seems the best plan for keeping him healthy, though it's not as easy as you might think), you'll find that he likes sitting down in what looks like a Shade gunner posture. He does it intermittently when you're sufficiently in front of him - which covers a frontal angle range of at least 160° I estimate. But he also does some dodging around and standing still; and when you're not in front of him, he'll just stand still.
He also has a rather surprising ability, exhibiting blast resistance when sitting! You can blast him with a rocket launcher and he doesn't even flinch. He likewise withstands close grenade blasts, although quite often a grenade will spook him, making him try to dive clear - at which point a blast can hurt him as usual. I did have one case where a nearby plasma blast killed him even though he still appeared to be sitting; but he'd twitched beforehand, so maybe that makes a difference.
I've never seen him survive a tag though. When tagged sitting, he always seems to twitch out of his sitting posture at some point, even if only for a moment; and the subsequent blast kills him, even if he returned to a sitting posture.
Incidentally, if the Shade Elite is armed and you knock him onto the steep slope beneath, he'll actually run up it. That's some pretty amazing traction, because the slope is over 50°!
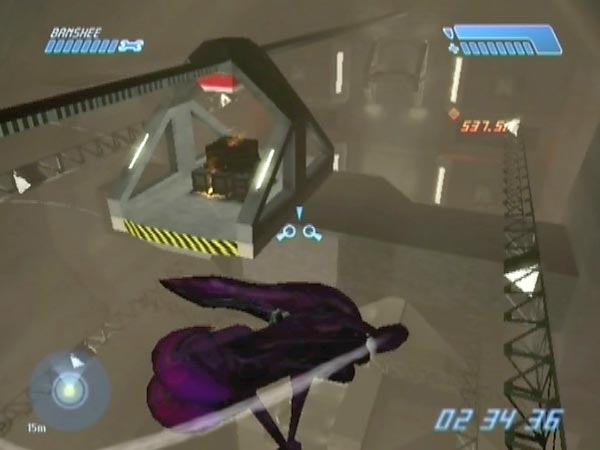
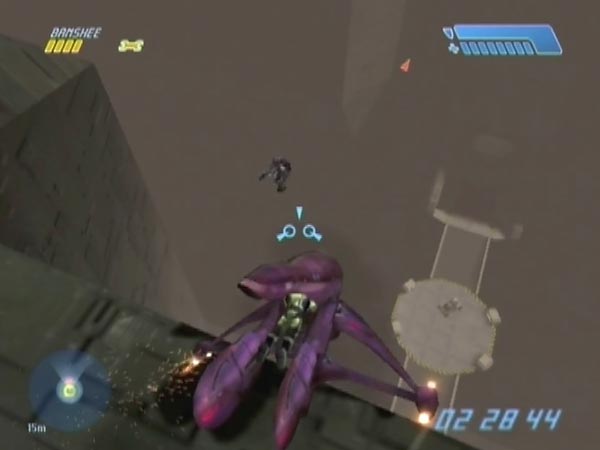
Fun with the other Banshee
If the left Banshee is present and manned, you can have fun with it in various ways - though obviously you'll want to've got a checkpoint first, so you can keep replaying.
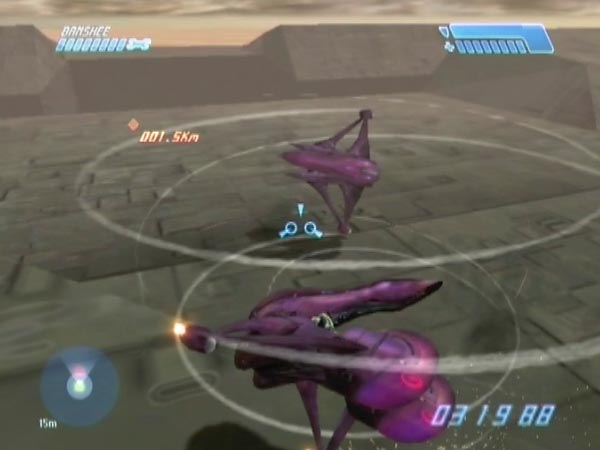
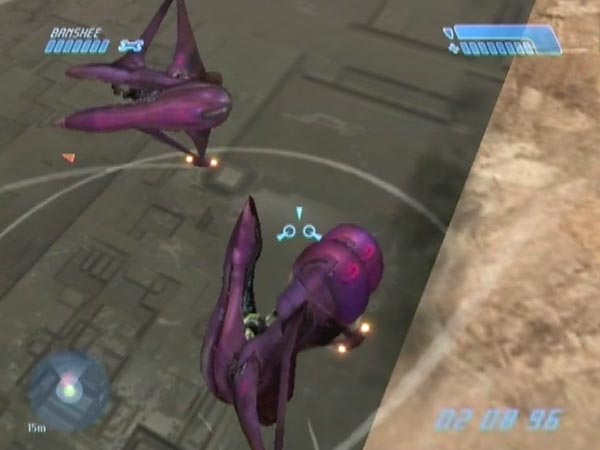
For probably the best fun, draw it up to the ship's roof. Up there it exhibits classic 'mad Banshee' behaviour which provides lots of fun, examples of which can be seen in BCM170 and BCM300. One aspect of the behaviour is that it'll chase your Banshee and generally try to get at you. You can enjoy letting it chase you around in various ways (it does a pretty good job of sticking to your tail), and in particular you can easily get into a mutual circling dynamic, either skimming the ground or up in the air. This chasing business makes for a great audio experience too. The sound of two Banshees swooping around close together is quite something.
There's further fun to be had on foot, dodging the enemy or simply standing still and letting it amusingly orbit you. Also, the Banshee will chase grenades - an obvious source of comic possibility. If you tag your empty Banshee, he'll potentially barge into it, knocking it away.
Although the scenery isn't so pretty, you can enjoy similar activities beyond the sides of the ship because the enemy exhibits the same odd behaviour there too. With either location though, try to avoid giving him a good line of sight to his usual flying territory, or he's liable to snap out of 'mad Banshee' mode, breaking off and returning. However, you can always draw him back to get things started again.
Dogfighting
Of course, there's also dogfighting - i.e. flying around attacking the enemy. But to get much satisfaction there you'd really want to be on Legendary I think, to make the enemy as tough as possible. On Easy it's so frail, it starts smoking after just a few plasma hits. However, you can still get satisfaction by delivering the killing blow with a fuel rod shot. Doing that from close range is rather easy though, so for more of a challenge how about trying from distance?
Ejecting the other pilot
Getting chased around on the roof of the ship by the other Banshee gave me an idea. By encouraging it to scrape against the invisible wall, maybe I could cause the pilot to pop out, like I've seen happen many times in level 2 when battling Banshees (for example see BCM157 which contains three such events).
It's pretty easy to get the pursuer to scrape the wall, simply by doing mutual circling close to it. Of course, it doesn't help that you can't see the wall, but by looking at the ground you can maintain a sense of where you are in relation to it. I tried such circling quite a bit, but had no success; the enemy seemed too secure in his machine. But I'd only been flying in fairly level circles, so I tried flying in wilder ways, and eventually achieved success. Learning from that, the desired approach became clear. After skimming the wall (touching it lightly or at least being close), you should be flying downwards. That encourages the pursuer to do likewise, which apparently makes him prone to ejection if he scrapes the wall.
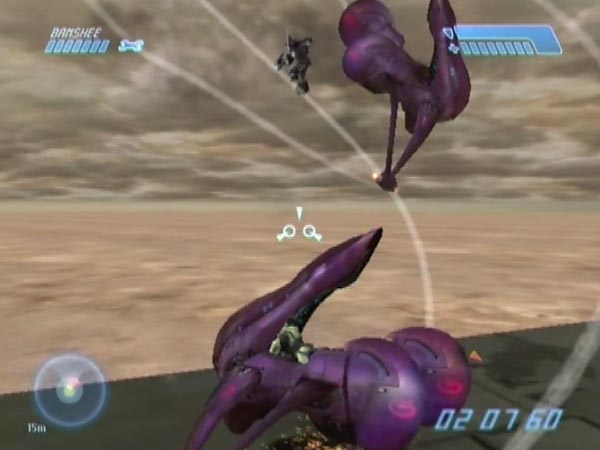
In due course I established a more specific recipe which I can summarize as 'skim and dive'. After skimming the wall, try to head down steeply; close to vertical even, as if trying to head back under the enemy (close to the wall). It's like you're trying to make it awkward for the enemy to stay on your tail. I found this much better than merely doing angled circling, and I'm frequently able to get the pilot out in less than a minute, once we've arrived at the wall. In fact, when I measured it 10 times in a row, my average work time was about 40 seconds. So once you've got the knack of the flying, it can be fairly easy. Getting the knack may take a while, but my movie BCM171 will at least let you see the sort of thing you're aiming for. It tells the story and shows several examples, including my first success.
Other places for ejection
All this ejection method required was 'mad Banshee' behaviour, a Banshee of your own, and a wall. As such, ejection can also be done beyond the sides of the ship, where the enemy has the requisite behaviour. You can either use an invisible wall or the side of the ship itself. The method has possible application in level 5 too, and I plan to explore that at some point.
Fun with the ejected pilot
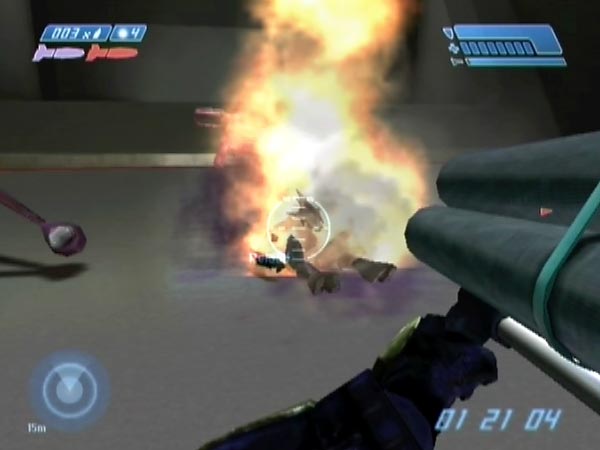
Of course, once you've got the pilot out, you can have some fun with him. One idea is to herd him off a rooftop edge by repeatedly making him dive. You better herd him fairly efficiently though, because he'll be firing at you every chance he gets! If your Banshee is about to explode however, you could always switch to his. Bear in mind that if he's sufficiently close to the edge, he won't dive that way; he'll dive away from it. To get him to dive off, he'll need to be a bit further away than that no-go distance - yet still close enough that a leap will take him over. Fortunately he's not too good at judging how far he's going to go!
Another idea is to get the invisible wall nicely decorated with splashes of purple blood - for example by launching him, as seen in my movie a few times. He potentially drops a whole load of grenades when killed, so you should try to get those detonated.
You might also like to try your hand at snuffing plasmas - again as seen in the movie. I've seen enemy pilots do that (see BCM170), and it's nice to know Spartans can do it as well! Actually, 'snuffing' isn't the most accurate term. That's what it looks like when you see an enemy do it, but it's not like you're extinguishing it. In fact, even though you escape any damage, there still seems to be an associated flash for the detonation. Sometimes it's very obvious, but other times it only lasts a single frame.