Banshee grab rim method and more
Posted June 19th 2026, formed from material originally elsewhere
- Introduction
- Rim method
- Alternative boarding with the rim method
- Playing the waiting game
- Other possibilities
- Measuring success rates
- Links to other material
Introduction
As mentioned at the start of my Bridge Banshee grab article, which focuses on the popular 'arch method' I developed, it was Sligfantry who started the whole Banshee grabbing business. In this separate article formed from material originally in the former, I'll cover his 'rim method' (as I took to calling it) and also talk of other possibilities.
His method namely involves getting the Banshee stuck in the bridge rim on the left, and he went public with it in his April 3rd 2016 tutorial. Actually (unbeknownst to me), he'd also noticed the possibility of the Banshee getting into trouble at the arch, but he'd encountered that in a different and rather problematic form, which is what led him to focus on the rim instead.
On April 12th he posted a video showing a stunning improvement of his rim method, having found an amazing way to board fast, though success was fickle. That seemed like it would give the fastest possible grab, beating the arch method by maybe 2-3 seconds.
By then, with both his and my own videos out, the speedrunners were on the Banshee grqbbing trail, and on April 15th ColdGrunter used the improved rim method to set a new world record of 4:50 for NTSC/PC, then got down to 4:42 the next day - 51 seconds faster than the original record. More importantly for the long-term though, he'd also found a more consistent way to get the pilot out, though the overall grabbing success rate remained low. As far as Legendary runs go, the classic 'bridge fall' technique for NTSC/PC became henceforth redundant. Strange to think that would ever happen!
Rim method
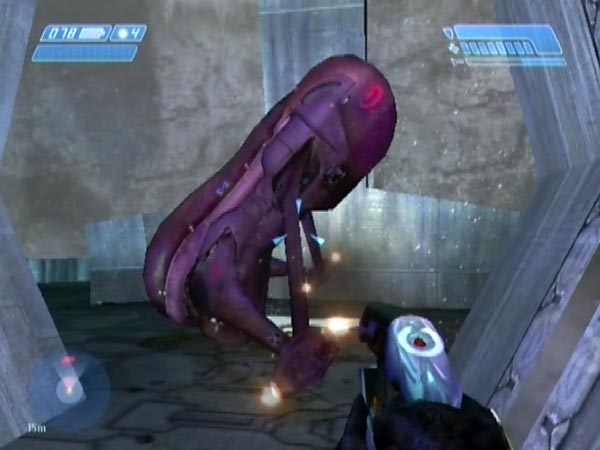
The rim method involves getting the Banshee stuck in the left bridge rim on its first attack run. Specifically, the left wing ends up stuck through the rim. Sligfantry showed the original routine in his tutorial 'Halo - AOTCR - Bridge Banshee Grab', which is accompanied by written details and an account of how the whole thing came about. However, getting the pilot out was problematic and very unlikely to occur fast. Also the subsequent boarding was a slow procedure, requiring the Banshee to be moved until it fell to the lower deck.
Fortunately, things were transformed a week later when he found a way to eject the pilot and board fast, though it was fickle. It's this improved fast-working method (incorporating a refinement by ColdGrunter) which I'm covering in this section. However, let me mention in advance that the boarding technique only works with red Elites, not blues. On Heroic you get about 50% blues, but on Legendary you get mostly reds.
The routine
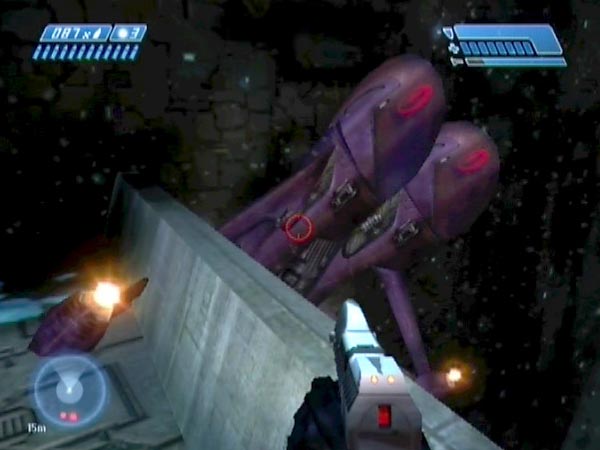
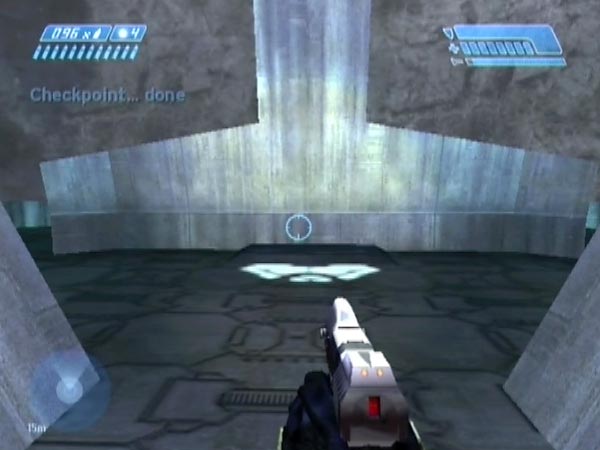
On arrival at the bridge, the initial task is to get the Banshee stuck. For PC and probably also NTSC, the current method goes like this. Kill any Grunt by the left Shade, and wait at the bridge rim in that corner. Optionally you can also kill some other Grunts, either before or after; but get to the corner without much delay. As the Banshee opens fire, jump backwards to bump into the door frame behind, then jump forwards and land on the rim, and jump. Your movements influence the Banshee, and if you're lucky (something like a 10-20% chance?) it'll end up stuck in the rim. It's quite an odd sequence of movements though and I suspect there's a better way just waiting to be found. That could really do with some investigation. As for how to influence the Banshee if you instead have PAL Xbox, I'll talk about that separately later.
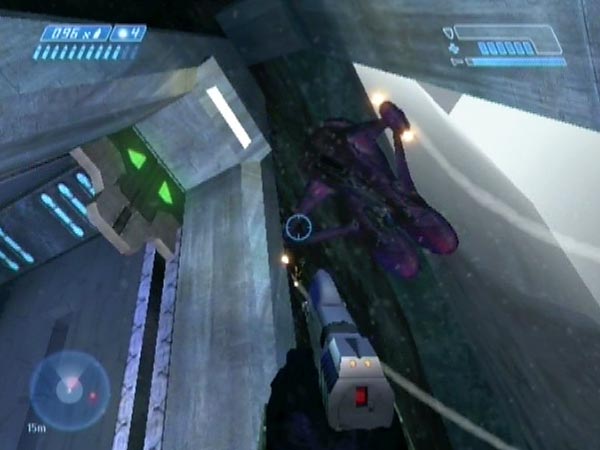
Now comes the task of boarding. What Sligfantry did was to jump diagonally across the Banshee towards the nose, then mash the action button to flip and board it when the pilot shifted the Banshee and - hopefully - fell out.
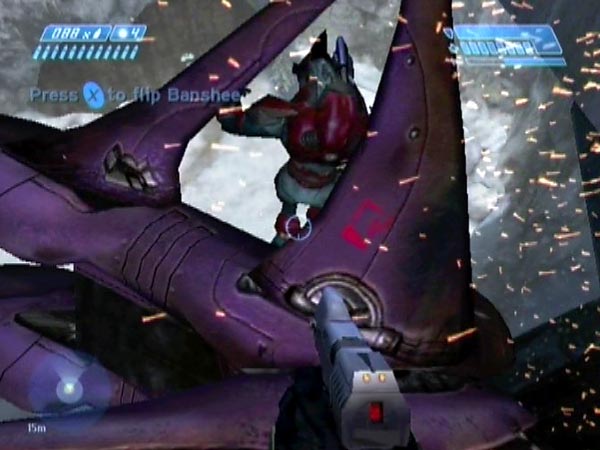
But when ColdGrunter got involved in connection with speedrunning, he found a way to get the pilot out more consistently (with the same underlying mechanism). Namely, stand on the Banshee between the nose and wing, getting there without aiming at the Banshee, then look at it and mash the action button to flip and board it if the pilot falls out. He did a tutorial on it, and also pointed out that it only works if the pilot is red. Blue Elites don't exhibit the necessary reaction.
Elaboration on boarding
At this point I'll elaborate about what's going on in regard to boarding, and give my own recommendation. If you're close enough and the pilot is aware of you (and he's red), he tries to move the Banshee around when you look his way sufficiently well. You don't have to be looking directly his way - and actually it can happen even when the Banshee isn't in your field of view at all, if you look in certain directions. It seems like an escape attempt, but maybe he's just trying to get a better view of you. His reaction is usually rather prompt, which is why it's important to try and avert your sight from most of the Banshee as you jump into position. You don't want him to react until you're in place, ready to flip and board. The nature of the Banshee movement depends on your location, which means you have some control over it.
What I'd recommend is to jump onto the Banshee facing the wall, landing between the nose and left wing, then rotate left sharply to bring some of the Banshee into view; or alternatively do the left rotation during the jump, for extra snappiness. After that, it's down to chance whether the Banshee moves in a way which happens to eject the pilot (though there won't be a reaction at all if the pilot's blue - which you'll be able to see). I don't think there's any point in crouching or trying to really get deep into the gap between the wing and nose (like ColdGrunter seemed to do in his 4:50 run). I've tried those things and found no benefit.
In regard to mashing the action button, you don't need to start doing that until the Banshee twitches. But if you prefer to start mashing as soon as you're on the Banshee, it certainly won't hurt. If the pilot is ejected, the mashing will first cause a flip, then a boarding.
Incidentally, it's also possible to cause ejection by jumping onto the tail. In fact, when I tested that in one particular situation, the pilot got ejected considerably more often when I used the tail. It didn't help however, because when you flip the Banshee, it tends to go away from you, making boarding relatively unlikely (though certainly possible).
Getting the Banshee stuck with PAL
Sligfantry mentioned that his PC method for getting the Banshee stuck in the rim doesn't work with PAL Xbox, and I agree. He described a slightly different method for PAL but it hasn't worked for me at all. Indeed, it's become clear that a method which works for one checkpoint situation may not work for others; so things need testing quite widely.
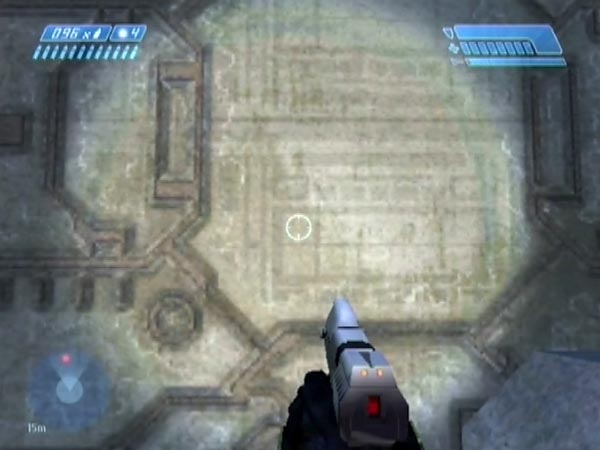
For PAL I found a simple method which in most checkpoint situations gives a success rate of maybe 40-60%, though I've also had situations where the rate seemed much lower or even zero (even with a checkpoint prior to the loading point). On arrival at the bridge, position yourself with down-aim as shown, just past the door frame. The large octagonal tile features a faint rectangle forming a 5 x 2 grid and I'm targeting the top left element. You don't have to have target it dead centre, but consider that optimal (there's a larger area where you'd still get a decent success rate for sticking, but I got the highest rate here).
Next, kill any Shade guys, ideally with pistol headshots. Don't grenade the left Shade - because if you do, that adversely affects the Banshee's flight decisions. The other Grunts will hopefully panic and not bother you for a while; but if one turns up later (it always seems to be a guy going for the left Shade), kill him. Simply remain standing where you are as the Banshee approaches. Usually it'll dip to towards the rim; and if you're lucky it'll get caught. It should be ok to start moving (if you want) once it's well into a dip. By that time your movements aren't going to have much influence on its course I think.
Trouble is, this sticking method has provided me with almost no pilot ejections! What typically happens when I get onto the Banshee is that it quickly escapes - often killing me in the process. The way it tends to get stuck just doesn't seem suitable for fast boarding. So at present, PAL is problematic.
Using a checkpoint
If you're not on a speed run, there are a couple of ways you can help yourself by delaying the pre-bridge checkpoint, which is triggered in the second section of the passage leading to the bridge. One way is to get it before stepping onto the bridge, to allow faster retries at getting the Banshee stuck. You could delay it until either just before the loading point - in which case you'll get different enemy configurations - or until you're at the door. In the latter case you can optionally delay it until just after Cortana starts talking. That would save a few seconds per try, and also has the benefit that you won't keep hearing her line.
Alternatively you could get the checkpoint soon after the Banshee is stuck, so you'll then be able to repeatedly make boarding attempts (but note: don't get near the Banshee prior to the checkpoint, else the pilot may react and shift the Banshee too early). If you fancy that idea, prepare as follows. There's a checkpoint triggered in the middle section of the passage after the landing zone. Keep that delayed until just before the trigger line for the aforementioned checkpoint; then get it and save it. When you now advance, keeping your newly triggered checkpoint delayed, you'll be able to reload from that save point if you fail to get the Banshee stuck. That'll save you having to restart the level.
Alternative boarding with the rim method
Sligfantry's original version of the rim method involved a different and much slower strategy for ejecting the pilot and boarding, and I'll cover that here (with a few contributions from personal experience) because it's still potentially useful. For one thing, the quick boarding way doesn't work with blue Elites at all. For another, maybe on average it could give you the Banshee faster, in terms of time spent working on it.
To start with, it'll be helpful to save a checkpoint before stepping onto the bridge. That way, if you end up with a stuck Banshee whose pilot refuses to budge, you won't need to restart the level. You can reload the saved checkpoint to start from there.
Ejecting the pilot
After getting the Banshee stuck, multiple tries are likely to be needed at getting the pilot out, so it's good to get a delayed checkpoint. You can use the bridge checkpoint (triggered towards the far end of the bridge). When you get back to the Banshee, the game will grant you the checkpoint as long as you're not too close.
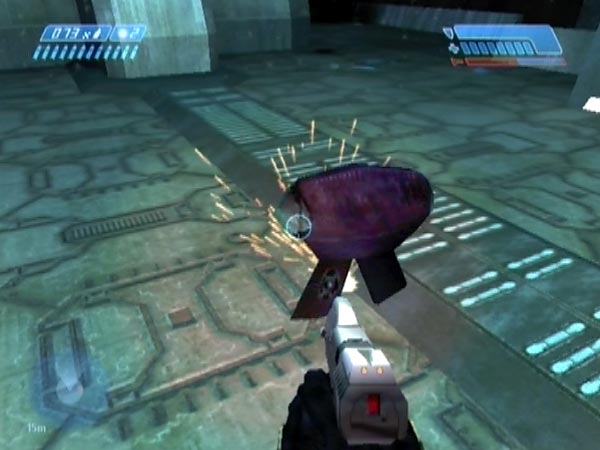
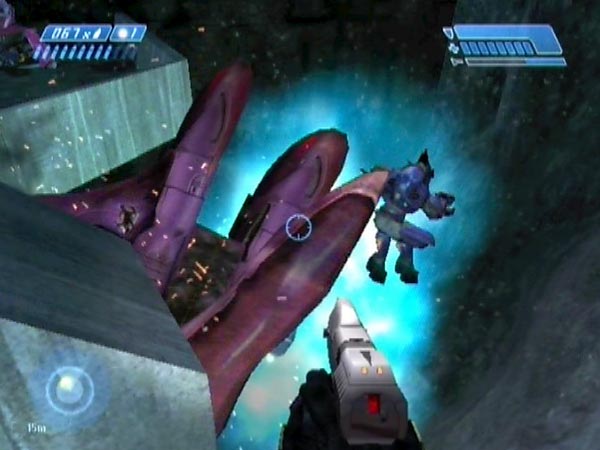
Various things can be tried to cause a Banshee shift which ejects the pilot. Going near it is one thing, but be careful about standing close, because if it twitches you can get mangled! The other main thing to try is try throwing grenades at it or near it (make sure you were well stocked). I especially recommend tagging it on the tip of the right wing. You could try the other wing tip too, though I don't recall having any success with that. You can actually tag it like that quite a few times, because the blast seems to cause relatively little damage.
You can also try going back over the loading point and returning; I found that this can sometimes cause ejection. But I think it depends on the angling. Like, perhaps it needs be really out of whack. When it happens, he's out by the time you see the Banshee again (and probably you heard some clattering while still in the passage - though not always).
Pilot ejection is a troublesome and fickle business though, doubtless partly dependent on the exact angling of the Banshee, and eventually you may feel obliged to just give up and start over. Have to say, I've ended up doing that in the majority of cases.
Boarding
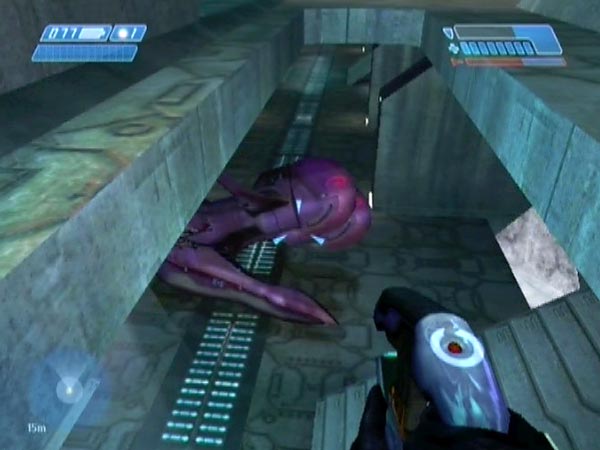
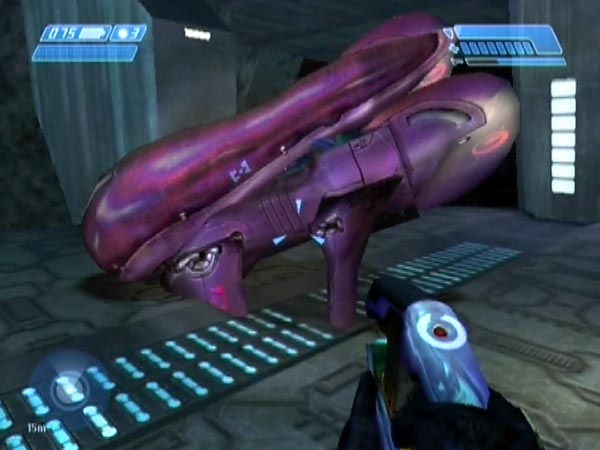
Let's suppose you get the pilot out though. The Banshee can't yet be boarded, but Sligfantry hit on an ingenious and rather amusing solution. By repeatedly flipping it, you can potentially get it moved to one of the deck holes for glass. When the glass is smashed, or if it was already smashed, the Banshee will drop down to the lower deck where you can board it - though it may need some final flipping, and you better be careful not to flip it off the deck! Actually, you could always get another delayed checkpoint before the final flipping, to safeguard against loss if you want. You can use the post-bridge checkpoint, triggered in the short second section of the passage after the bridge.
Moving the Banshee looks easy in Sligfantry's tutorial, but it may not go so smoothly in practice. To begin with I found it very hard to get the Banshee moved because it seemed jammed, or went back and forth unproductively. Turned out there was a deck support wall in the way, but I eventually realized what to do. You can use melee to shift the Banshee clear. Based on my later experience, I'd say you'll quite often need a bit of melee actually. Use a plasma pistol or AR, as those have the highest whacking rates.
Incidentally, you don't have to do all the shifting work from the upper deck. You can potentially do some work from below too, once the Banshee is made accessible.
Playing the waiting game
In view of how easy the arch method now is, probably nobody will be interested in the slow variation described in this section (stemming from my early investigation), but I'll cover it anyway.
The arch can namely be used to get the Banshee in a leisurely fashion if you're not in a hurry. You can simply wait around for attack runs, hoping for eventual success. Typically the Banshee gets stuck, and then when it tries to get free the pilot can fall out. This is a bit different to the case of using the arch on the Banshee's first attack run. It tends to enter the arch at a more level angle, which seems to make it more inclined to get stuck.
In regard to the waiting, naturally it makes a big difference where you stand or move, because those things affect how the Banshee approaches, and its subsequent course. I can give you some pretty good information for PAL Xbox, though I can't be sure things work the same on NTSC/PC.
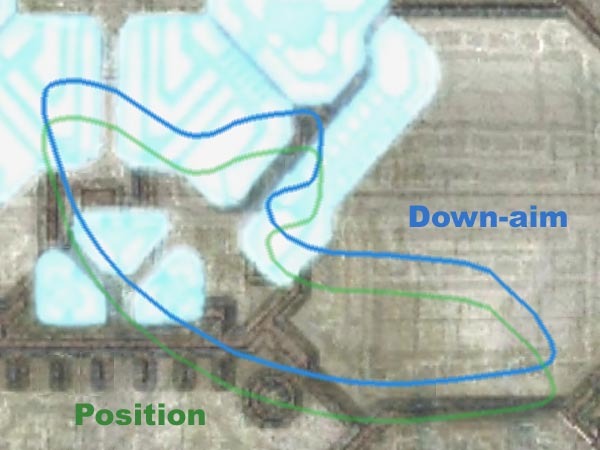
I tested a lot of spots to try to get an overall picture of where it's good to stand, to make the Banshee circle around into the arch fairly often (often enough to hold good promise for an ejection). The result is shown in the picture here. The green outline shows the approximate 'good area' to stand in. It's pretty small as you can see. Outside it, you could be standing all day without seeing any arch entries. Within it, undoubtedly some places are better than others, but I don't have any detail on that.
The blue outline shows where you should down-aim (while facing the arch wall) if you want to be in the required area. It's just a slight offsetting of the positional area, bearing in mind that when you down-aim, you're looking at a spot slightly ahead of your position (by almost exactly 3 pistol reticle radii).
Using a checkpoint
For playing this waiting game, it's a good idea to eliminate the four Grunts and get a delayed checkpoint, so you can always revert to full health if necessary. You could use the pre-bridge checkpoint, or the bridge checkpoint triggered towards the far end of the bridge. That said, standing around in that area seems completely viable health-wise. Even on Legendary you're unlikely to get quickly killed, and need only move from your spot when evasive action is necessary (the Banshee may come behind the wall occasionally).
Other possibilities
In this section I'll cover some other possibilities or ideas for grabbing.
Direct entry into the arch
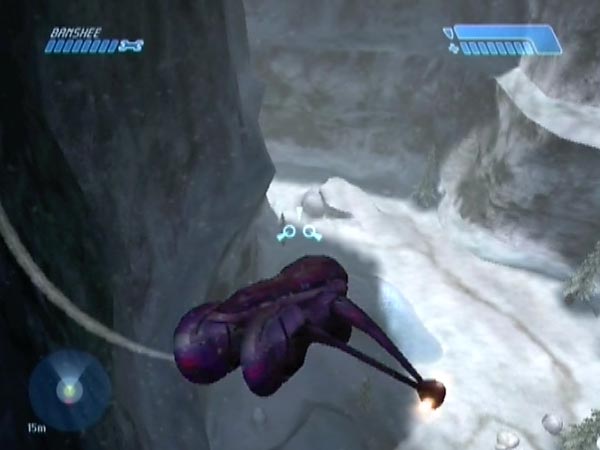
In regard to using the arch, I focused on what I call 'circle entry', where the Banshee circles around to enter from the bridge's right hand side. However, it's also possible for it to enter from the other side - which I call 'direct entry' because the Banshee is already coming in from that side, making its attack run.
Direct entry actually provided Sligfantry's first Banshee grab, after the Banshee got fortuitously stuck. He got a checkpoint and eventually found he was able to get the pilot out by spooking him with a grenade. But he was never able to find a way to get the Banshee stuck again, so ultimately gave up on it, switching attention to the rim instead.
I looked into the possibility myself and focused on getting it to the arch on its first attack run (see pic). I found a method and hoped it might lead to some fast grabbing, but alas it never did. The way the Banshee arrives at the arch just doesn't seem to give the right potential; and even when it got stuck rather than just bumping around a bit, I don't recall much success getting the pilot out when doing the sort of thing Sligfantry did, throwing a grenade from distance. For the record though, my method of getting it to the arch was as follows. Earlier I described a PAL method for getting it stuck in the bridge rim. Do the same as that, except crouch after it's been firing for a while. On Heroic I was crouching after two volleys, or thereabouts. When the Banshee breaks off, it seems random as to which of various courses it takes, but there's a significant chance it'll rise up into the arch. That happened about 25% of the time, in a test comprising 50 tries from a checkpoint at the door.
Further ideas
The arch and the left bridge rim corner aren't the only places the Banshee can end up stuck. I've seen it stuck in lots of places, including between decks. In fact I'd been planning to explore that idea and do a movie on it even before this grabbing business turned up. It's possible that the pilot might get ejected in some such cases. In particular, if you've got a stuck Banshee you could use grenades to try and get the pilot out - ideally after getting a handy delayed checkpoint nearby so you can make multiple attempts.
You'll see plenty of that in BCM178, in which the Banshee got stuck in the rim in an unusual place. As you'll see from that movie, you can potentially also have a lot of fun playing around with ejecting the pilot and killing him. You don't need to be restricted to your current weapons either; you could fetch others and get a new delayed checkpoint for additional fun. I'm especially thinking of a rocket launcher and sniper rifle there. But also, you may be able to have an awful lot of fun with a Banshee of your own, ramming and blasting the ejected pilot in mid-air, as seen in BCM184. Scoring fuel rod hits is quite a challenge though.
However, for any of this to be useful you'd need a method for trying to cause a particular situation. At present I have nothing to offer there, other than directing you to how the Banshee got stuck in BCM178 (I hadn't been intending for that situation though).
One other remark. I've spent some time at the far end of the bridge, seeing if I could get the Banshee into trouble at the arch there. However, the situation isn't a mirror image of the near side, and I don't think it's going to work. The Banshee just doesn't seem to have the right flight behaviour over there.
Measuring success rates
This is a bit of a technical section, but if you're interested in investigating some new methodology in regard to Banshee grabbing, you'd be well advised to read it, to be sure you appreciate some key issues.
In regard to any particular methodology you employ on the bridge, naturally you'll be interested in the success rate. For example, in regard to the rim method you'll be interested in the success rate for getting the Banshee stuck in the rim. However, there's an issue here about how you measure things, and it gets quite problematic. Let's suppose you get a delayed checkpoint at the door to the bridge, and repeatedly try your methodology from there, to get an approximate success rate. All well and good, but you need to realize that you've got a particular checkpoint situation, involving a particular enemy configuration. If you were to set things up again with a new checkpoint, things might be different enough that the Banshee tends to react somewhat differently, leading to a very different success rate.
To take that into account, you might instead test the success rate from a checkpoint obtained just prior to the loading point, so enemy randomization has yet to occur, and so you'll encounter a fuller range of situations on the bridge. It's a definite improvement, but now here's the problematic bit. Surprisingly, your checkpoint situation may already be quite 'specialized' in some way, even though you haven't hit the loading point yet! To give an example, I was doing this for testing a method of getting the Banshee stuck in the rim, and typically I was getting success rates upwards of 40%, but then I got a checkpoint which gave not a single success in 50 tries! Also, I've had situations where I get nothing but red pilots.
In subsequent testing I found that even if you get the pre-bridge checkpoint well back from the loading point - specifically at the start of the long section of passage - you may still have a specialized situation. That's as far back as I've checked.
Links to other material
March 2019: Burnt Scythe has done a long PC-based tutorial on the rim method, after using the method in setting a new world record.