Three Wraiths
Posted September 3rd 2013
Associated movies
Introduction
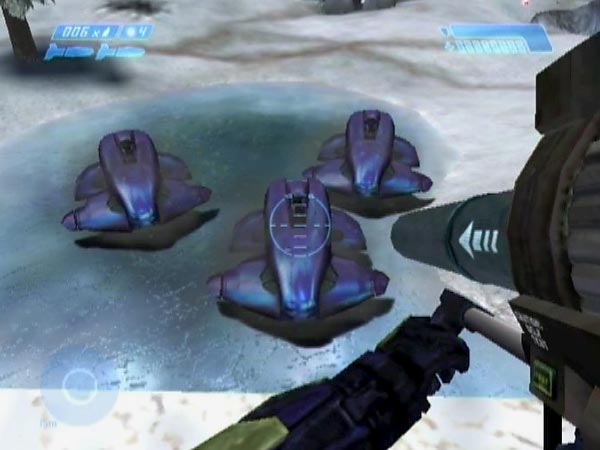
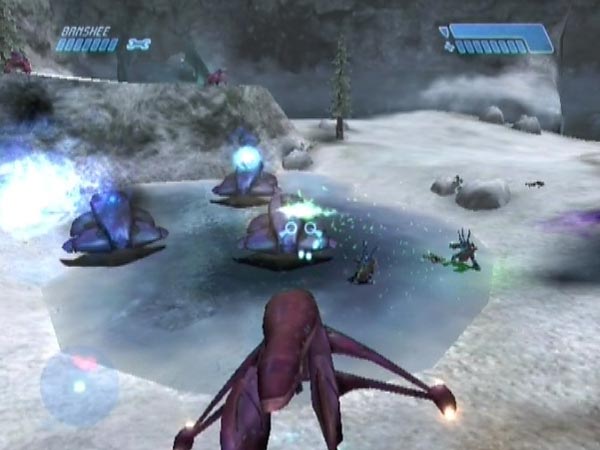
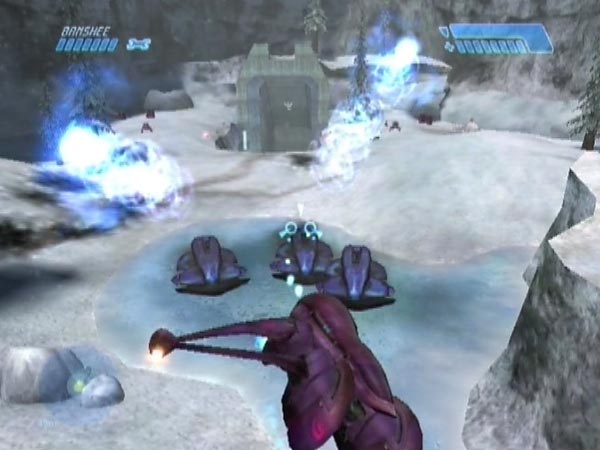
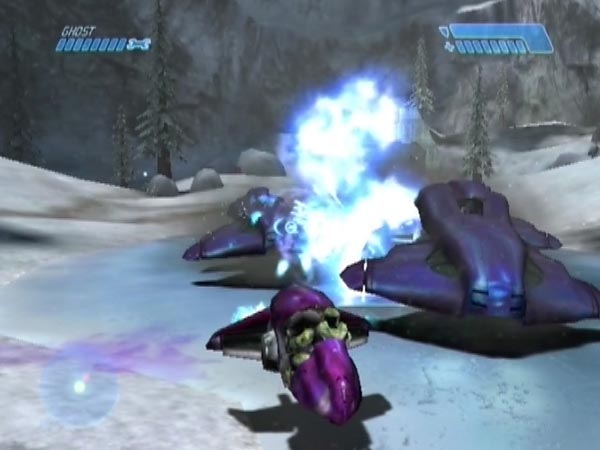
In the two-Wraith area there's a Wraith on an ice patch and another up above the entrance of the tunnel that leads to the cavern. By using a Banshee you can push the high Wraith down and onto the ice patch, thus ending up with both of the Wraiths together. But wait, you can go one better than that! If you left the level's first Wraith intact, you can actually get that one onto the ice patch too, and in fact it'll eventually home in on the ice patch - some interesting behaviour. You can thus end up with three Wraiths there.
It's quite a novel sight, and quite spectacular when they're all firing giant plasma balls. And need I say there's a good deal of fun to be had with them? I'll talk about that later.
The set-up work isn't terribly hard either. Any difficulty level can be used, but the higher the level, the more aggressive the Wraiths will be about firing, and hence the more careful you'll need to be when trying to push them around. It's no big problem even on Legendary though, and that would be the way to go if you want the eventual fun to be as noisy, plasma-filled and dangerous as possible.
Setting up
Save a checkpoint in the passage before emerging into the first battlefield. That's just to guard against a bit of trouble you might get later; you may need to restart from here.
In the first battlefield, leave the Wraith intact. It's easily bypassed in a vehicle or even on foot, and you can let the Marines die if you want to make sure they won't damage it. It's not necessary to kill off the covie troops here. If you want to be minimalistic you could simply run to a vehicle then speed off. You may want to get the sniper rifle and rocket launcher before leaving, but those are also available in the next area, or could be picked up later (any time before you trigger a tunnel checkpoint, at which point the game would remove them).
In the crashed Pelican area, eliminate covies and Marines, and check that the Wraith has come over the step. Sometimes it fails to, though I'm not sure why. If it hasn't come over, alerting it may bring it over if it's nearby. But if it's back in its original territory, that's no good. Restart from the passage checkpoint you saved, and hope you have better luck next time.
Moving on, steal the platform Banshee and do some killing in the two-Wraith area if you want to. One option there is to land on the Banshee platform and do some sniping. Could be quicker than using your Banshee, and it'll keep the Banshee safe. If you want maximum safety in your subsequent Wraith pushing work, leave only the Wraiths.
You may like to get a delayed checkpoint just before this next operation, in case things go wrong. One option is to use the checkpoint triggered with the battle, and then there's one for triggering the Banshee pilot. Beyond those, there's always the option of using a tunnel checkpoint.
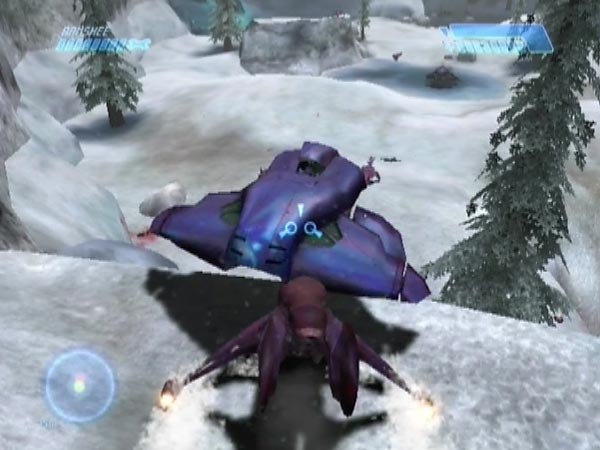
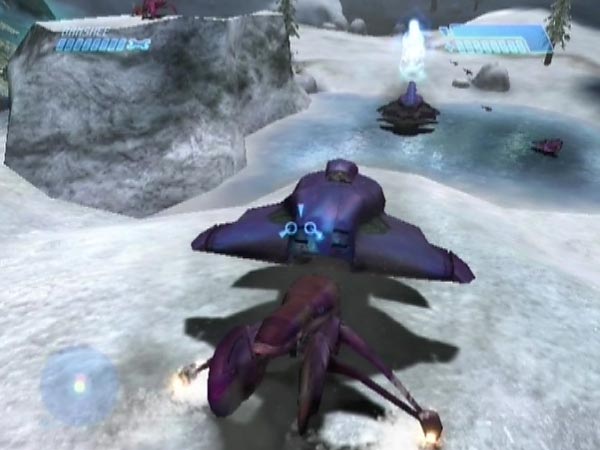
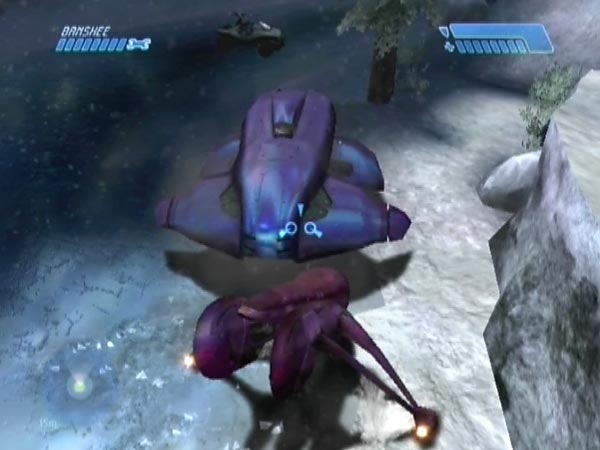
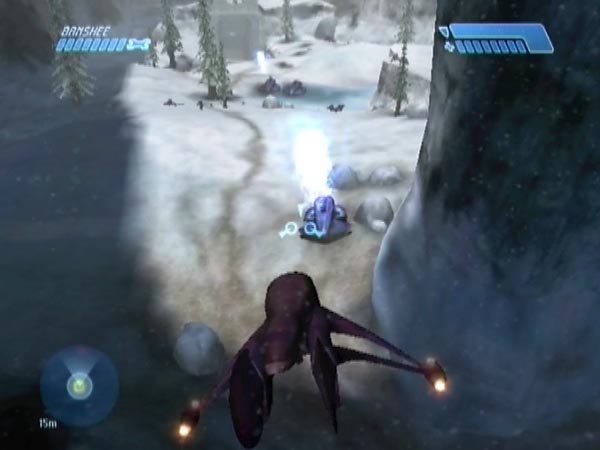
Fly to a place over the left of the high Wraith's platform area so it moves to the right (the side where the supplies are), then close in and push it off the edge. It mustn't overturn else the pilot will be ejected. Also try to avoid it ending up on the slope down into the tunnel, because it's harder to push up a slope.
Push it to the ice patch, trying to stay close so it won't fire. If you're ever nose to nose and it's not budging, just back off a bit then ram it to get it moving again. It's also possible to get underneath the front and sort of carry it along (quite fast), but it's not easy to maintain that arrangement. As well as in BCM80, you can see examples of Wraith pushing technique in BCM54 starting around 2:41.
A danger here is that while pushing, the other Wraith may send shots your way, which could also damage your cargo; so watch out for that. It helps if that Wraith is initially unaware of you and looking away, potentially enabling you to get the high Wraith to the ice patch without coming under fire, if there are no other covies around. Such misdirection is quite easily arranged by getting it firing at you in the direction of the Banshee platform then flying off to the platform or thereabouts, far enough that it loses sight of you. At that point you can arc around still unseen and descend to the high Wraith (freefalling is good). If shots do start coming your way while you're pushing though, it could be worth breaking off for a while before closing in for another spell of pushing. You could repeat the misdirection tactic for added safety.
Note: the high Wraith has no positional movement instinct once off its platform, so it'll remain where you leave it.
This next bit of Wraith moving isn't as danger-prone as with the high Wraith, but again you may like to get a delayed checkpoint beforehand.
Fly back to the early Wraith then push it through the crashed Pelican area and down the sloping path on the left. Once it gets past the rocks on that path, it should head for the ice patch of its own accord. If you want a new Banshee afterwards, you could fly through the level and get one from the top of the tower. The Wraiths should still be present when you get back.
Finally, save a checkpoint for the start of your fun. You can always use a tunnel checkpoint for that. You can delay it with Banshee fire until emerging from the tunnel. It's also possible to use the Banshee pilot checkpoint if you kept it delayed long enough, such as seen in BCM80.
Set-up options and details
Here are some additional options and details for setting up.
Using advance preparation
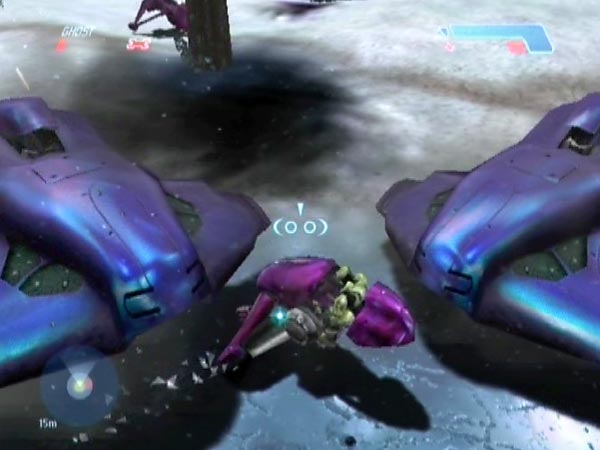
If you descend off the level's first bridge, you can fetch the twin bridges Banshee and blast the platform Banshee down. One of these can be reserved as a new Banshee to use for fun after getting your Wraiths together, and the other could be used to ease the main set-up work. See Rearranging the furniture if you're not familiar with what I'm talking about. There are a few other things you could do as well. For example you could overturn the two Ghosts which normally attack in the crashed Pelican area, and you could move a Ghost to a place where it'll be handy for later fun with the Wraiths. The Scorpion too.
Note: When setting things up this way, you can potentially go back later to trigger a checkpoint on the bridge (one you missed because of descending off it), and delay it to use for the start of your Wraith fun. This could be useful if you want to avoid triggering a tunnel checkpoint. See here for the checkpoint I'm talking about.
Arranging handy items
For your later fun with the Wraiths, you might want various weapons and vehicles handy. You can move things into convenient positions any time prior to getting your final checkpoint. A good place for spare weapons is up on the Shade hill overlooking the ice patch, where they won't be in danger of getting blasted away by Wraith fire.
You'll surely want a rocket launcher, and in that case be sure you've got one with you if and when you first trigger a tunnel checkpoint (after initiating the first ground battle), because at that point the game seems to remove any launcher you're not carrying (even if you picked it up sometime previously). This fact also means that if you want to have two launchers for your fun, you'll need to avoid triggering a tunnel checkpoint.
Music issues
Another detail of setting up is, do you want to have music playing at the start of your save or not? There's battle music triggered for the two-Wraith area if you didn't board the Scorpion, and music triggered when opening the tunnel door. By doing things appropriately, you could have either of those tracks playing at the start of your subsequent fun (as long as you didn't open the tunnel door during some advance preparation, in which case those tracks end up playing together), or you could have no music playing. The battle music ends when you reach the bottom of the slope leading down into the tunnel (or never gets going if you boarded the Scorpion). The tunnel music ends when you cross the loading point beyond the cavern.
If you want the battle music ('The Gun Pointed at the Head of the Universe'), you won't be able to use a tunnel checkpoint to complete your save, but you can use the checkpoint associated with triggering the Banshee pilot. When you drop down to push the high Wraith, you'll trigger that checkpoint (the ceiling of the trigger zone being a few metres above that high ground). It'll initially be delayed by enemy threat, but when clear of threat you'll need to keep it delayed another way, e.g. by Banshee firing. You can see me doing that in BCM80.
Having other covie troops too
In the set-up description I mentioned killing off the other covies in the two-Wraith area for maximum safety in moving the high Wraith, but they can instead be left alive to add to the later fun. If you're interested in that, preferably avoid triggering a tunnel checkpoint (any time after triggering this area), otherwise all covies on foot will head for the cavern (part of the dynamic used in forming a cavern megabattle).
In view of the fire you might suffer while pushing the high Wraith into position, it would be nice to have three Banshees already available via advance preparation. Two for the set-up work, and one for the later fun.
Alternative placement of the high Wraith
As I mentioned earlier, the high Wraith has no positional movement instinct once off its platform. This means you can move it to wherever you like and it'll stay there. So, perhaps you'd like to put it somewhere other than the ice patch? It could go up on the Shade hill for example. The other two Wraiths are different however. If you shift one off the ice patch, it'll try to return.
Avoiding an enemy spawn
When you trigger the crashed Pelican area, there's a group of covies on the ice just ahead of the Marines. If any of those covies are still alive when you've reached the next trigger point, the covies who'd normally spawn in the tunnel and down the path seem to get cancelled. You might like to do that deliberately, to save having to kill them - not that killing them would be any great trouble. However, they also seem to get cancelled if you left a lot of enemies in the first battlefield (e.g. all those in the second half); so that's an alternative dynamic to rely on.
Setting up with Marines
With extra work it's possible to set things up so you have some Marines around to attack the Wraiths or ride with you on a hog. I may elaborate on this later, but for now I'll just mention a few easy options.
If you get two Marines in a Marine-retaining hog in the first battlefield then leave it somewhere safe (e.g. indoors), you can come back for it later after getting your three Wraiths together. Actually you could also make do with a normal hog, by getting two Marines blocked by it in the passage leading to the first battlefield, so they won't run after you.
Getting the early Wraith over the step
I mentioned that the early Wraith sometimes fails to come over the step that marks the start of the crashed Pelican area. Is there any way of making sure it comes over? I did quite a bit of experimenting to try to identify the workings, but it was inconclusive. However, it does seem to help if you kill the Marines in the first battlefield. Occasionally I've seen the Wraith waiting just short of the step (rather than returning to its original territory), and in that case if you get its attention it'll probably come over.
Having fun
Some talk now about things you can do with your trio of tanks.
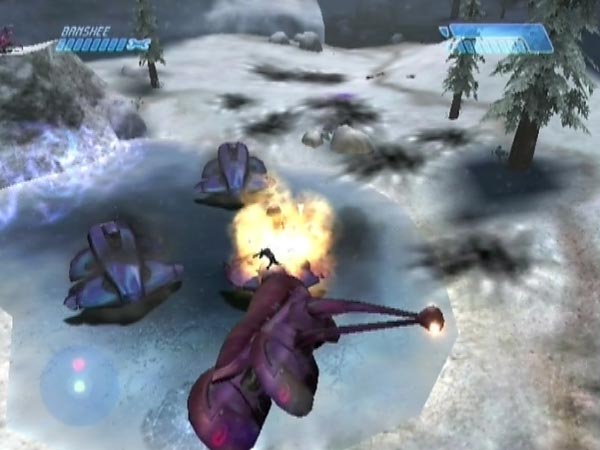
Banshee attack
Flying around blasting them with a Banshee is good fun for starters, and naturally there'll be more plasma in the air than usual! On Heroic each Wraith can fire at a rate of up to 14 shots per minute, but on Legendary that rises to 20 and you can expect the shots to be more accurate too. Indeed, Wraith pilots can be devils, sometimes giving the impression of being able to anticipate where you're going. See BCM135 for some Legendary action. In the opening play I had fun swooping around the trees quite a bit, and in successive plays I get more gung-ho.
The trees can be part of an aspect you might enjoy, namely trying to fly closely around things and skimming close above the ground. In short, cutting things fine. It's great practice for Banshee control, and in regard to the Wraith hazard you can make things as dangerous as you like.
Note: If the battle music for this area is playing, it'll stop when one of the original two Wraiths here is destroyed (it has to be destroyed; pilot ejection wouldn't be enough, even if you kill him).
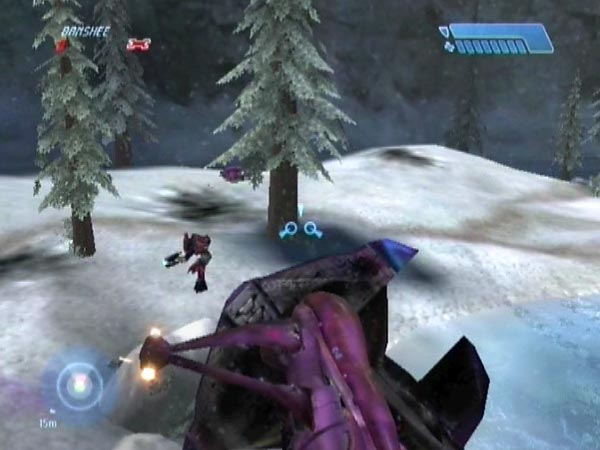
Ejection challenge
In a Banshee you could also try my 'ejection challenge', in which your task is to get all three pilots ejected and killed, and survive. Of course, the problem there is in avoiding Wraith blasts in the process! It's especially tough on Legendary as the gaps between shots can be very low - like 2.5 seconds - and the plasma rifle fire from an ejected red pilot is fierce too. But it's still viable, and excellent fun - though you might enjoy a lower difficulty level better for less severe fire (especially if you're new to the business of ejecting).
You can also do this challenge against the clock, measuring your time from when a first Wraith starts coming into view (or from any convenient starting point you like) to when the last pilot dies, as judged by either his animation or the start of a death cry. See BCM81 for some of my speed plays.
A few tactics. (1) At the start, you can often take them by surprise and get a first pilot ejected quick before there's any firing. (2) When there are two Wraiths, you could try approaching so you're in a line with them, so the nearest will block any shot from the one behind. (3) On Legendary the fire from an ejected red pilot is so dangerous that you should normally try to kill him as quickly as possible after ejection, rather than moving on to your next ejection. Incidentally, if you leave an ejected pilot alive, he'll potentially run to board a Ghost if there's one handy - so watch out! (4) Sometimes you can briefly use a disabled Wraith for cover; especially when trying to kill the pilot from a first quick ejection. (5) If you eject a pilot so he lands near another Wraith or even on it, he may well get killed from a knock, saving you the time and trouble of killing him yourself.
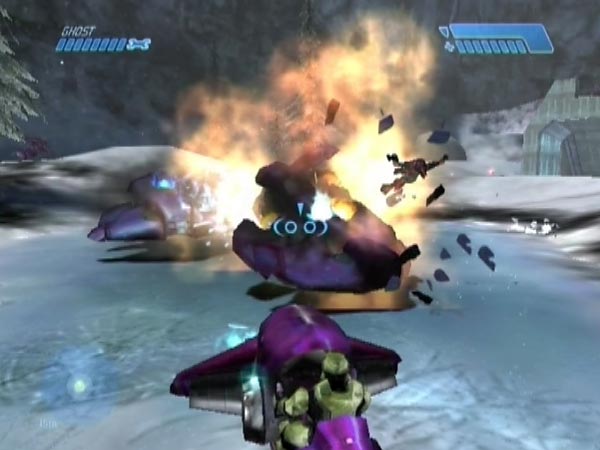
Ghost attack and stunting
Tackling the Wraiths with a Ghost is another enjoyable option, and you can see a taste of that in BCM153, which may give you a few ideas for tactics.
In particular you might enjoy the challenge of seeing how fast you can destroy the Wraiths - just as you might with any other weaponry indeed. If you circle them closely as seen in the latter part of the movie, you can get them to clumsily blast one another a lot, which can speed their destruction considerably, adding to the damage you're doing with your hopefully near-constant bombardment. You have to be careful not to hit the scenery and get stalled though, else a Wraith blast is likely to ruin your day pretty quick!
Of course, you also need to stay clear of blasts as you circle. It's a tricky balancing act to do that and maintain your fire, and you'll probably need a bit of practice before you start to feel a measure of control. You can circle in either direction but perhaps going clockwise is a touch more favourable in terms of how the Wraiths configure themselves. I think I did better with it on average.
You can also enjoy attempting stunts, using the Wraiths as launching platforms. Drive at a Wraith to bounce off it and you can quite easily do a back flip or corkscrew (possibly a double); and if you get a blast from behind, a front flip is possible. There are a few other dynamics you can get as well; check out my stunting extravaganza BCM154!
If you find yourself going under Wraiths too much (it can quite easily happen), remember that you can always raise the nose of your Ghost just before hitting a Wraith, using the A button.
Of course, when stunting you should expect to get killed a lot, either before, during or after. So for the sake of convenience it'll be good if you're already in a Ghost after reverting to your last checkpoint. That way you won't have to take the time to board one every time you revert. Also, it's highly advisable to have a Ghost which is in perfect condition, so it can withstand a close blast or two.
Rocketing
Rocketing the Wraiths is another fine recreation. You could try it from down at their level, or station yourself up on the overlooking Shade hill, or fire from long distance such as from the Banshee platform. One special thing you can try is to get all three Wraiths to a severely weakened state, then finish them all off with a single rocket blast (or other type of blast) - if they're close enough together. Actually, the blast from a Wraith exploding could potentially finish off another close by; so they don't necessarily need to all be in range of your blast to get finished off.
Joyriding with Marines
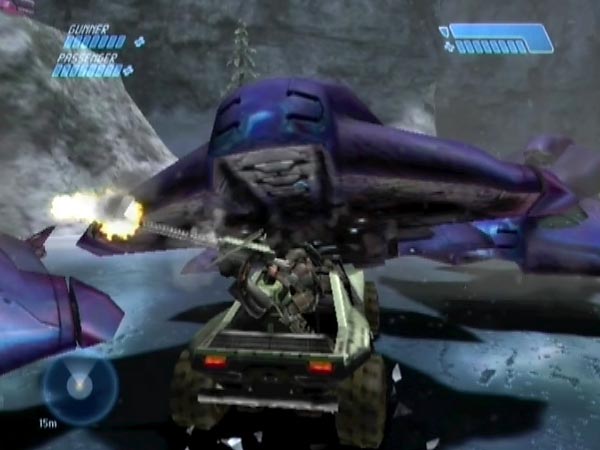
There's also the possibility of whizzing around in a hog with a Marine on the chain-gun (see my Warthog joyriding article). One thing you can do there is speed onto the ice patch and barge through the Wraiths. If you drive straight into one, it goes up over the hog (see earlier pic).
Other weaponry
Using grenades and fire from weaponry other than a launcher is another idea, as a challenge. See if you can wear them down on foot. Oh, and there's also the Scorpion to play with. I haven't tried that out yet; maybe later.