Setting up
Associated movies
- BCM77 - Normal; Setting up with 40+ covies (9:58)
- Basics
- Detailed plan
- Bypassing enemies
- Ejecting Shade gunners
- Cliff corner Grunts problem
- Enemy numbers
Basics
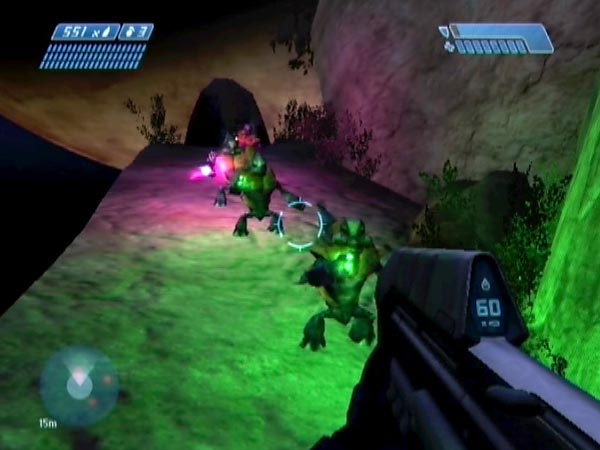
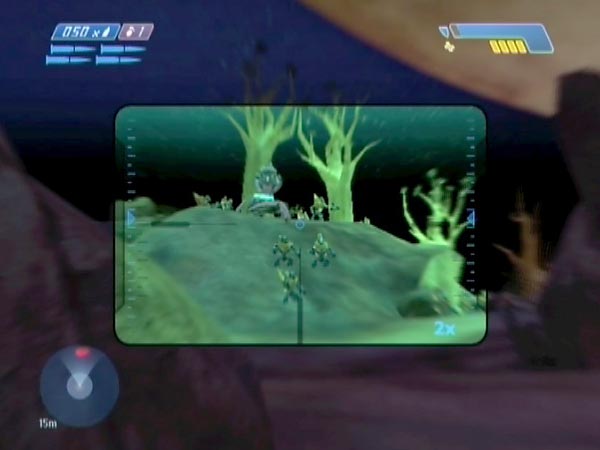
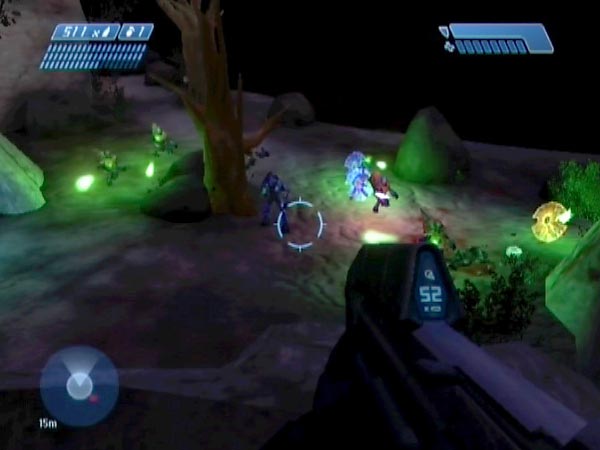
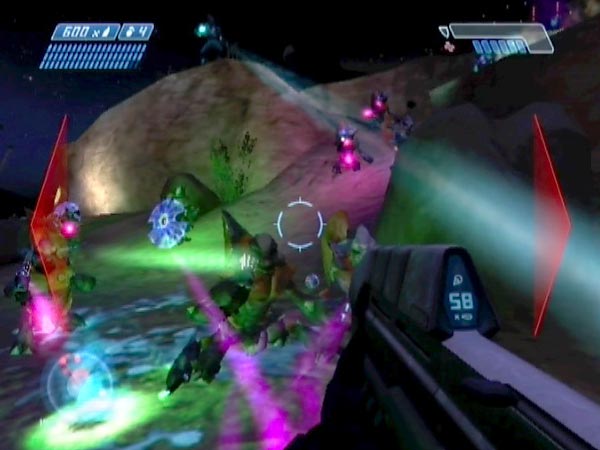
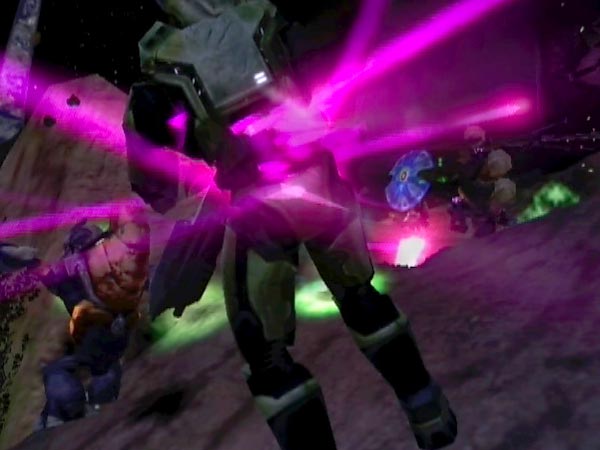
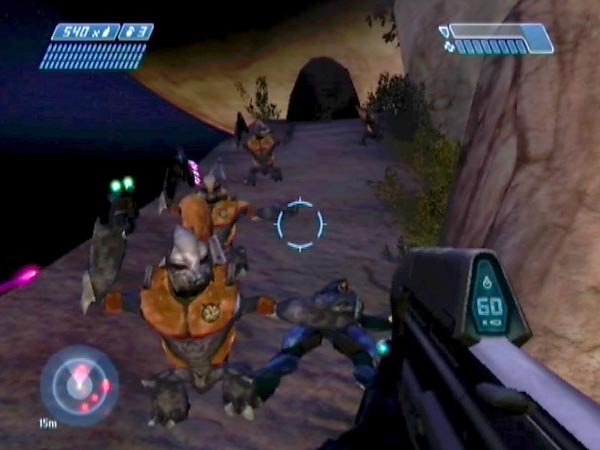
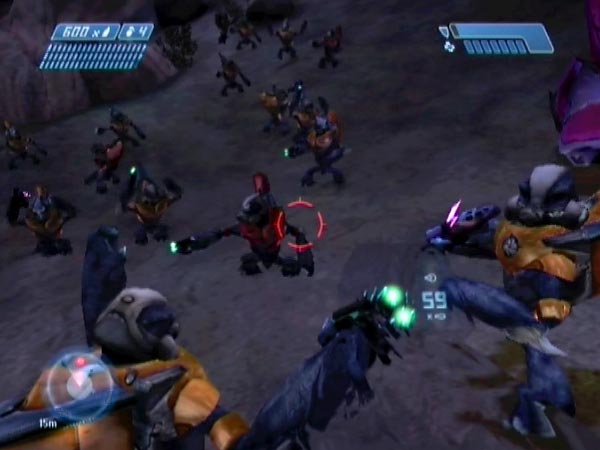
The dustbowl megabattle takes place in the dustbowl area of level 3 ('The Truth and Reconciliation'). It's the big area with a rocky bridge over a bowl-like depression. The key to setting it up is to get enemies from earlier (even Shade gunners, once ejected) to move through to the area, swelling the numbers to as many as 50 on Heroic or lower. You can do this by triggering certain checkpoints ahead of them, causing a behavioural change which frees them up to move on, given a bit of encouragement. Doing this involves running past a lot of enemies at close quarters though, so getting near the maximum 50 is only a realistic possibility on Normal or Easy. But you might not want that many anyway, as it can result in some noticeable framerate slowdown in battle. That said, most of my dustbowl play has been against 45+ enemies on Normal, and despite some slowdown at the start of such battles, it's still acceptable.
Basic plan
Here's a shortened account of setting things up, to get you started - or you could just watch BCM77. I recommend using Easy to get used to things. The higher the difficulty level and the more enemies you try to achieve, the more frustrating the set-up work can get (on account of all the fire you have to suffer when running past enemies), and the more important it becomes to refine your tactics.
Kill the Marines. During the remainder of the set-up work, kill any enemies you don't want for the megabattle or that are endangering you too much, but try to leave the rest unharmed.
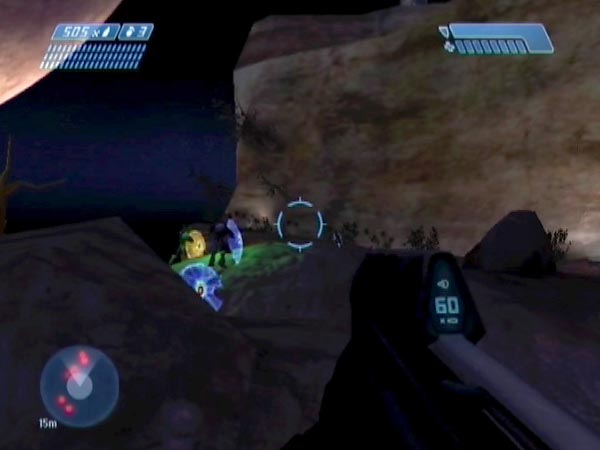
Run through the first area and reach the small dark rock on the right of the rising cliff path, then backtrack to cover in the first area. The enemies there will leave, though some might need prompting with shots into the air (or try backing off to the landing zone). Grunts manning Shades can be ejected with grenades if you place them at a safe enough distance.
Run up the now crowded path and continue past the raised land in the second area (the area with supplies and a Shade or two). Head along the precarious path leading to the dustbowl area. Around the sharp cliff corner, head along the cliff path to try to lead pursuers deep into the area so they're as far away from the cliff corner as possible, then swing back around through the dustbowl to return to the second area.
Most remaining enemies will probably be gathered near the supplies. Attract them around the raised land with shots into the air (e.g. from near the other side) and get clear while they pass. Over the next few minutes they'll hopefully trickle around and head on through to the dustbowl area. Any enemies that didn't advance close enough to the supplies will tend to stay put however.
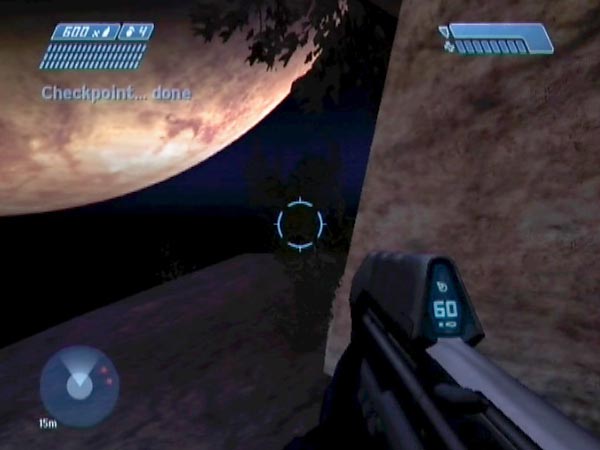
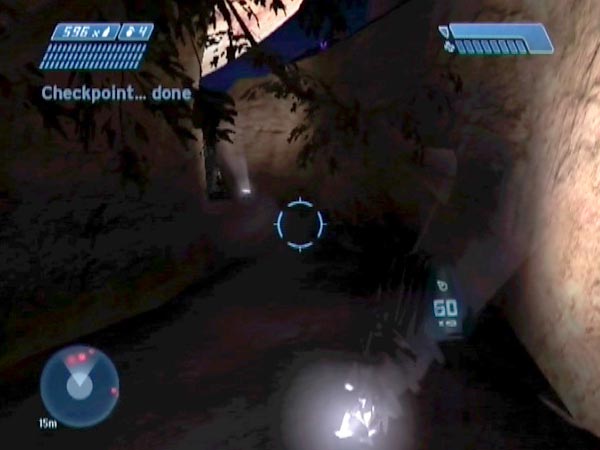
Prepare for battle (weapons, grenades, medkit) then head on through. Get to the active camouflage and apply it. Run along the path and jump down into the passage that leads to the grav-lift area. Get a battle start checkpoint a few metres in, where a ground light projects brightly up onto the left passage wall. Now have some fun!
Difficulty levels
After getting familiar with the set-up work on Easy I suggest you try Normal next, which may actually be the best difficulty for battling on. Fending off 40+ enemies at close quarters will be no pushover, believe me! Things will be much harder to set up on Heroic and you may find the battling too murderous to enjoy, though it depends on your tactics and enemy numbers. On Legendary there are actually 55 enemies available - 5 more than the other difficulties - but there's no way you could manage to get anywhere near that many into the battle, due to the difficulty of running past enemies at close quarters. You're probably best off sticking to Heroic or lower as the fighting is potentially so tough, often giving you little chance to get your shield recharged due to the almost unrelenting enemy pressure.
Detailed plan
Now here's a detailed account of setting things up, with lots of explanation about what's going on and why you're doing certain things, plus tips and troubleshooting advice to help you do the best job possible. My movie BCM77 shows an example of this plan in action.
General advice
Throughout, kill any enemies that you don't want for the megabattle or that are endangering you too much, and try to minimize damage to the rest, simply bypassing them - except maybe peppering certain enemies to discourage them from shooting at you. There are some general tips on bypassing later. Also feel free to pick up dropped grenades or weapons of course.
Checkpoints will usually be delayed for at least a while due to enemy presence, as the game generally delays checkpoints while it considers you under threat. In some cases (which I'll mention) it's useful to keep a checkpoint delayed until just before a difficult phase of work, to make repeated attempts as convenient as possible. The more ambitious you are in regard to getting high enemy numbers and retaining excellent health, the more important that way of proceeding becomes. When not under enemy threat, you can always continue a checkpoint delay by jumping. I won't bother to keep mentioning that.
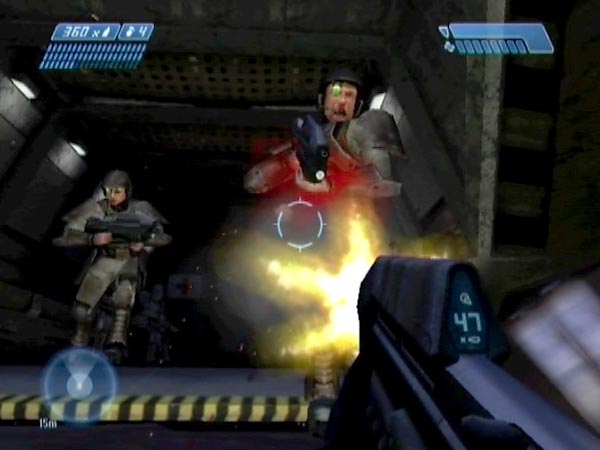
Kill the Marines
After disembarking, kill the Marines; they'd only interfere with your work. With an AR you can potentially kill them before they've even run off, or maybe even before they've hit the ground. To do this, disembark facing them, having already hit the weapon-switch button which takes effect in a delayed-action way when you're down. You'll be able to start shooting when they're still seated. You can also use the sniper rifle if you don't mind using up a few rounds (as few as two; one for each row).
Trigger a retreat without losing health
Shortly you're going to try and get through the first area, bypassing enemies there. But before that, I suggest briefly advancing far enough to make an Elite and two Grunts enter from the path beyond, to make the start of the path safer when you get there. It suffices to reach the small rock past the first ground light on the left, as seen in BCM77. You'll probably get spotted, but as long as you don't lose health it won't matter much.
You also have the option of doing some killing from safety if you want to eliminate anyone. If you're going to kill an Elite, do it just before your run through the area, as it can usefully cause panic.
If you see an unmanned Shade, you may like to try and grenade it over without killing the nearby gunner, to reduce the threat and save yourself having to eject him later. However, the Shade on the right isn't too dangerous so I suggest letting it get manned, making one less Grunt on foot. As for the left Shade, firing a shot to alert the covies tends to make the gunner move away from it for a moment, which can keep him safe from your grenade; so keep that tactic in mind.
When you're ready, run through the first area. I suggest entering at the back, dropping down from the overlooking high ground. You may get the chance to recharge at the start of the path if there's no Shade Grunt around (you probably would've needed to kill him for that). Maybe you won't even need to recharge though.
There's a large sloping rock along the side, which can initially hide you from the four incoming Grunts. If you fire a shot before they're alerted to your presence, it can panic them for a few seconds if they were close, saving you damage.
Reach the 'rock trigger point' at the start of the small dark rock just past the large sloping one. This triggers enemy retreat behaviour and also a checkpoint (the 'rock checkpoint') which will initially be delayed due to enemy threat, and which you should keep delayed for the time being (do jumping when not under threat). Without losing health (you'll want full health for an even tougher run coming up later), get back to a place of safety - possibly the LZ.
Tip: If the left Shade was manned as you neared the start of the path, you could try to eject the gunner by leaving a frag in just the right place as you pass, thus saving you from further nasty plasma fire. There's a big rock to the right of that Shade, and a frag placed halfway along it should do the job.
Another tip: Unless you're happy to some Elite killing, it helps a lot if the only ones here are blue. If you get a red, you can always revert to the landing checkpoint to get them randomized again. On Normal or higher, I'd certainly recommend that. It would also make the start of your next run easier.
Empty the first area and save the delayed checkpoint
Now that you've triggered a retreat instinct, enemies on foot are able to leave but some may need prompting (which is part of the reason you returned - else a lot of these guys would simply get left behind). Try firing shots into the air or moving to a position where they don't feel threatened. When the foot soldiers are gone, eject any Shade gunners with carefully placed grenades and let them join their buddies.
In the next phase of work you'll be running past the enemies you've met so far, plus new ones. It can help if they've gone quite a way up the path, so you can get quite far before all the shooting starts. To encourage that, fire off your weapon somewhere along the back wall of the first area, where there's a Shade near a couple of stationary shields (maybe near the right corner is best). This tends to attract enemies along on the other side of the wall, as you'll see from your motion tracker. It also seems to draw in some enemies from around the tip of the raised land you'll be running past shortly, which I think is beneficial as it lowers the pressure you'll be under on the other side.
Now you're ready for the next run, which may very well need multiple attempts, get the checkpoint at where you want to start from. I suggest getting it at the end of this first area, but another possibility is to get it at the aforementioned sloping rock, as long as you're not spotted. I strongly recommend saving this checkpoint, to make sure can get back to it if needed.
Music elimination tip: Near the back wall close to the tree, you can trigger the path music in advance, so that when you revert, it'll be over. I recommend this because (1) it can get annoying to hear it repeatedly, and (2) a lack of music will make it easier to hear when any covies die from friendly fire, which may be a consideration if you're trying to get through without any such deaths.
Get to the cliff corner trigger point
Being as evasive as you can (and let me remind you of my bypassing tips), run past the mob. I recommend going along the left edge of the path. In places where the edge goes in then back out, you can even be shortcutting your path by hopping over the void! Be ready to hop over enemies where needed. Don't get held up, even for a second.
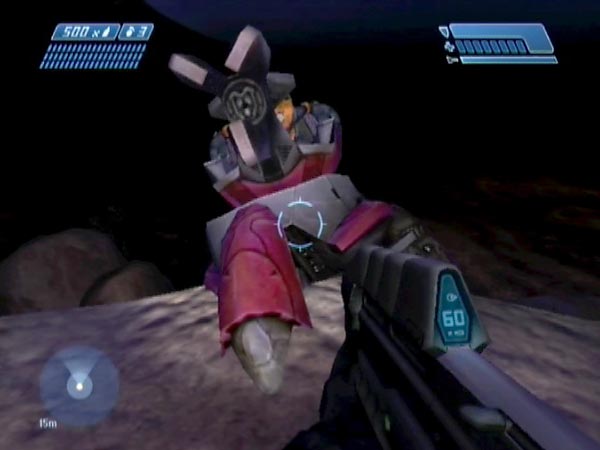
When you get around the tip of the raised land past the supplies, it can be worth killing the Elite who advances along the precarious path ahead. It can ease the pressure considerably, including by making Grunts panic, and is also a fix for the cliff corner Grunts problem detailed separately.
You might be able to recharge your shield if no Elite is hot on your tail. One option is to shelter close in to the side of the tip, but there's also a tree out wide which can serve. Actually, there's also a potential recharging spot before rounding the tip. On the part of the path near the Shade, there's a rock very near the edge. If you crouch behind it in just the right position, you'll be sheltered from enemies you've passed and from the Shade - though not from enemies ahead of you if any. When recharged, you can continue straight on after backing up a step and taking a running leap across the void.
If possible, try to dawdle a bit on the other side of the raised land while firing shots into the air, trying to encourage earlier enemies in your direction. This is partly to get more pursuers to draw into the next area, and partly to attract the most distant early enemies to advance closer to the supplies - because if they're not far enough advanced when you reach the cliff corner trigger point in a moment, it can be hard to make them progress to the dustbowl area later.
Continue on to reach the 'cliff corner trigger point' where Cortana says "Covenant forces detected up ahead". It's just before the first bush on the right as you start along the precarious path leading to the sharp cliff corner. This triggers new retreat behaviour, freeing covies to move through to the dustbowl area, though some may need prompting later. It also triggers the 'cliff corner checkpoint', which you should keep delayed. Initially it'll be delayed by the threat from covies behind.
Advance then return (optional but recommended)
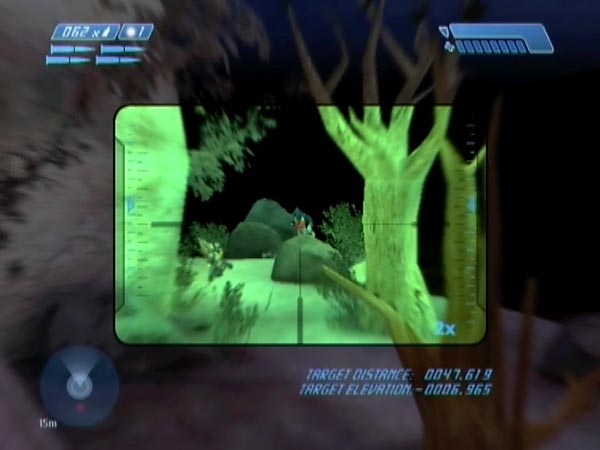
The temporary advance I now describe is optional but recommended. Continue on around the cliff corner, trying to lead pursuers deep into the next area and away from the cliff corner, hopefully making your later re-entry there less dangerous. You can also kill any new enemies you're not going to want around later, which can likewise help with re-entry, particularly if you eliminate the Elite that patrols near the entry area. You could also attempt to eject some Shade gunners (note: if there's one in the enclosure at the far end, a frag dropped near the ground light on the right can do the job, as seen in BCM77). This advance is probably also your best bet for getting your shield recharged. When you've done all you want, get back to the second area.
In making this excursion, usually I'd head up the cliff path, past the Jackals and on to the enclosure where there's sometimes a Shade. You can eject the gunner and he'll run off after a while as long as the Shade is overturned. It's easy to get a breather in the enclosure as enemies will stay back for now. In particular, enemies from earlier will stay along the cliff path or up on the adjacent high ground. It can be quite amusing to watch them with a sniper scope. You'll probably see lots of Grunts hopping around, eager to get at you. For the return journey I'd normally cut across the dustbowl, starting from just past the active camouflage.
There's an important consideration to bear in mind with this excursion. When you head back to the second area it's highly advisable to have a delayed checkpoint in hand, so you'll be able to keep it delayed until ready for the final phase of the set-up work - a phase which could take many attempts unless perhaps you're playing on Easy or have killed off a good number of Elites. At the start of your advance you've already got the cliff corner checkpoint in hand, and that's generally the one you'll want to use.
However, if you get that checkpoint at any time during your excursion (whether by accident or intent), there's another you can trigger and delay instead, namely the outer passage checkpoint triggered by approaching the passage into the grav-lift area (you can approach from up above if you like). But this releases two Elites and frees all covies to come into the dustbowl after you, all of which could make life significantly harder for you when you return here later and try to safely bypass the mob; so in general I wouldn't recommend it. There are some benefits to getting the cliff corner checkpoint deliberately however. For one thing it would allow you to make multiple attempts at ejecting some Shade gunners. For another, it would allow you to make multiple attempts at getting back to the second area alive - though that's often relatively easy.
Empty the second area while keeping a checkpoint delayed
Back in the second area, most remaining enemies will probably be gathered near the supplies. They may need prompting into movement with shots into the air, but they should gradually clear off to the dustbowl area. You could be on the opposite side of the raised land, or up with the Shade where its proximity would save you having to keep jumping to delay your checkpoint. You can potentially be right next to it, as it won't fire if you're close enough. You can even crouch under the tip of the barrel, and the barrel can then keep you crouched.
Sometimes only one or two troops start moving, other times you might get a whole procession (probably due to the departure of an Elite, drawing lesser enemies along). Sometimes you don't even need shots in the air; they might just flood around of their own accord. When troops are leaving, preferably avoid being seen, to minimize the chance of any hold-up or blockage. Hopefully the troops will continue straight on and around the cliff corner. It can take several minutes before the area is emptied, so you may need a bit of patience. Leave any Shade gunner ejection until the supplies area is clear.
Enemies that are well down the path back towards the first area are a problem. It's as if they're too far away from the exit route to sense it. Earlier before leaving the first area, you hopefully tried to tempt enemies to go well up the path as advised, which should help prevent this situation. If you also dawdled on the other side of the raised land prior to reaching the cliff corner trigger point (which is when they potentially become rather static), that can help too. However, if you do get this problem, I have a few bits of help. Firstly, if you go up on the raised land and over towards the cliff wall, it can encourage sufficiently advanced enemies to advance even further to try to see you, and they should then be able to leave. Secondly, an Elite can be made to swipe at you. Each swipe advances him, and eventually he'll be able to leave. Thirdly, if you get right up against a Grunt, he'll hop from side to side and it's possible to gradually work him towards the supplies until he's far enough advanced to progress (though it's slow and not easily controlled). From what I've seen, an enemy needs to get about as far as the first tree along the path before he's able to move on. If you can't shift an enemy, just kill him to lighten the game's workload.
Another issue to do with obstinate enemies is the cliff corner Grunts problem, which I've detailed separately.
When emptying the second area, I usually take cover up on the raised land. I've already mentioned being close to a manned Shade, but there are other options. On the side of the land there are two trees, a rock, and one of those 'dog rocks' as I call them, reminiscent of a dog's head pointing up. Maybe the level designer had a pet Labrador or something? They're all over the place in this level! These features all provide cover as the enemy passes, and you can attract enemies around simply by being there, though you may want to do a bit of moving around if they seem obstinate. Another place you can go is down on the ground closer to the start of the precarious cliff path, where a tree and a rock are close together. When enemies approach you could back off to the cliff wall while they pass (as seen in BCM77 with an Elite).
You might get some enemies stalling on the cliff path, possibly having spotted you. When one enemy stalls, it can lead to others being blocked and you could get quite a traffic jam building up. I think it can also stop the flow of enemies from near the supplies, because they sense that there's no clear path through. You might clear the jam by killing an enemy at the front or killing an Elite to cause panic, but obviously that's not ideal. Try not to get spotted; don't give enemies a cause to hang around.
Prepare for battle and get a delayed checkpoint
Prepare for the battle. There's a medkit if you need it, and dead covies can potentially supply you with plasma grenades and other weaponry if you want it. Shade gunners seem to drop plasma pistols on 100% charge, which is nice. However, you'll soon be able to pick up Covenant weaponry in the battle later (or maybe you're planning to do it in the final stage of your set-up work), so for a general-purpose save I'd recommend taking the AR and sniper rifle so you'll have as many weapons available to you as possible. If you're mainly interested in close quarters fighting though, you may prefer to swap the sniper rifle for a plasma weapon to ensure that you'll have two suitable weapons right from the start.
If you're still delaying a checkpoint, move up to just before the cliff corner and end the delay to get a handy 'final phase checkpoint' to revert to if the final phase of work goes badly. On any difficulty above Easy it can be hard to get past the waiting mob with decent health (which you'll want for the battle itself), so it may take a lot of attempts!
Reach the camouflage in good health
Ideally without losing any health (because you obviously want as much as possible for the megabattle), get past the nasty mob that will probably be waiting around the cliff corner, and get the active camouflage. As for your actual route, there are three main options.
One is to struggle through the mob and continue along the cliff path, but you'll probably take a lot of fire in your back even if you dodge around. If you make it to the end ok, you might be able recharge there. If not, you could continue on to recharge in the enclosure. As long as you can recharge you should be ok from here. You can continue around the perimeter with relatively little pressure. There's an Elite patrolling near the camouflage but he's pretty easily bypassed.
Another option is to take a right up the ramp entrance. This may alleviate intense fire from the mob down below quicker, but on the other hand you'll be getting fresh attention from enemies up top, including Jackals on the bridge. Heading down into the bowl, you might be able to recharge under overhanging plates of rock on the left, but it's hard to get clear of all fire there, and enemies can soon come down far enough to get you. Possibly you could reach the enclosure to recover, but perhaps the best recharging plan is to cross to the far bridge base. In the corner on the left you're out of range of the enemies you left behind, and hidden from the Jackals above on the bridge. Probably your only concern would be if there's a manned Shade over on the hill.
Finally, there's a 'rock-hop' shortcut which can be best of all, depending on just how bad the mob is. As you come along the cliff path there's a rock on the right where the dustbowl edge starts. From the peak of that rock it's just possible to jump up onto the edge if you end with a crouch for extra clearance (do some practice so you can nail it fast). You'll probably have a few Grunts in your face up there, but you can quickly hop over them or dodge around to get down into the dustbowl. Normally I'd curve left to briefly go under the start of the bridge for cover, which also cuts off any pursuing needles. You might even be able to recharge there (it can help if you go back and forth a bit, alternately hiding from enemies on each side), but I prefer to cross the dustbowl and recharge at the far bridge base, as described above.
The rock-hop is definitely worth trying as it saves you wading through a mass of covies, but in some cases it may not be viable due to the weight of incoming fire while trying to get up. For a moment you're pretty much stationary, which the covies really seem to seize on. Plasma balls from Jackals are a particular hazard; it's game over if one of those hits you. It has to be said that the jump isn't easy even when unpressured, let alone when under an irritating hail of fire. But hopefully you've got a checkpoint from back around the corner, so at least you'll be able to keep trying. Stay calm and block out the irritation. Maybe you'll get up ok eventually!
Get your battle start checkpoint
Now cloaked, trigger the inner passage checkpoint by reaching the ground light that projects brightly onto the left passage wall just after a low branch (the quickest route is to run along the path and jump down into the passage). Pause and you'll probably get it within a few seconds if the emerging Elites have gone.
Alternatively you could head straight out, keeping the checkpoint delayed a while to get it somewhere else; perhaps at some particular defence spot, or perhaps at the safe spot after giving enemies some time to gather below. Enemies will drift your way even while you're cloaked, but bear in mind that you'll still probably need to be several metres distant from any enemies for the game to give you the checkpoint once you stop jumping. You can read more about these sort of options in my later section on shaping the start of your save.
Triggering the inner passage checkpoint stops the annoying and repetitive music which started when you triggered the outer one by approaching the passage. If you actually want the music in your battles however, just use the outer checkpoint as your battle start checkpoint.
Bypassing enemies
Bypassing enemies while remaining in decent health gets harder and harder with difficulty level, as you'd expect. The following general tips should help.
Picking your route
Weave about and be thoughtful about your route, always looking to minimize incoming fire and to avoid bumping into enemies (it's annoying that you can't just push past the minor enemies, like you really ought to be able to). Rocks will give you intermittent cover as you run, and you can often use them to block fire from enemies you've just passed. It's usually quicker and easier to jump over an enemy rather than dodge around. In particular, you can jump over an Elite as he takes a wild swing at you. Hah, missed again, squid-face! This also stops him from firing of course. You can jump over rocks too, to save time.
Peppering enemies
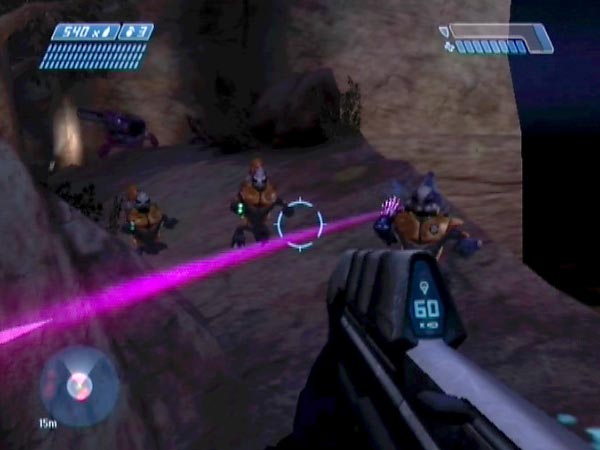
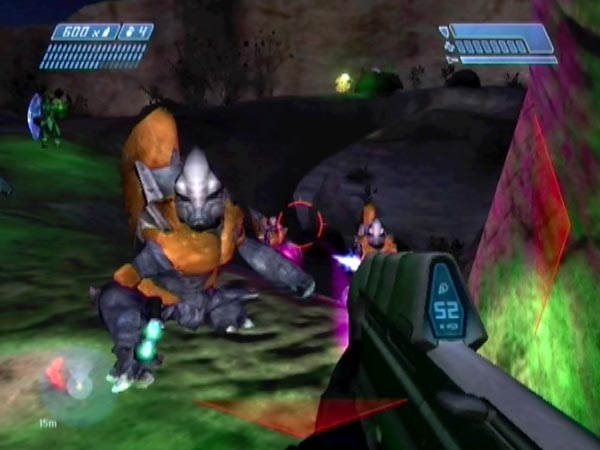
As enemies come into view, it can help if you lightly pepper them with fire to stall them from firing. Single AR rounds are the least damaging, which is an important consideration on the lower difficulty levels. The more you damage an enemy, the more likely he is to end up dead from friendly fire later; and there'll be quite a bit of that. However, it's fine to bounce a bit of fire off Jackal or Elite shields of course. Bouncing fire off a Jackal shield is especially useful as it won't damage him but will generally make him roll, which stops him firing for a moment. I'm also often on the lookout for Grunts with needlers. Needles can quickly mount up and ruin your day, so it can be a good idea to try and forestall them.
Recharging
Maybe pause somewhere if you think you'll have enough time to recharge your madly bleeping shield. But that's quite a luxury! Be aware of how far behind your pursuers are, and check your motion tracker.
Killing Elites
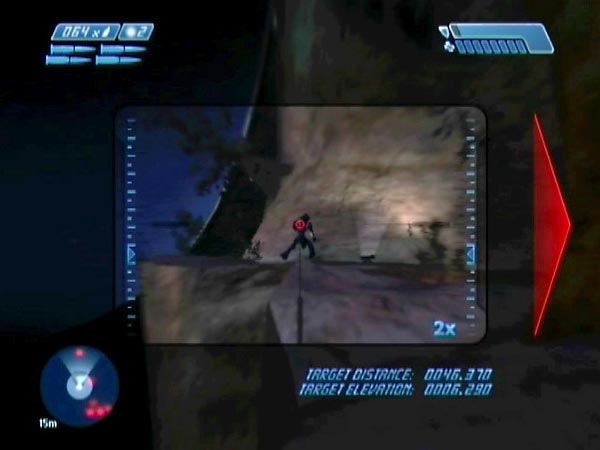
If you're going to kill an Elite, I suggest slaying him with the sniper rifle as soon as possible, though it's not always easy to pick him out under fire. Killing an Elite can also make lesser enemies panic, briefly stopping them from firing. In that way Elites are potential 'panic bombs' you can set off; useful for helping you get past a mob.
Avoiding plasma balls
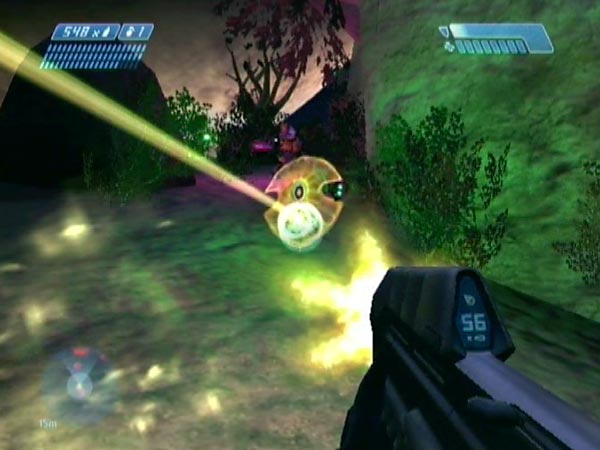
Watch out for Jackals about to fire plasma balls. The last thing you want is for your shield to get wiped! If you see a Jackal ahead waiting to let you have it, try to spook him into releasing his shot, and be ready to dodge.
Minimizing friendly fire
Especially on the lower difficulty levels, try to minimize the amount of friendly fire the lesser enemies suffer, to minimize unwanted casualties. Be aware of enemy lines of fire. For example, quite often you'll have enemies shooting at your back, and new enemies coming up ahead. The fire from behind might hit them, but you could forestall this by diverting to one side a bit. Also, don't provoke concentrated groups of enemies into firing if you don't have to. They're complete idiots and will slaughter each other without a second thought. Sheesh… and I thought Marines were daft!
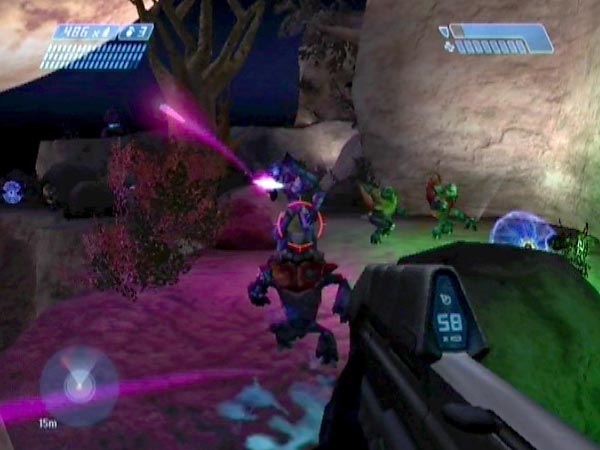
Ejecting Shade gunners
If you eject a Shade gunner he becomes just as mobile as a normal Grunt, and can thus be part of the chasing gaggle in the megabattle. There are two ways to do it.
Grenading the Shade
The first way is to grenade the Shade over. As long as the blast isn't too close the ejected gunner survives, though on Easy there's probably only a narrow margin of success as Grunts are so weak. Practice and you'll get used to how far away the blast needs to be. Moreover, with a specific Shade you can potentially learn an exact spot to drop a grenade at, judged by some nearby feature or whatever. That's the most reliable way to do it. Either type of grenade can be used, but frag blasts need to be a bit further away than plasma blasts.
When the blast goes off, try to ensure that the Grunt is facing in that general direction, as that seems to increase his survival chances. It's as if the turret barrel gives him some shielding from the blast, though I'm not sure things actually work like that. One other thing. Normally you'll want the Shade to end up overturned else the Grunt is likely to just reboard it, unless you've triggered enemies there to move on to a later area.
Pushing the Shade off a drop
The other way is to push the Shade off a drop by repeatedly whacking it, and hope the gunner pops out without getting squashed. He's usually ok. He'll have his gun pointing right at you while you're whacking, but he won't fire. Watch out that you don't get hit by the gun swinging about though, as it can kill you.
I'd always use this method for the Shade in the second area, after all nearby enemies have cleared off. For Shades in the dustbowl however, it would be difficult to use as you'll probably be under fire from foot soldiers. In addition, clumsy fire from other Shades could damage or kill the gunner.
What are you doing up there?
I have to mention something cute. In regard to the Shade near the exit of the first area, dropping a frag grenade near the rock to its right will usually eject the Grunt safely (I've learnt exactly where to place it). Sometimes he ends up in the nearby overhanging branches though, and sometimes he flies right over. All great fun to watch. You can usually get him down alive from the tree with a single AR round.
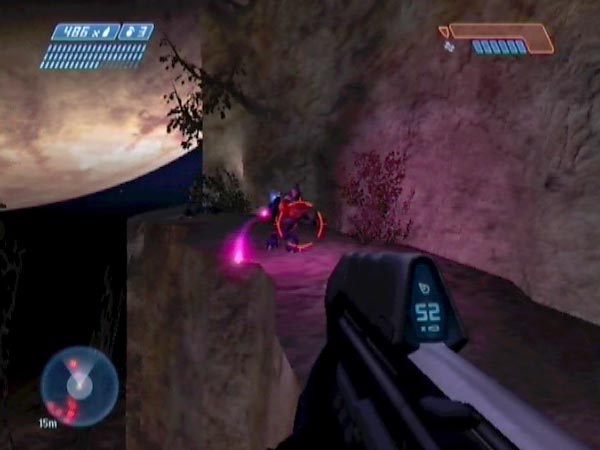
Cliff corner Grunts problem
When emptying the second area there's a particular problem you can get relating to the three 'cliff corner Grunts' from around the cliff corner, who potentially come running in along the precarious path sometime after the 'cliff corner Elite' runs in. These Grunts sometimes end up staying in the second area, near the start of the path. While you're busy trying to get everyone to leave, they'll be hanging around there, occasionally annoying you with needles or whatever, and they won't go. When they're obstinate like this, they're unlikely to take part in the megabattle, though there may be a chance they'll follow you in later.
Investigation
Not wanting to end up three Grunts short, I investigated. What causes this behaviour, and what can you do to fix it? To begin with, I think that when the Elite comes running in, the Grunts don't actually exist yet. Two reasons. Firstly, I lobbed grenades onto the corner, which would've killed them if they'd been nearby. Secondly, sometimes when approaching the corner you hear a Grunt falling off, which suggests that the Grunts have just materialized in a bit of a jumble and then had a bit of a mishap settling down.
So, what actually triggers them? It seems to work like this. If you kill the Elite before reaching the cliff corner trigger point (part way along the path), they're triggered and they'll run in along the path. Otherwise they're triggered when you reach the cliff corner trigger point. In that case they might run in, or you might bump into them awkwardly around the corner.
When they're triggered by killing the Elite, they'll leave ok later. But when they're triggered by the cliff corner trigger point, they're usually obstinate. Here's a possible explanation (pure theory). In the latter case, the game first switches the behaviour of existing enemies, giving them an instinct to head for the next area, and then it creates the three Grunts. In that way, they'd miss out on having the modified behaviour. They'd retain their original behaviour, which is to defend near the start of the path.
During my experiments, there was one time when I hadn't killed the Elite, yet got no trouble with the Grunts. It went like this. With the Elite chasing me, I ran towards the cliff corner. On the other side, it looked like the Grunts were starting to creep along towards the dustbowl area, so presumably they hadn't sensed me yet. Maybe that's what made the difference. Those guys never headed into the second area at all.
Conclusion and advice
The upshot is that if you want the three Grunts in the battle, you'd better kill the Elite before you reach the cliff corner trigger point. Otherwise I think you're unlikely to get them, though maybe you'll get lucky. Of course, this is also quite an obstacle to achieving the maximum enemy count, if you're interested in that. Unless you're prepared to leave that Elite alive and try repeatedly until the corner Grunts go through, you'll have to settle for being an Elite short of the maximum.
If you're going to kill the Elite, bear in mind that if you go out wide on the left as you round the tip of the raised land, you can snipe him the moment he appears, or at least before he's got far. That's my normal method, and on a good day you can take him down before coming under fire from a couple of Grunts ahead. His death will hopefully panic those Grunts too, which could give your shield a chance to recover. You don't have to go out wide to get this shot, but it does give you the clearest view.
Enemy numbers
Ignoring the 2 'enclosure Grunts' (see below) who aren't terribly relevant, the potential enemies for the megabattle are as follows, for Heroic or lower:
- In the first area there's 1 Elite, 2 Jackals and 7 Grunts.
- On the start of the path out of the first area, there's 1 Elite and 2 Grunts, then another 4 Grunts and 2 Jackals (all as long as Cortana finished saying "Stick to the higher ground to the right" before you entered the first area - else they don't seem to spawn).
- On the raised land in the second area, there's a Shade Grunt and a Jackal, plus 2 Grunts on the right. An Elite hides in a cave to the right, and another jumps down from the raised land. There are 4 Grunts near the tip of the raised land and 2 on the far side.
- As you advance through the second area an Elite enters along the precarious cliff path, and there are 3 Grunts around the corner.
- In the dustbowl area there are 2 Elites, 4 Jackals and 7 Grunts (3 assigned to Shades).
- As you near the passage into the grav-lift area, 2 Elites emerge.
- Total = 9 Elites + 9 Jackals + 32 Grunts = 50
Legendary has an extra Elite in the first area, 2 extra Grunts in the second area, and 2 extra Grunts in the dustbowl. Also, Shades rarely seem to be manned to start with.
Counting enemies
If you want to check how many enemies are in your megabattle, see my later suggestion about using the safe spot. That's how I normally do it. Another option is to get back to the precarious cliff corner, from where you can easily kill enemies one by one with the sniper rifle.
Maximum gruntage
Being a Grunt fan, I'm always keen to get as many of the little guys as possible in these megabattle situations, thereby achieving maximum gruntage, as we say here at the Bad Cyborg research labs. As far as I'm aware, the 32-Grunt gaggle you can get here is the largest in the game for Heroic or lower. Getting that many is a realistic possibility if you're willing to persevere. On Legendary there are actually 36 Grunts available, but I'm not sure you could manage to get them all. On Legendary those critters hurt!
To get the maximum gaggle, you'll need to eject all the Shade gunners of course, so they can become part of it. You'll probably need quite a bit of practice before you're managing to get all these reliably. The trickiest Shades are the ones in the dustbowl area itself, other than one you might get in the enclosure. The trouble with these exposed ones is that you tend to be under pressure; possibly fire from other Shades, which could easily damage the gunner.
Enclosure Grunts
At the far end of the dustbowl area there's an enclosure that sometimes has a Shade in it. Experiment suggests that if you approach the enclosure when there are no more than 6 enemies alive in the dustbowl or earlier areas, and you haven't approached it before, 2 Grunts materialize in the corners (maybe both in one corner, maybe one on each side). You doubtless know the ones I mean. So, you can potentially get these guys near the end of your megabattle. However, I don't count them as part of the possible maximum 50, which is for enemies present at the start of the battle. Note also that the enclosure Grunts aren't free-roaming like the others. They're territorial and hang around near the enclosure and the active camouflage area.
Enemy dropship consideration
Can you get an enemy dropship to come in and swell the numbers even further, ready for your battle? It seems not. Experiment suggests that an enemy dropship only gets triggered if the number of enemies here or in earlier areas has dropped to 4 or less (and you need to've left the cliff path but not triggered the outer passage checkpoint yet). Obviously then, you're not going to get the dropship with your masses of enemy around.